The Last of Us 2: Downtown Seattle Collectibles Guide

Upon opening The Gate Ellie and Dina will gain access to Downtown Seattle. Downtown Seattle serves as a major area in the game and because of its importance there are a ton of collectibles to find. This is both a good and bad thing as having a lot of collectibles means exploration, but that can also mean missing certain ones if you aren’t careful. To help you avoid missing any of the collectibles in this area use our The Last of Us Part II Downtown Seattle collectibles guide below.
Downtown Seattle Collectibles List (29 Total)
- Artifacts: 18.
- Trading Cards: 5.
- Journal Entries: 2.
- Workbenches: 1.
- Safes: 3.
FEDRA Census Document Location

The FEDRA Census Document (1/18) can be found inside the guardhouse near Gate East 2. This is the first area you will enter after your ride with Dina. Simply open the drawer in this little shack to get at this collectible.
Bank Heist Plans & Bank Robber Letter Locations

Once you are able to free roam make your way to the area marked on the map above to arrive at the Westlake Bank. Head through the rubble to reach the interior. Inside the bank clear then enemies and make your way to the Safe Deposit Lockers in the back left corner. Interact with the bag on the floor to get the Bank Heist Plans (2/18). Read this note to get the code for the vault which is 602306. Use this code to open the vault (1/3). In the vault you can get the pump shotgun, open a lock box to get the trophy ring (3/18), and get the Bank Robber Letter (4/18) next to the duffel of cash.
Cache Hunter Note, Letter from Isaac, and Docter Uckmann Trading Card Locations
These three collectibles are all found in a cluster together on your map so I will be lumping them together for the sake of space. All three of them are pretty out in the open so you shouldn’t have an issue finding them.
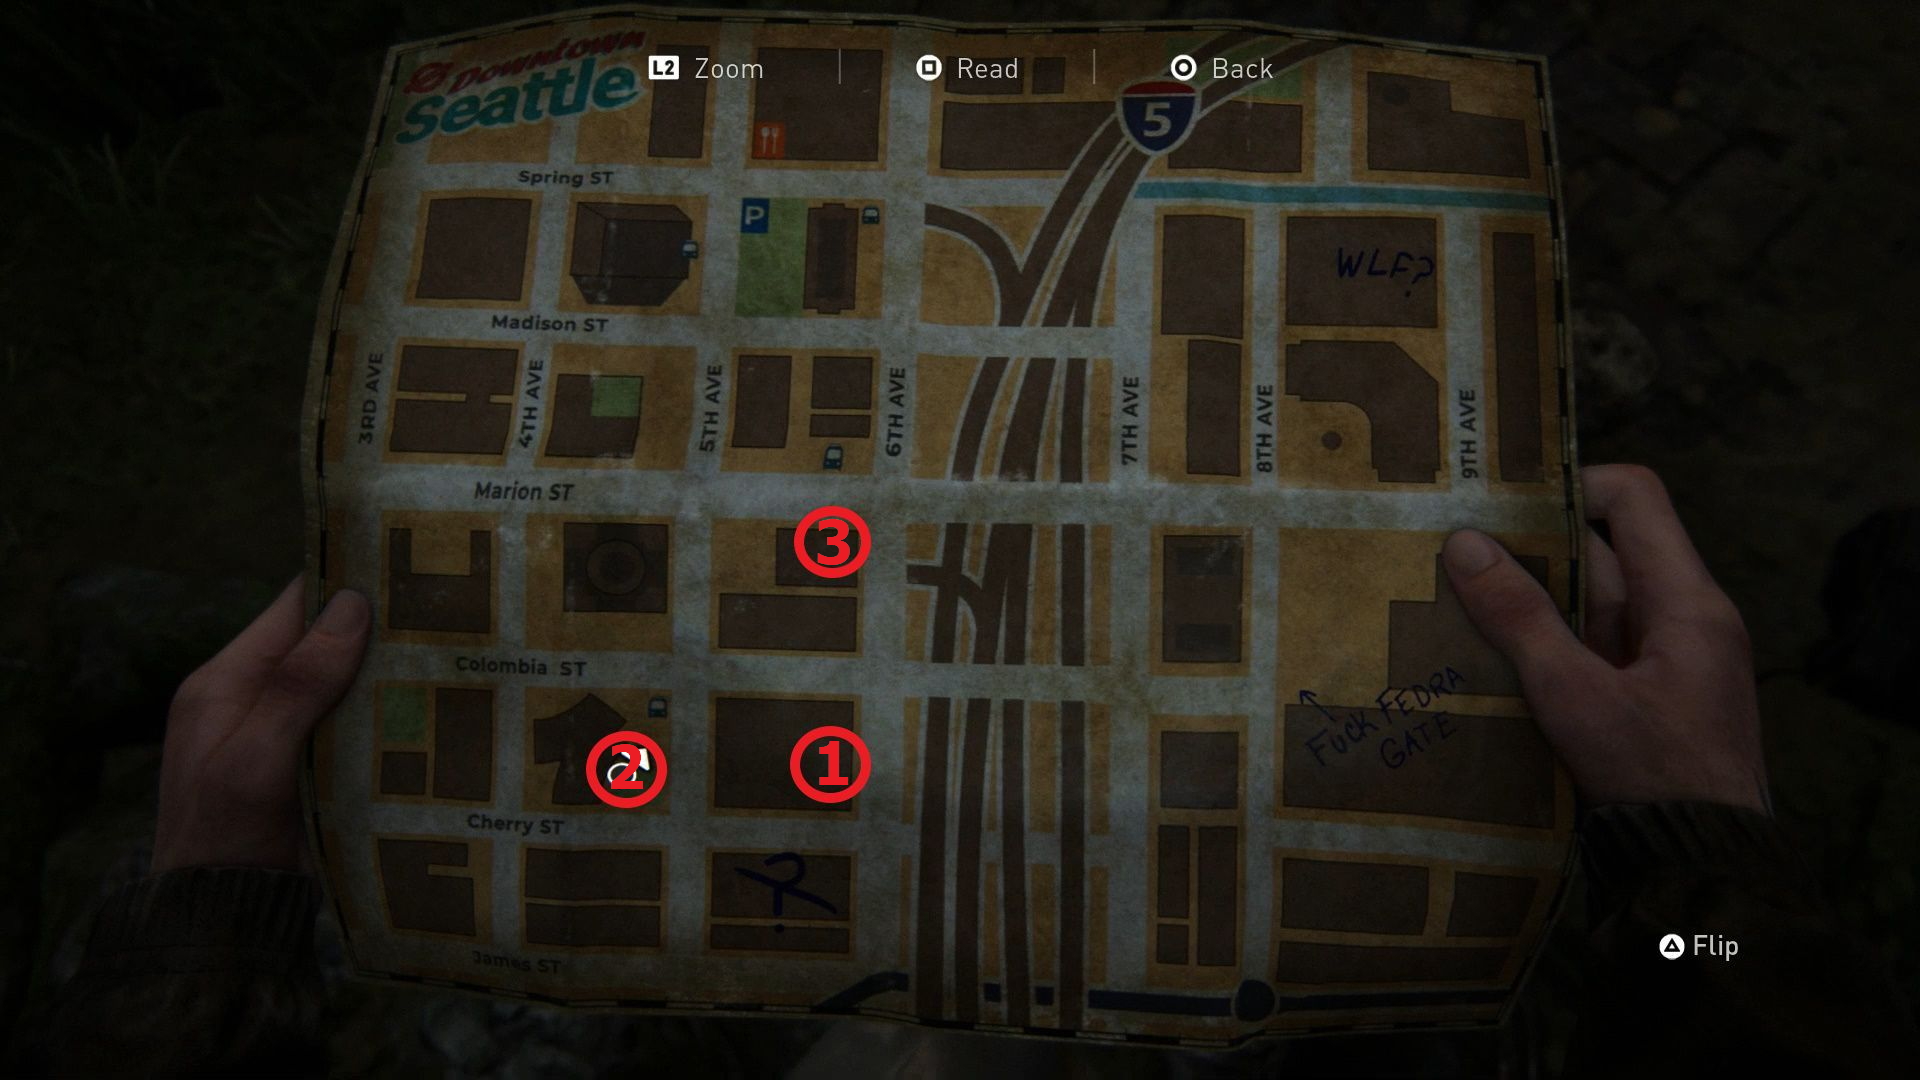
- From the bank head to the north to the ruined building across Cherry St. Inside this building you will find a purse. Open the purse to get the Cache Hunter Note (5/18).
- From the collectible above head west across 5th Ave to reach an old bus stop. Behind this bus stop is an overgrown tank. On the stairs to the southwest of the tank there is a body. By this body is another purse with the Letter from Isaac (6/18) inside it.
- Head to the northeast from the Letter From Isaac collectible to reach another destroyed building. On the top floor of this building is the Doctor Uckmann Trading Card (1/5). To reach this card you will need to go up the stairs then smash the window and walk out onto the awning. Jump across the gap between awning and then go up the ramp to reach the upper floor where the card is.
Das Wort Trading Card Location

Once you’ve grabbed the above mentioned collectibles head northwest to the corner of Marion St. and 5th Ave. Here you will find the Valiant Music Shop. Go inside the shop through the front door and hang a left so you are can get behind the counter. Interact with the drawer beneath the stack of magazines to find the Das Wort Trading Card (2/5).
Street Drawing & Journal Entry 1 Location

Go to the second floor of the music store if you wish to play guitar. After this brief cutscene go out the top floor window on the west side of the building and follow the platform north until you reach the wall with the guard towers on it. Go to the second guard tower to get the Street Drawing collectible. After you collect the Street Drawing (7/18) and a Journal Entry (1/2) prompt will appear.
Downtown Seattle Workbench Location

Continue heading to the west of the guard tower to reach a FENRA Tent. Go inside the tent to find a Workbench (1/1). If you feel it is need use the Workbench to upgrade any of the gear you may have found up to this point. There are also a number of pieces of scrap in this tent you can collect.
Note to Informant Location

From the Workshop tent mount your horse and ride to Spring St and 6th Ave. To the southeast of this location you should see some trucks in the water below. Go down to these trucks and look for one with Fascists written on it. Open the back of this truck to access the Note to Informant (8/18) collectible.
WLF Safe House Supply Note, Big Blue Trading Card, Barko’s Key, and Join WLF Note

Head west on Spring St until you reach the corner of 5th Ave and Spring St. Here you will find a store called Ruston Coffee. Go inside Ruston Coffee by breaking one of the windows. On the counter you will find the WLF Safe House Supply Note (9/18). Go behind the counter and open the drawer under the Hot Chocolate poster to get the Big Blue Trading Card (3/5). Inside this coffee shop you can also find the key to Barko’s in the back bathroom (10/18).
Join WLF Note Location

When you have the Barko’s Key take it to Barko’s on 6th Ave and open the delivery door in the alleyway. Explore the back room to find the Join WLF Note (11/18), a recipe for Smoke bombs, and the Long Gun Holster which let’s you carry easily swap long guns. You can also interact with a whiteboard here to get a new location marked on you map.
WLF Community Supply Chest Note Location

Make our way north on 6th Avenue and then head west on Madison St. So you are at the NW corner of the courthouse. Here there are a set of stairs you can go up. Go up the stairs and hang a left to find some crates and a pack beside them. Open the pack to get the WLF Community Supply Chest Note (12/18).
Gate West 2 Safe & Flo Trading Card Locations

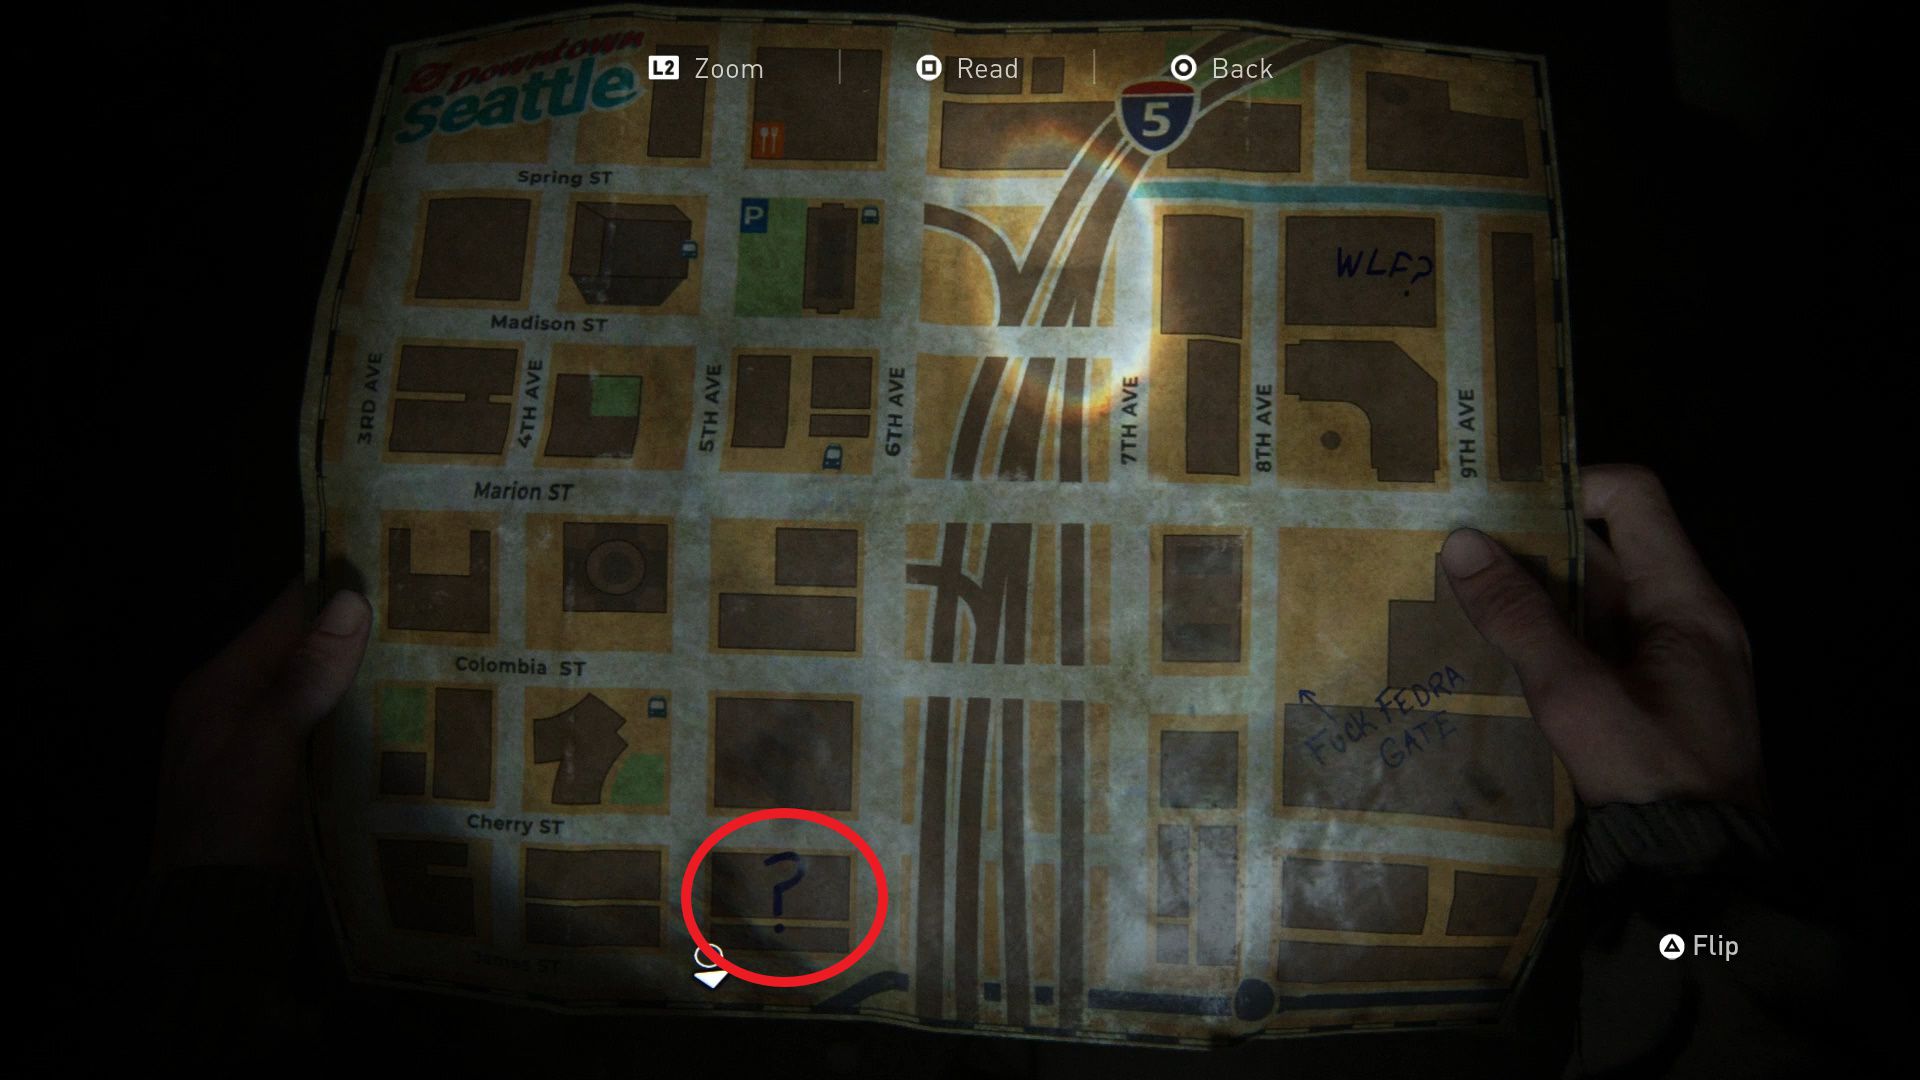
Continue down Madison St towards the ? mark that got added to your map at Barko’s. At the mark you will see the sign for Gate West 2. Squeeze through the metal gate that is partial open to the right of this sign. On a platform nearby you should see a safe. To open this safe (2/3) input the combination 0451. Inside the safe you will find the Flo Trading Card (4/5) alongside some resources.
Emergency Protocols Memo, Journal Entry 2 & Rabbi Saunders’ Letter Locations
Now that we’ve explored most of the Downtown Seattle areas its time to advance the main story. To do this make your way to the building located to the south of the Workbench. Make your way inside the building. Enter the caged area through the large hole and go between the shelves. Move the rolling cargo dolly over so you can jump and reach the generator area. Fill the generator then go back to the dolly area and push it out into the main hall. Push the dolly over to the metal shelf so you can reach the area above.
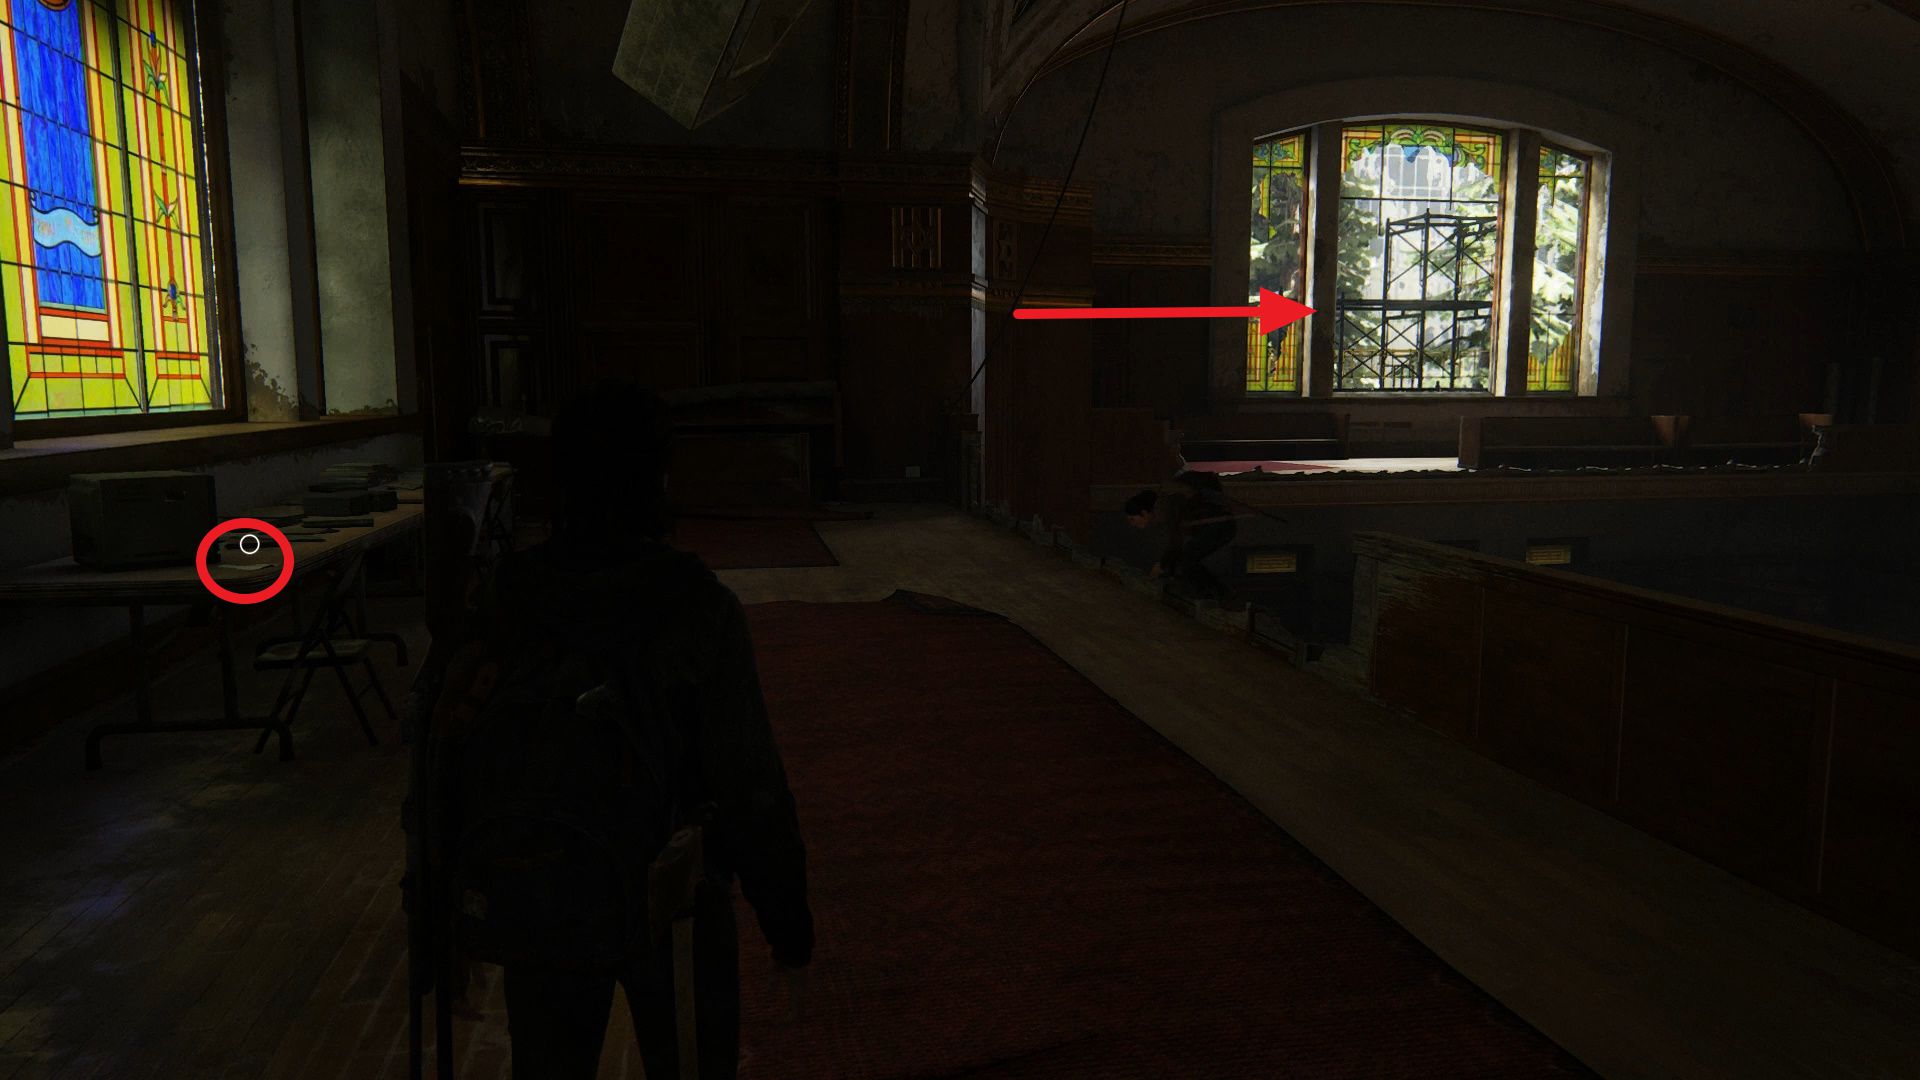
In this upper area you will find the Emergency Protocols Memo (13/18) on a desk. Turn to the right and you will see a rope hanging from the rafters. Use the rope to swing to the other upper area. Go through the far door here and open the desk drawer to get the Rabbi Saunders’ Letter (14/18) and Journal Entry 2 (2/2).
Plea to a Friend Letter Location

The final place we need to look for gas is the Courthouse. This building can be found one block north of the Barko pet store. To get inside this building you need to cross over the security gate on the southeast corner and open a window there. Once you are inside make your way through the library area until you reach a door with a bookshelf leaning against it. Go through this door and head down the stairs. Walk all the way to the end of the green tile area and look for a FEDRA sign. To the right of this sign is the Plea to a Friend Letter (15/18).
Courthouse Safe, Lt Torres Memorandum, and List of Known WLF Agitators Locations

To the left of the above collectible you will see a yellow door. This door is locked, but you will want to go inside this room. To do that break one of the glass windows and vault inside. In this room there are three collectibles:
- Courthouse Safe: Open this safe (3/3) using the combination from the whiteboard which is 860722.
- Lt Torres Memorandum: Pull machete out of body by whiteboard to pick this one up (16/18).
- Known WLF Agitators: inside blue filing cabinet by whiteboard (17/18).
Once you’ve gathered these collectibles complete the courthouse by getting fuel from the parkade. After you’ve done this you will head back to the FEDRA gate at the start of the area. Put the fuel into the generator and turn it on. Head over to the gate and input the code 5345. Ride up to the WLF building and use the blue dumpster on the west side to get inside.
WLF Recruiter Journal & Know it All Trading Card Locations

Go inside the front doors of the WLF building and take a right to the barred doors. Open the door and head up the stairs in-front of you. At the top of the stairs you will see a corpse. Interact with it then head into the room behind it. Go through this bedroom into the next room and open the tv stand and nightstand to get the WLF Recruiter Journal (18/18) and Know it All Trading Card (5/5).
That concludes our Seattle Downtown collectibles guide. IF you made it this far int he guide congratulations. This is by far one of the largest and most complex areas in The Last of Us Part II so knocking out the collectibles here is definitely not easy.
Next Level: Seattle Day 1: Eastbrook Elementary collectibles guide.