The Forgotten Crossroads | Hollow Knight Guide
Once you’ve made you’ve reached Dirtmouth and have dropped down the well you will arrive in the first major area of Hollow Knight called The Forgotten Crossroads. The guide below walks you through The Forgotten Crossroads in Hollow Knight, gets you to the False Knight boss, and then to Greenpath.
Forgotten Crossroads Map
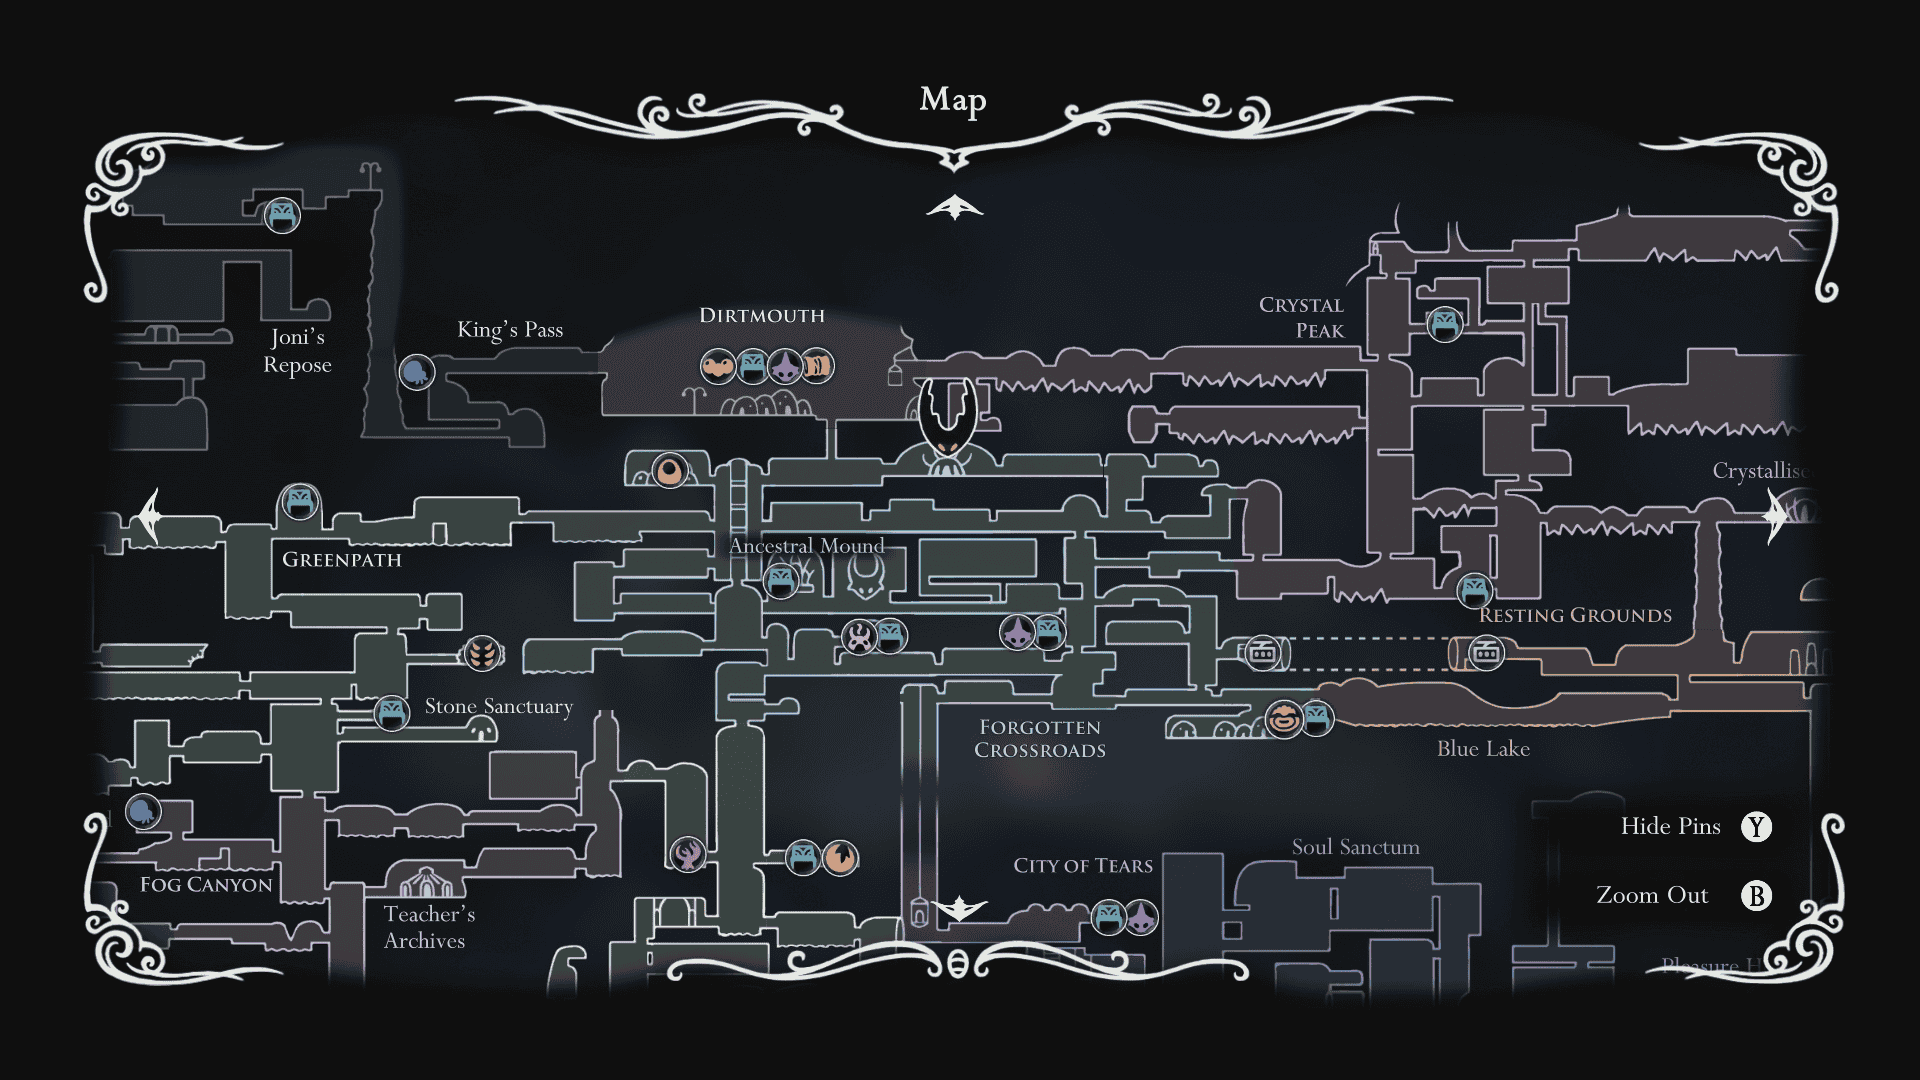
When you drop into The Forgotten Crossroads, you will be mapless. This makes navigating the area fairly hard to do. I have attached the map above for you to use, but our first order of business will be to find the map seller Cornifer so you can have an in-game map of your own.
Where to find The Forgotten Crossroads Map
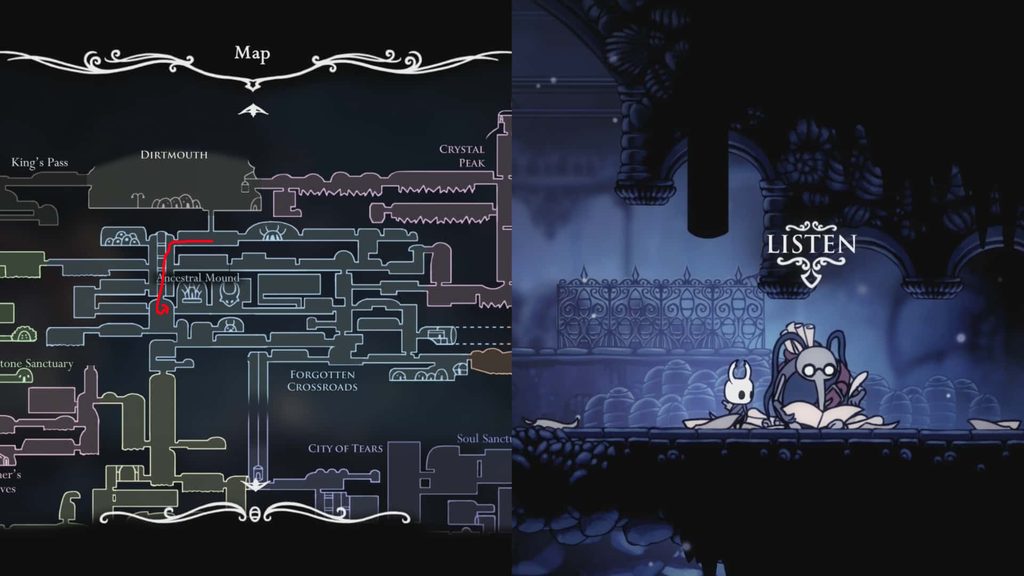
From the well head left drop down and grab the Geo Deposit. Continue left and enter the large room. In the large room make your way to the very bottom. Drop down the hole in the floor into the room below.
In the room below you will find paper on a platform. To the right you will see a character on the ground. This is Cornifer. Cornifer is a cartographer who maps out the different areas of Hollow Knight.
Speak to Cornifer and purchase a map of The Forgotten Crossroads for 30 GEO. This unlocks the map for the area. It also causes his wife Iselda to move into Dirtmouth. Iselda sells a number of useful mapping supplies that can help make our mapping abilities better.
What Happens If You Don’t Buy the Forgotten Crossroads Map from Cornifer?
If you don’t find Cornifer or you don’t buy his map from him before he moves to a new spot, don’t fear. Maps will appear in Iselda’s shop in Dirtmouth, but at a higher price than if bought directly from Cornifer.
Visit Iselda (Optional)
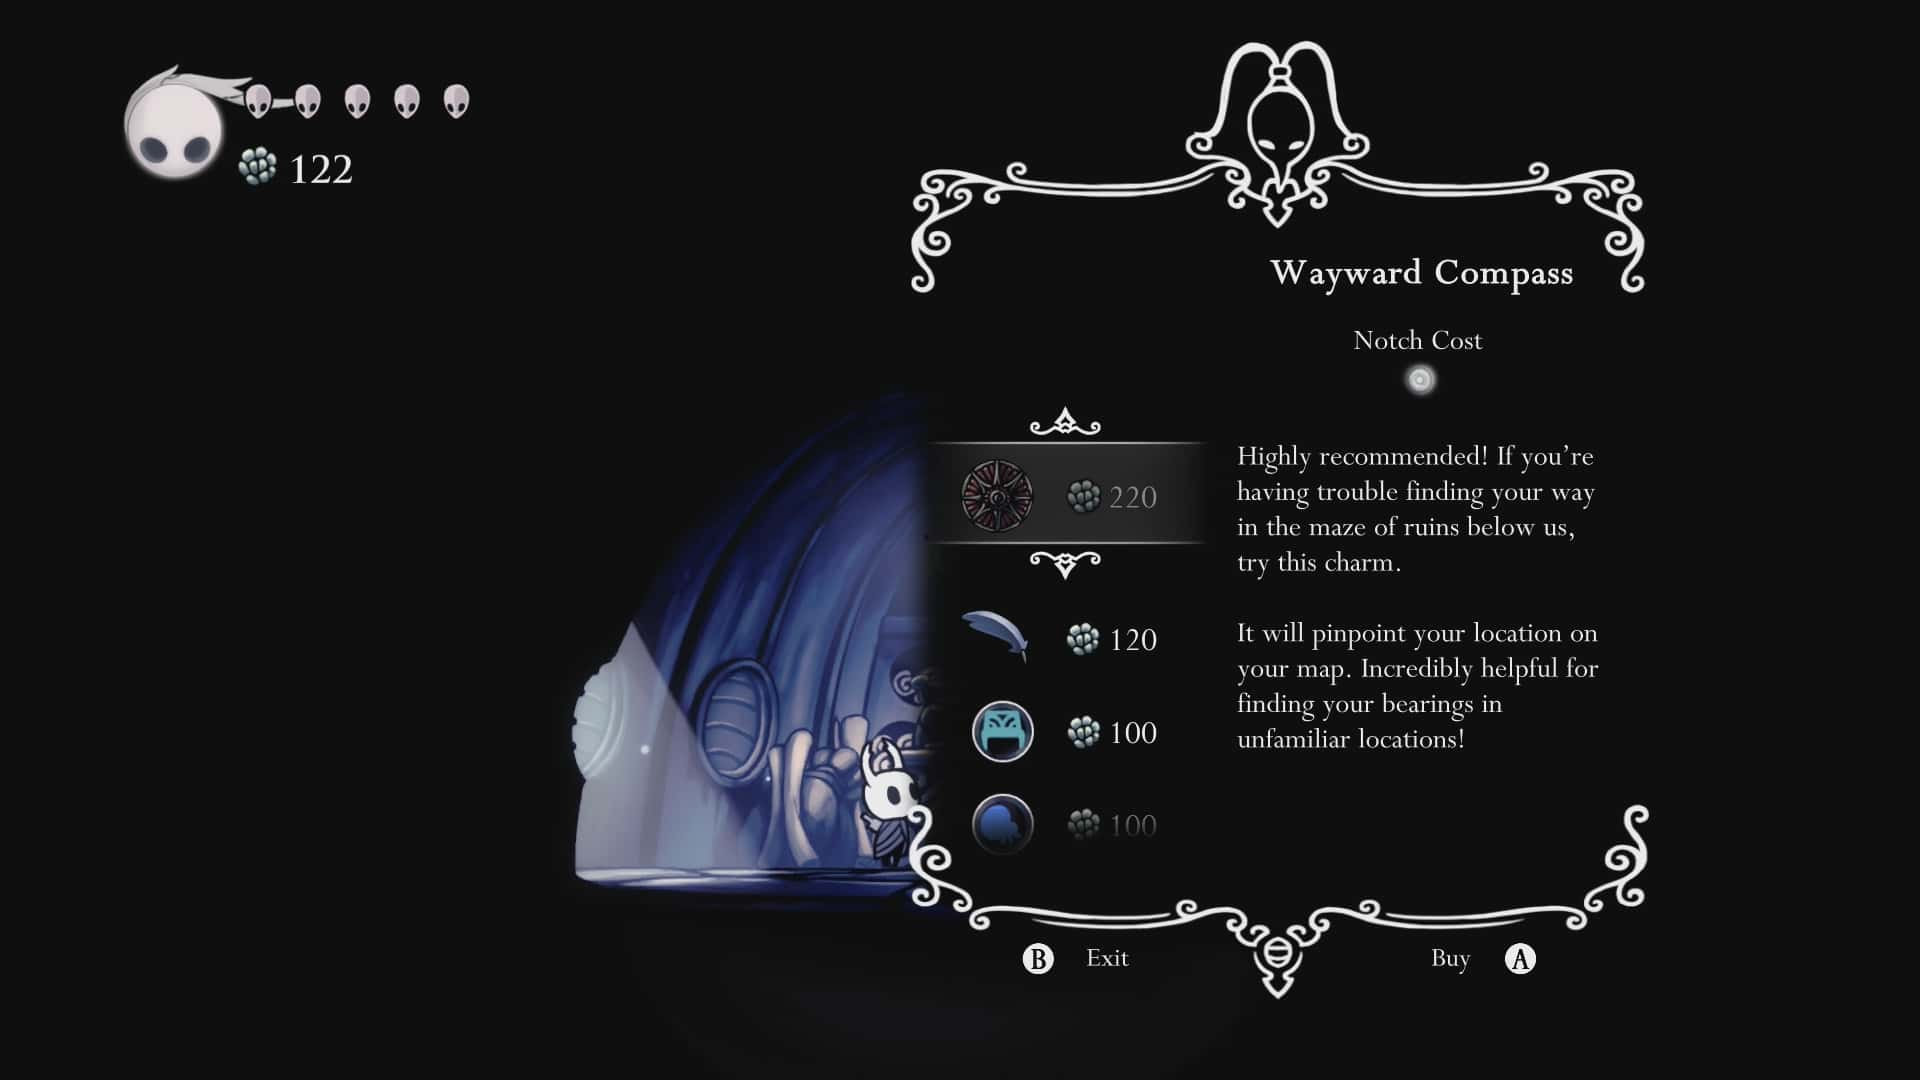
If you want you can return to Dirtmouth and visit Iselda now. She sells a bunch of items relating to mapping. It is worth your time to visit her and purchase items to improve your maps usefulness. She sells the following:
| Item | Description | Cost (GEO) |
|---|---|---|
| Wayward Compass | It will pinpoint your location on the map. | 220 |
| Quill | Update your map with new areas as you explore. | 120 |
| Bench Pin | Mark benches and other rest spots on your map. | 100 |
| Cocoon Pin | Mark lifeblood cocoons on your map. | 100 |
| Vendor Pin | Mark shopkeepers or any other interesting bugs you find on your map. | 100 |
| Hot Spring Pin | Mark hot springs on your map. | 100 |
| Scarab Marker | Mark locations you find interesting on your map. | 100 |
| Shell Marker | Mark locations you find interesting on your map. | 100 |
| Maps | Maps you missed. | Various |
At this point I recommend buying at least the Wayward Compass and the Quill. Both will help you keep you oriented in each area we visit.
Exploring The Forgotten Crossroads
The Forgotten Crossroads may seem fairly small, but it is actually full of stuff to find while you explore. If you want to be explore it you can follow this section. If you want to simply head straight to the boss, jump to the False Knight section.
Visit The Temple of the Black Egg
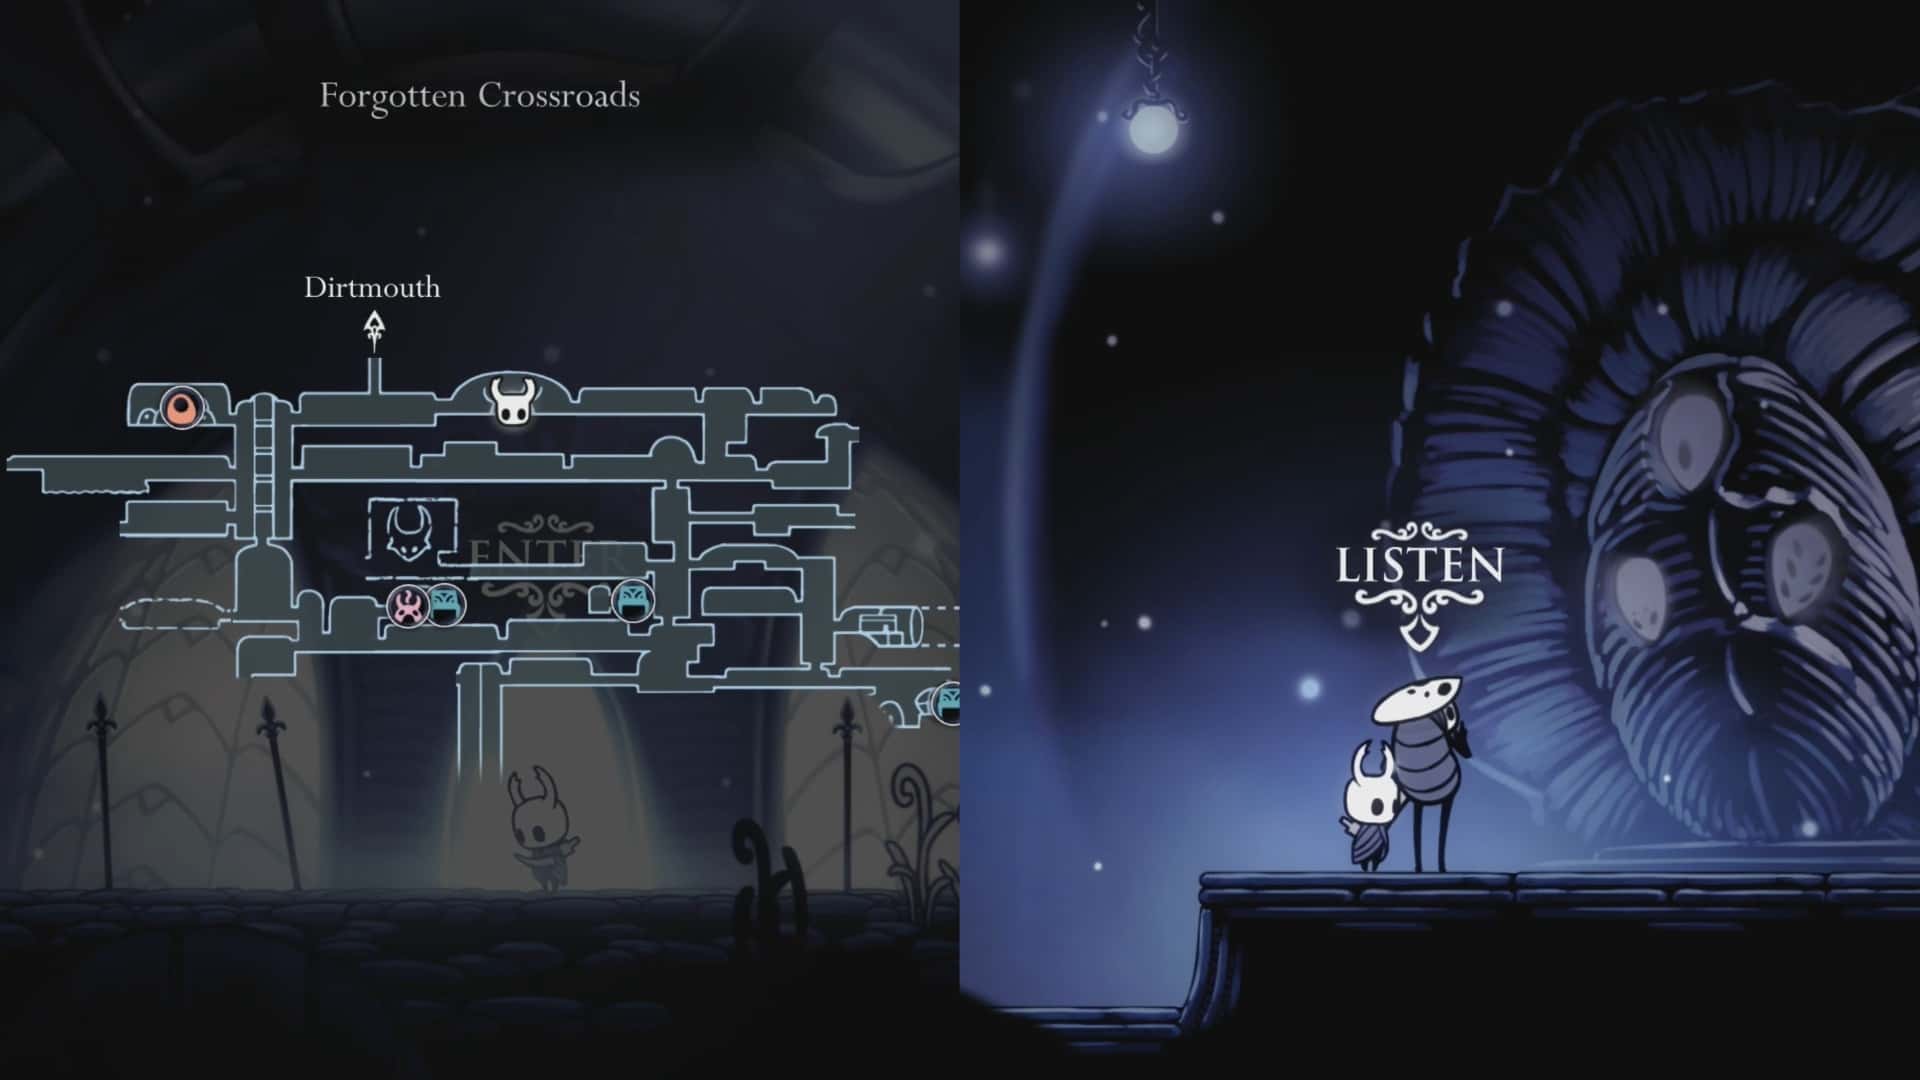
If you head right from the well entrance you will reach The Temple of the Black Egg. The Temple of the Black Egg is a very important building in relation to the storyline.
Go inside the temple and speak to Quirrel. Quirrel tells you that the Black Egg has strange markings on it. Exhaust the dialogue and then leave.
Grub 1
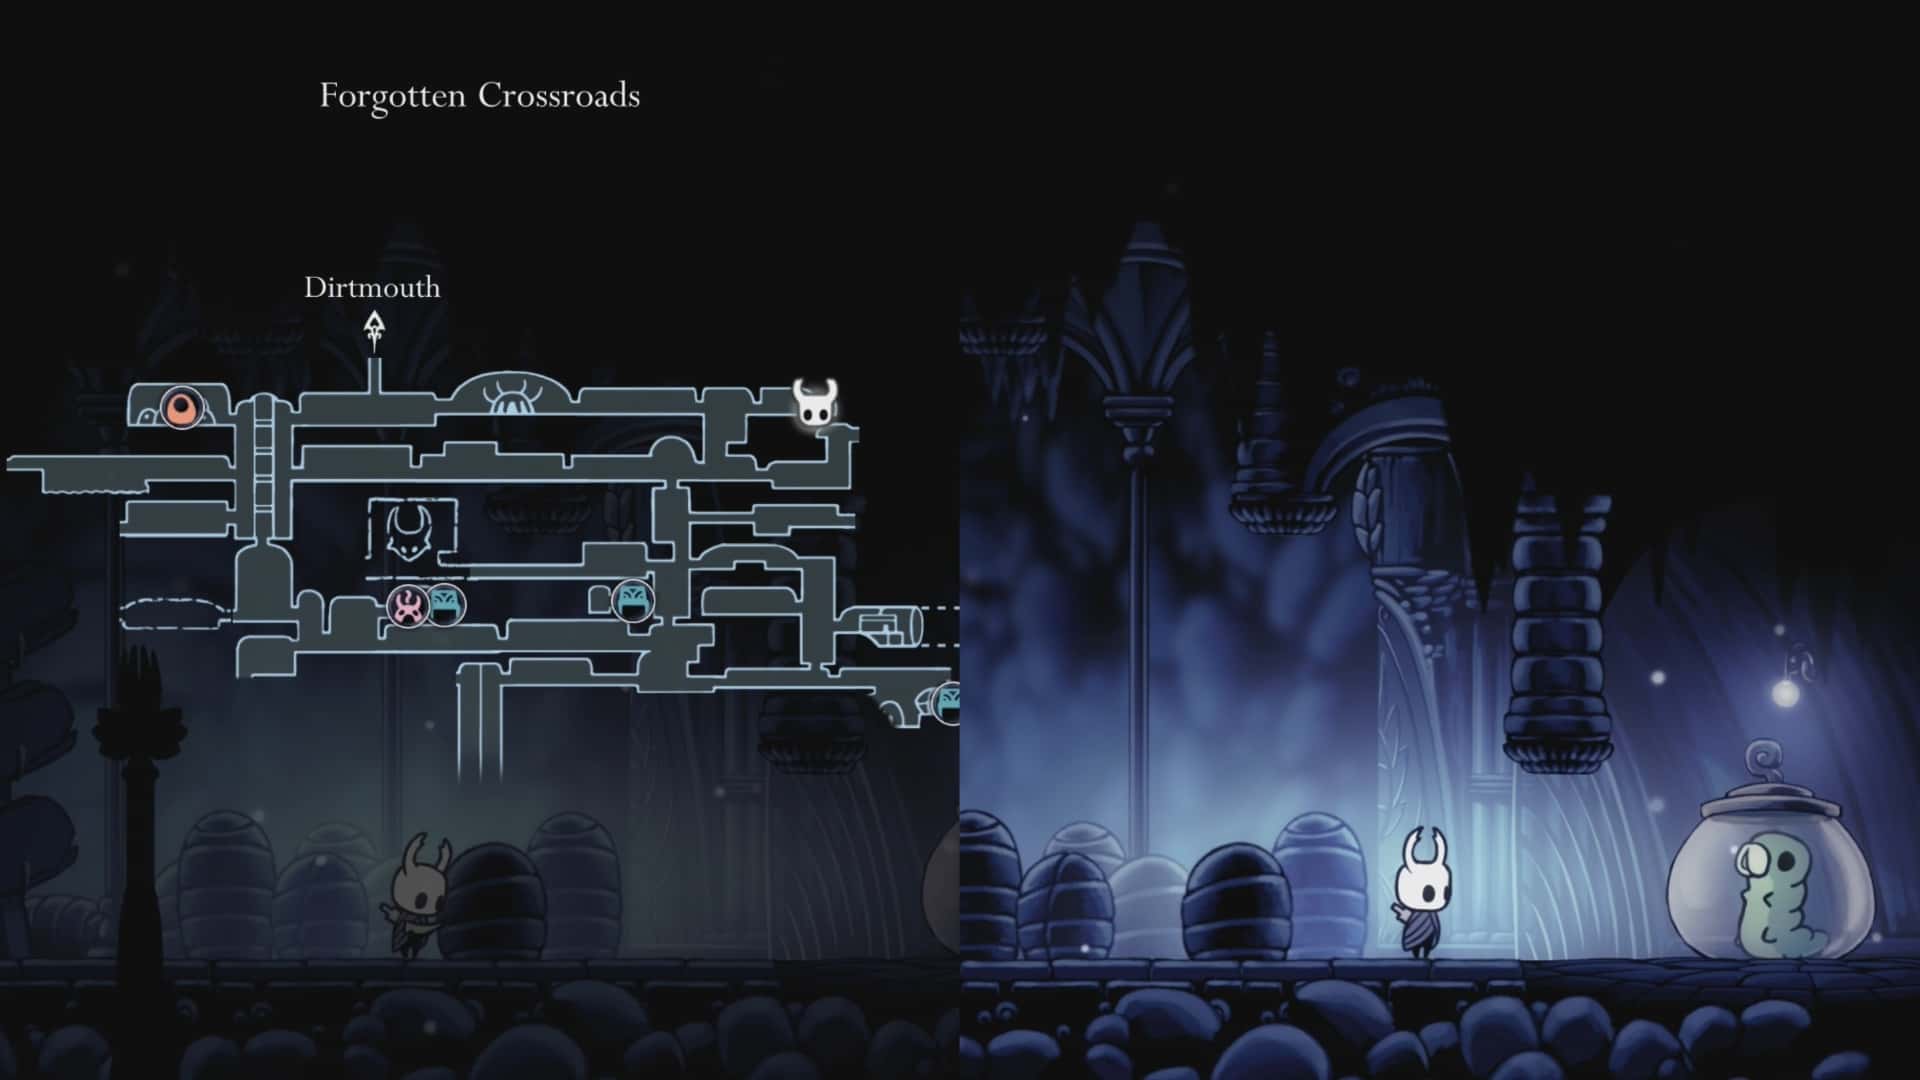
Head to the right of the temple until you reach the room marked on the map above. Here you will encounter a hard enemy called the Husk Guard.
Defeat the Husk Guard and you will find a Grub (1/46) to the right of it. Hit the Grub’s container to free it. Grubs are a type of collectible I will explain more about later.
Exit this room and go down. Head to the bottom of the room. You will see a mine entrance to your right. Ignore that for now (we can’t do anything there yet). Instead head to the left into the next room.
In this first room you will see a path going down. Ignore it for now (is a shortcut we unlock later). Head left until you reach the room with a Grub on a platform in it.
Grub 2
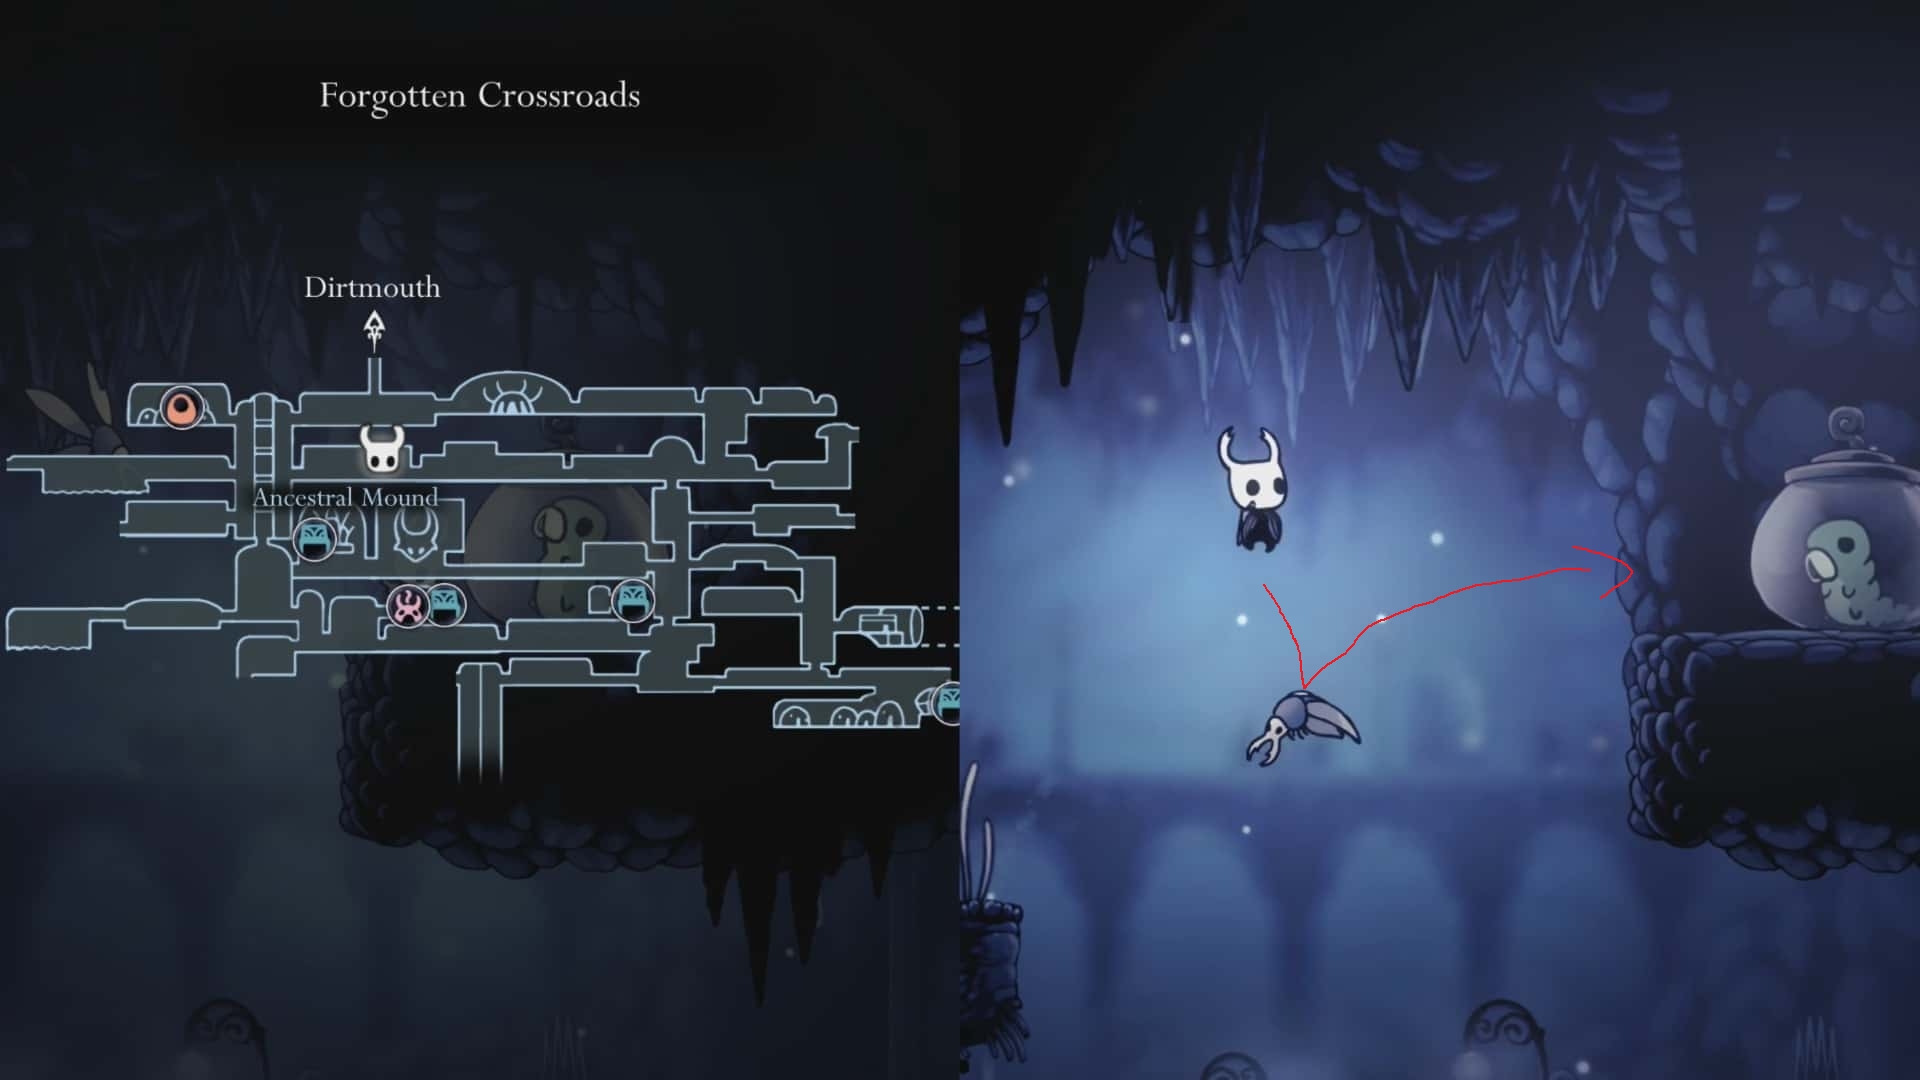
Normally you would get this Grub using either Monarch Wings or Crystal Heart, but you can get it now if you feel skilled enough.
Clear the enemies in the room but leave the flying Vengefly. Bait it over to the area by the Grub. Pogo off it and over to the ledge with the Grub (2/46).
The Grubfather
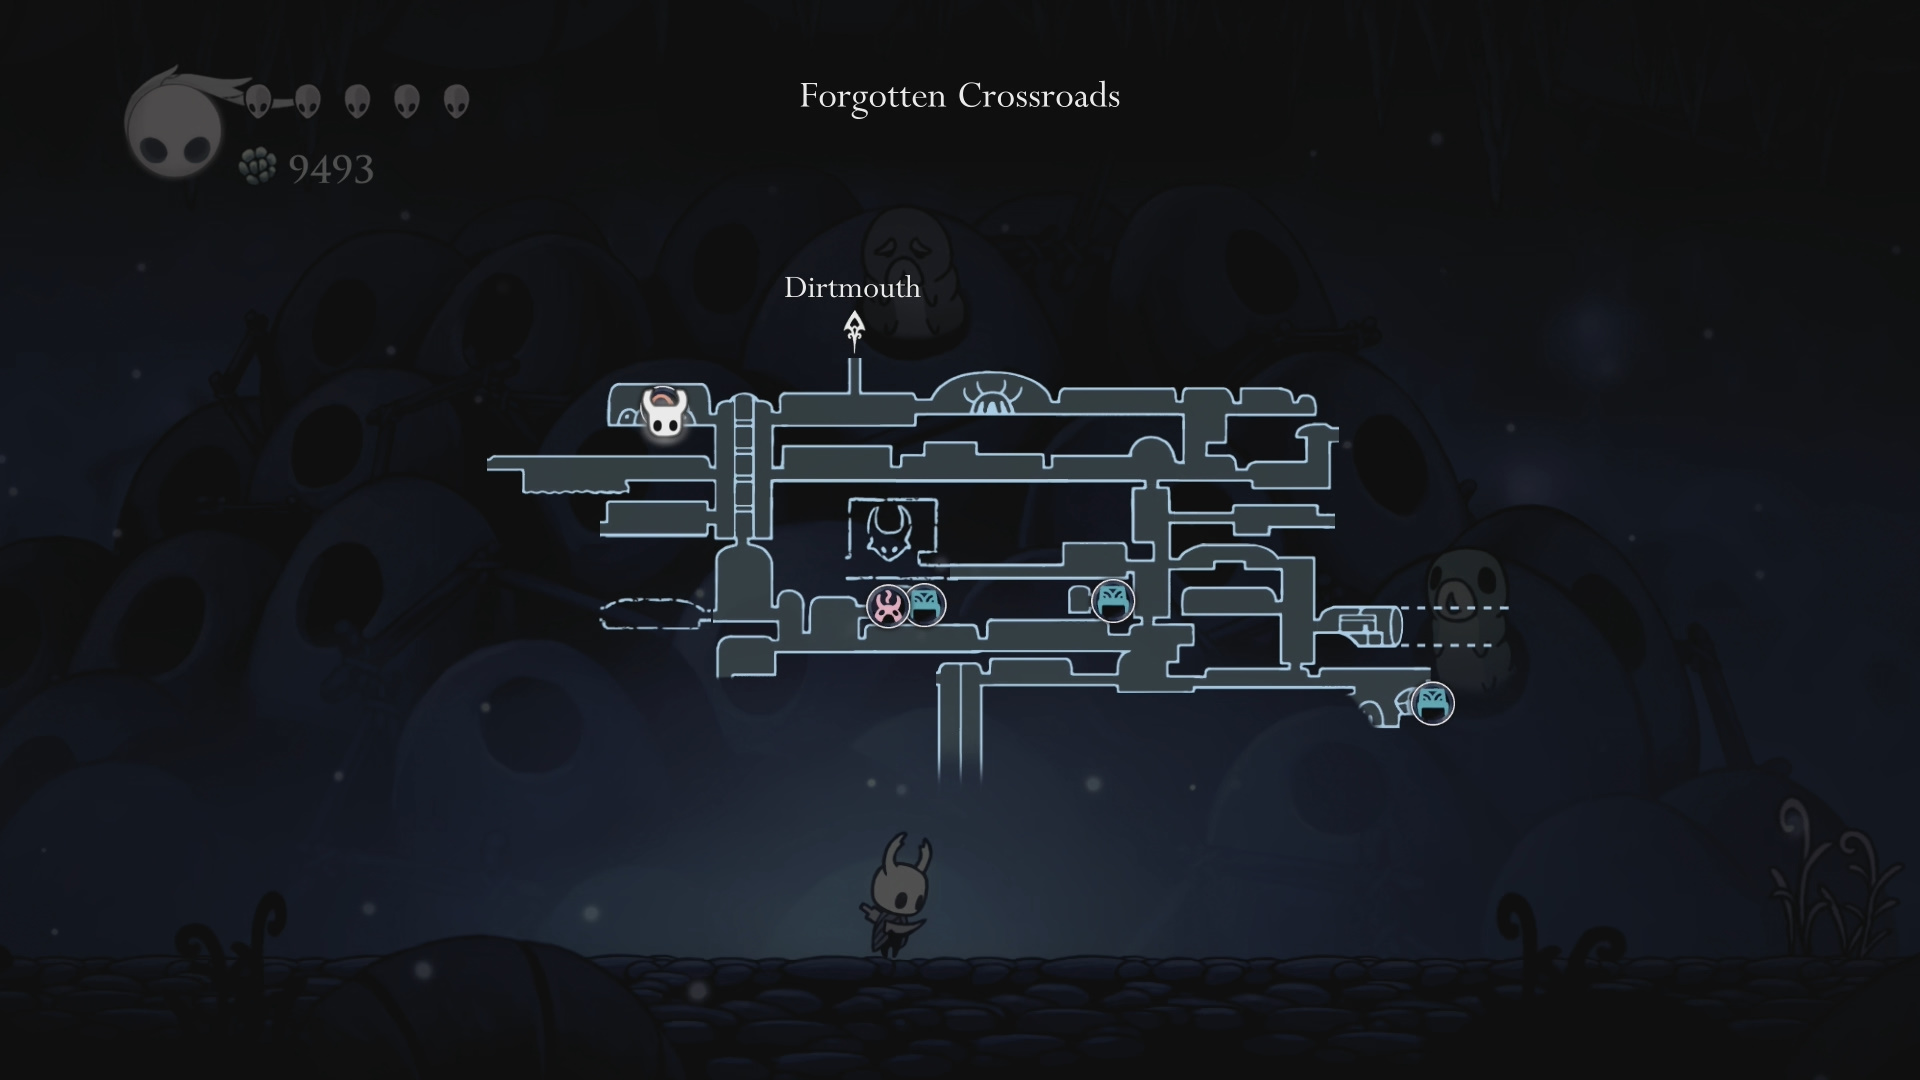
In this first room you will see a path going down. Ignore it for now (is a shortcut we unlock later). Instead go left through the room until you reach the big room above where we met Cornifer. Go to the top left corner of this room and enter the room there. Here you will meet the Grubfather.
The Grubfather will reward you for finding the trapped Grubs throughout the world. There are 46 total for you to find. Since we’ve found one already, he will throw you some Geo as a reward. Return to the large room.
Grub 3
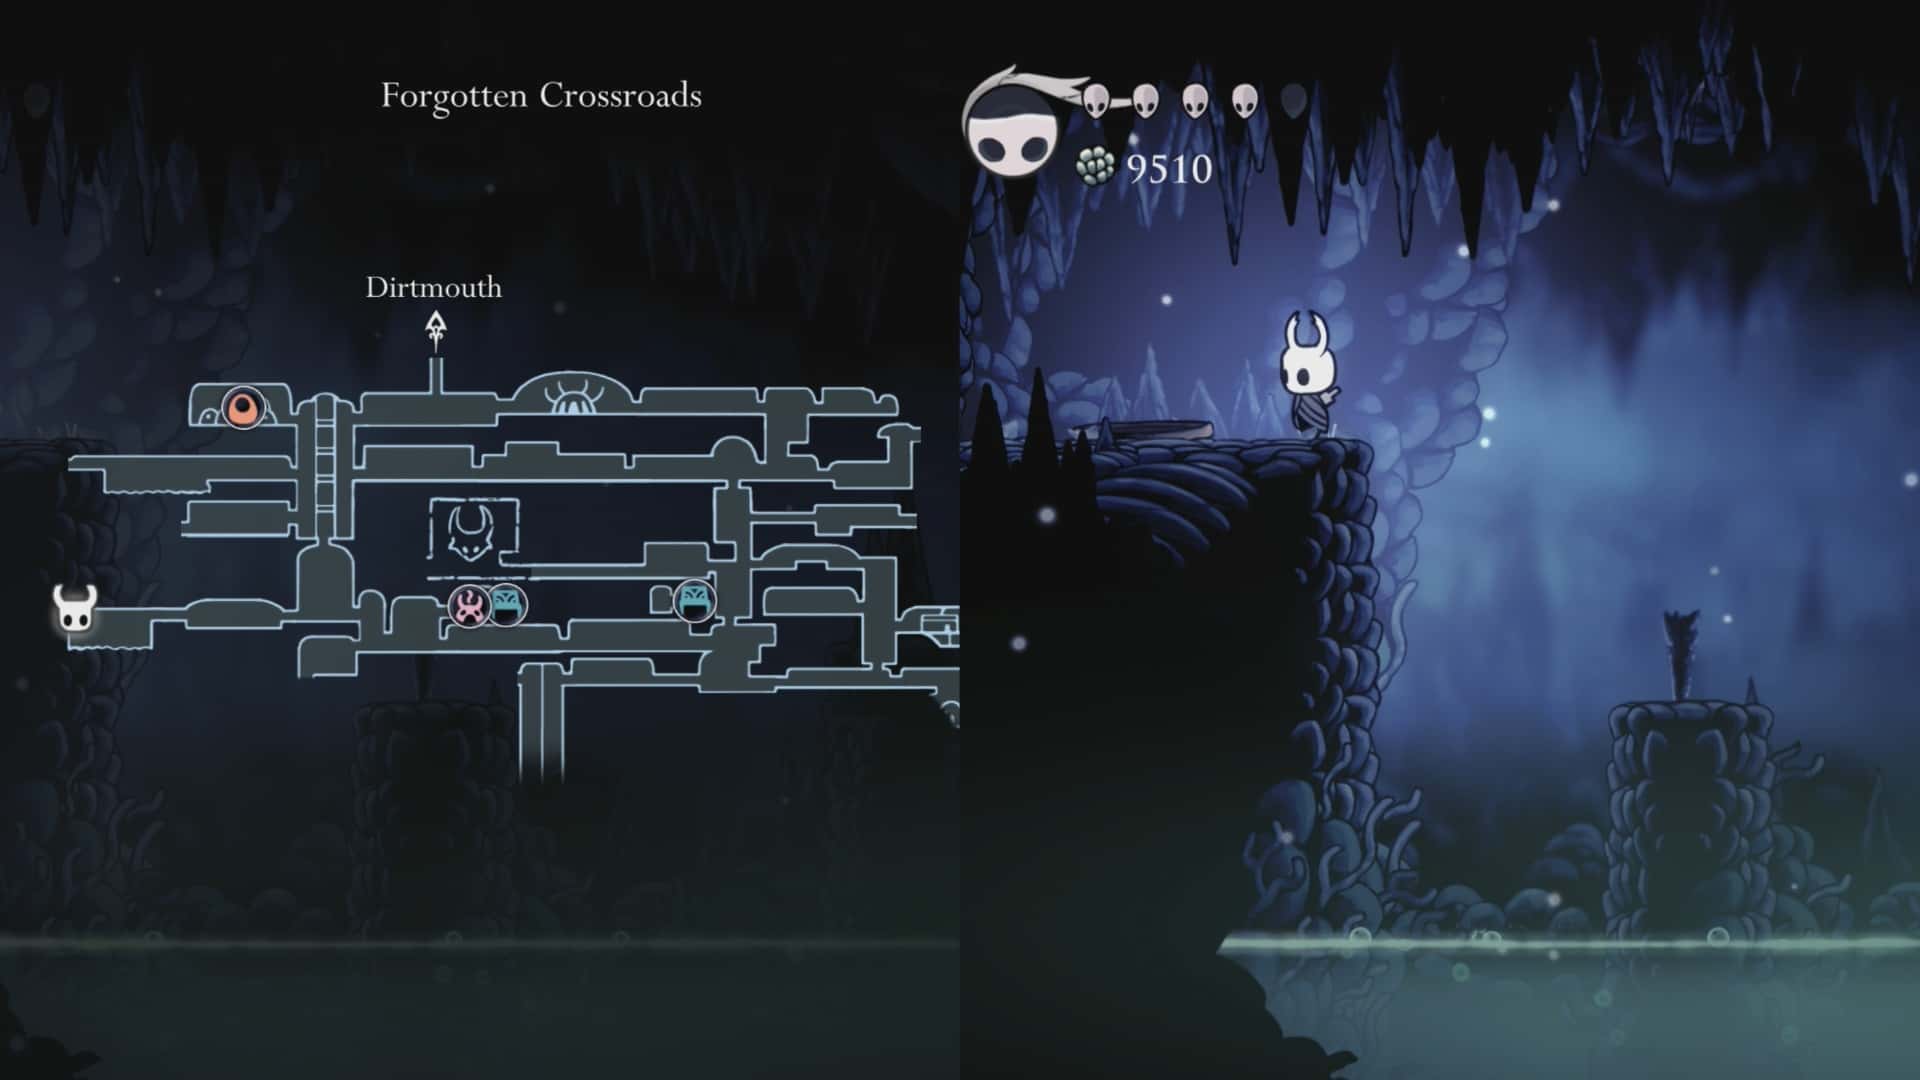
Go down into the room where we met Cornifer. Head to the bottom left and go into the next room. Use Nail Pogo (down + attack) to cross the spikes and then complete the platforming section in the next room to reach a Grub (3/46) at the end.
Return back to the room where we met Cornifer. Head right into the next room.
Hot Springs & Bench 1
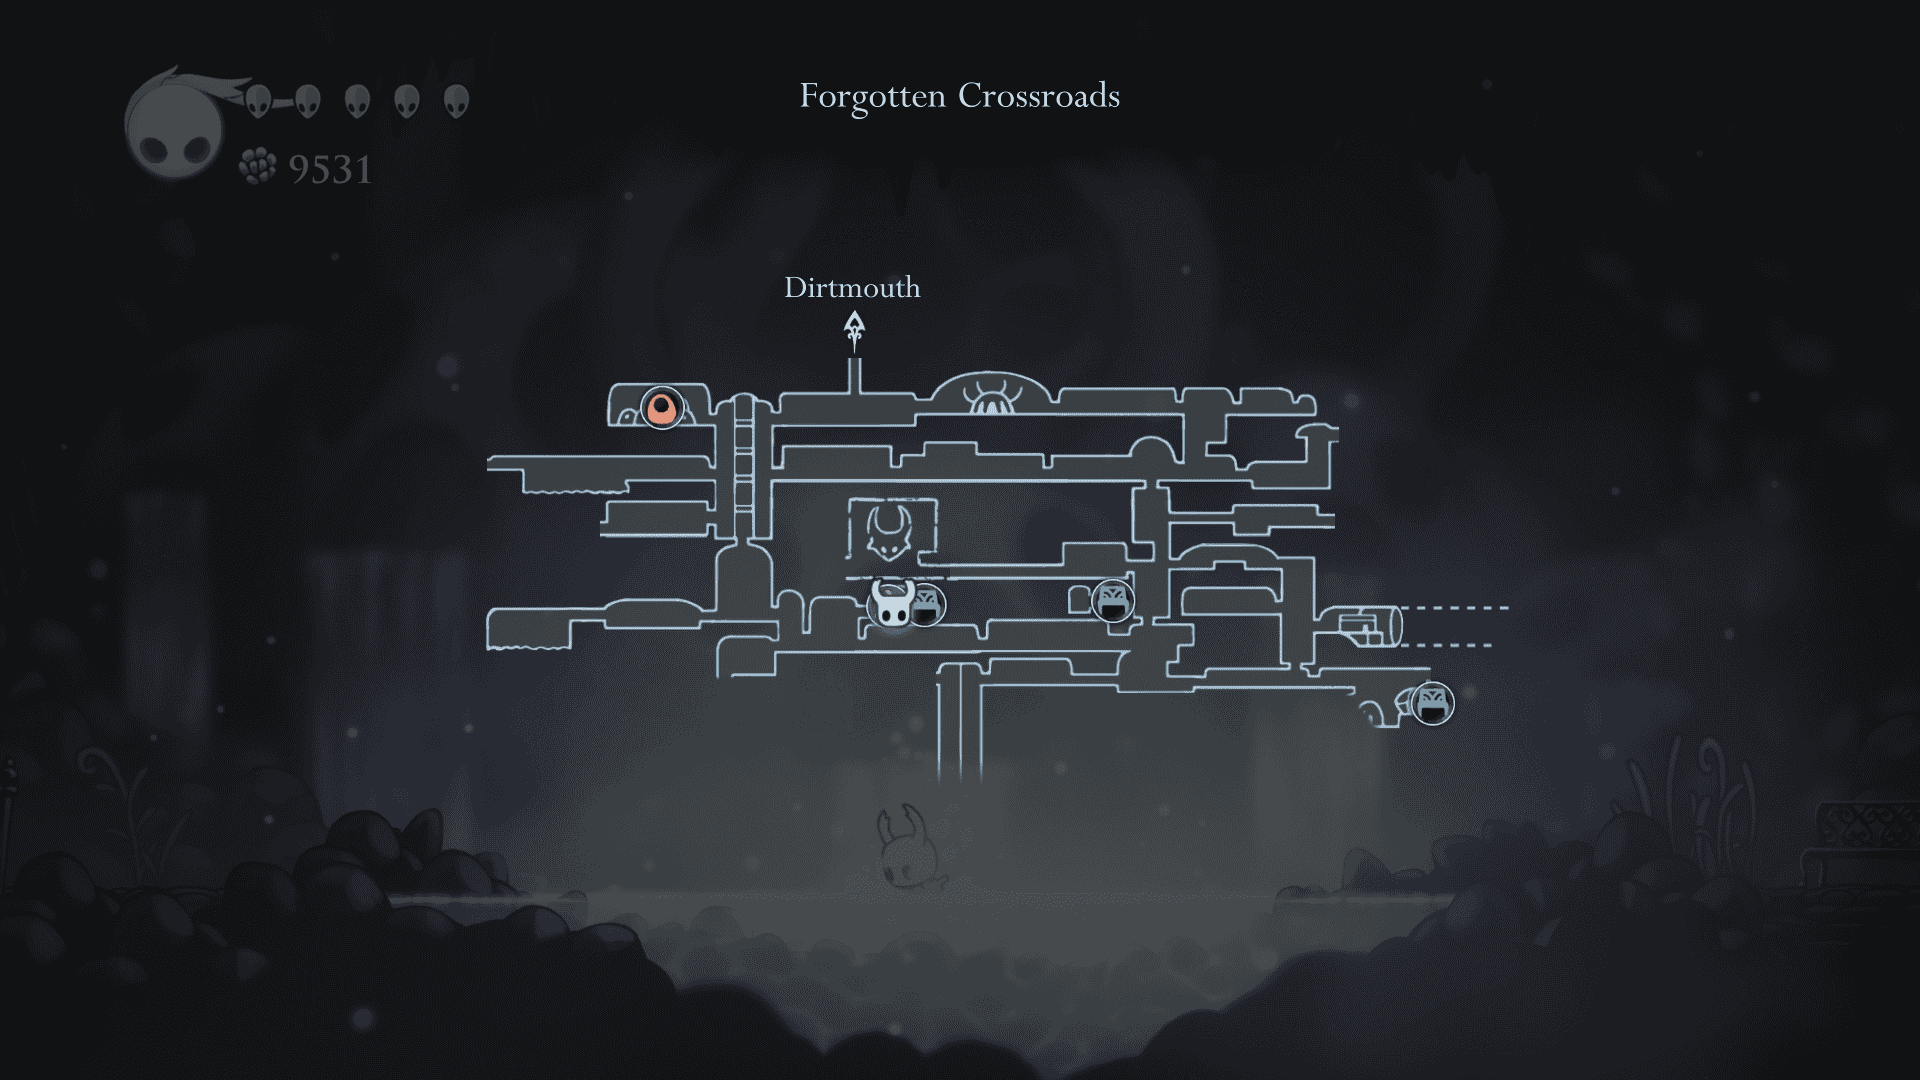
In this next room if you go up you will find three Geo Deposits you can smash for some Geo. Next to the furthest right one there is a hidden wall you can destroy. Go through it to find another Geo Deposit and a shortcut to the Hot Springs and Bench room shown above.
Going down and right (instead of through the Geo Deposit wall shortcut) will take you into a combat challenge room. This challenge must be completed before you can reach the Hot Springs and Bench room.
What Do Hot Springs Do?
If you stand in the Hot Springs you will gain both Health and Focus if you are missing either.
Use the Bench then leave the room. Drop down below (complete the combat room if not done) and head to the right through the next two rooms with the tunneling worms. Head up in the room that has the sign for the Stag Station into the room above.
Stag Station (Fast Travel) & Bench 2
At the bottom of this room you will see the Stag Station sign. Go left into the room by it. You will enter a Stag Station with a Bench. Sit at the Bench.
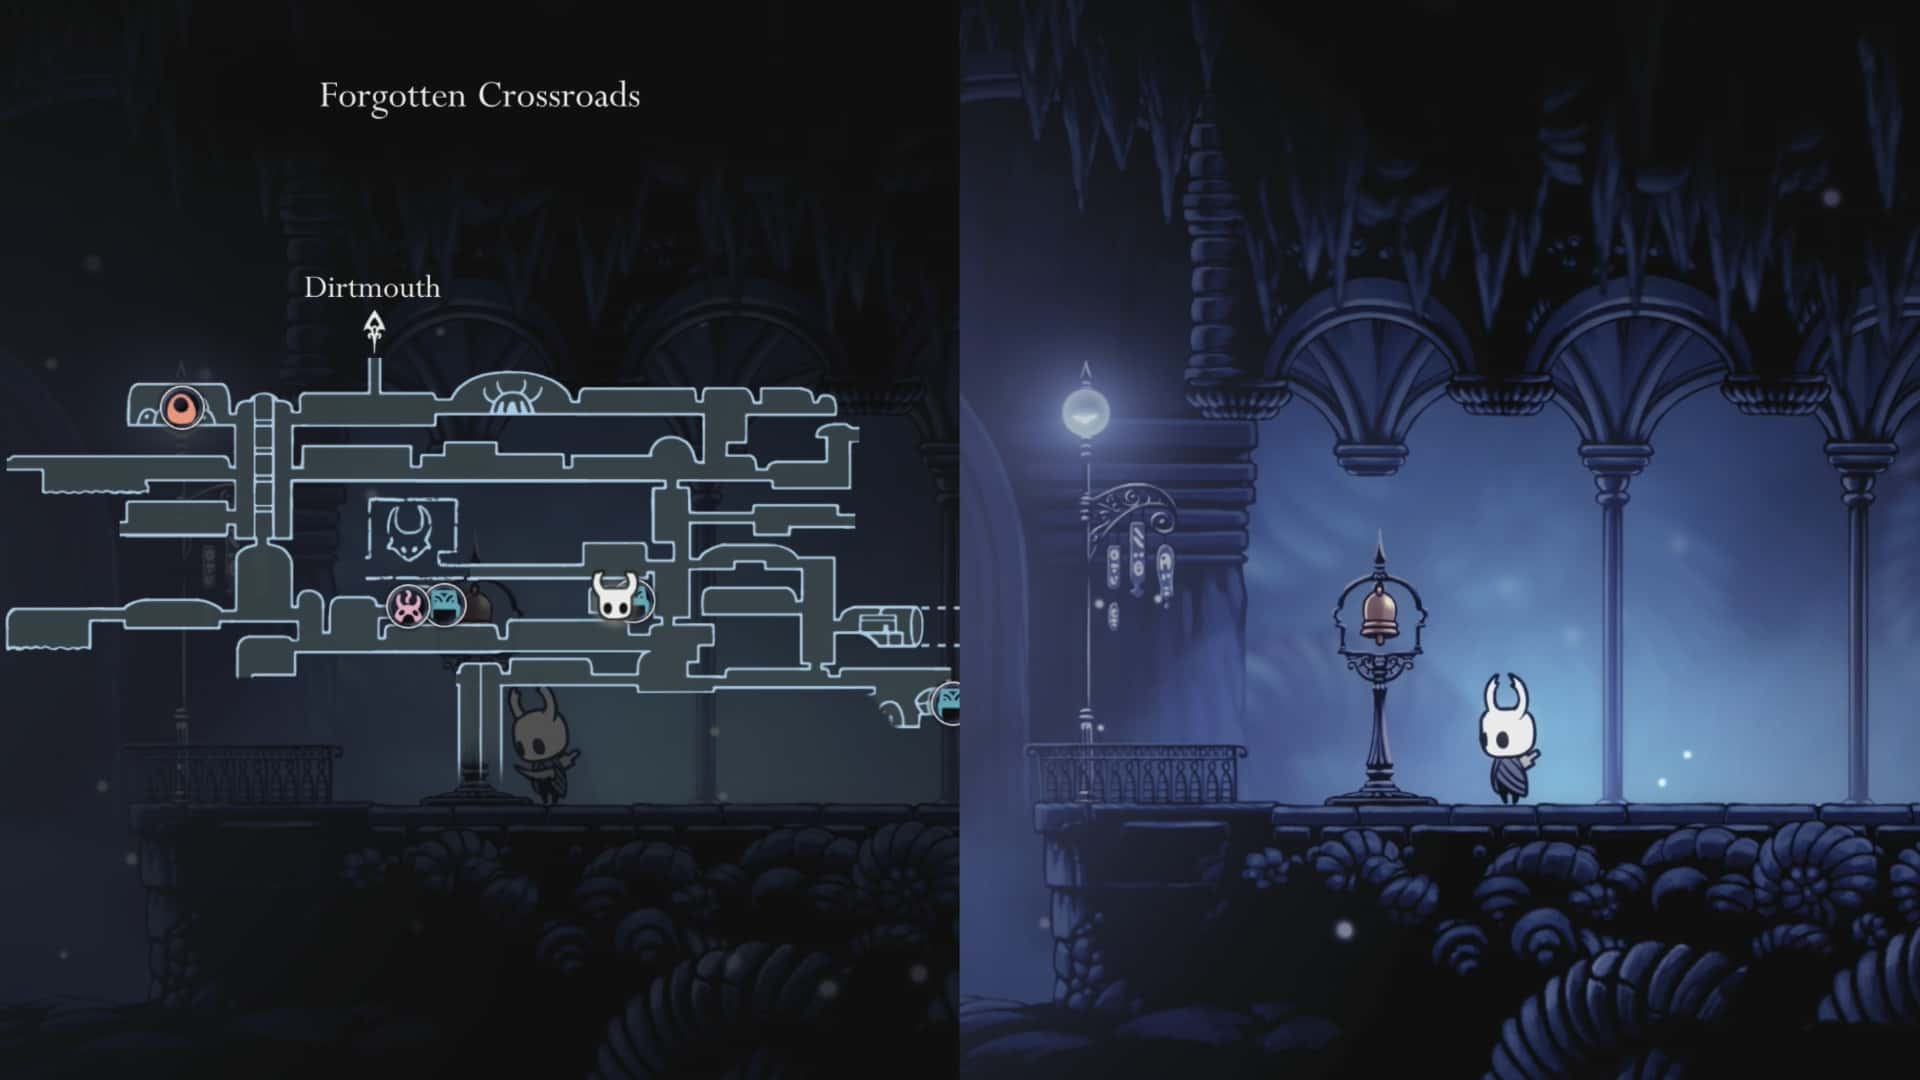
Head left and interact with the pay meter there. Pay the 50 Geo and then ring the bell. This unlocks the fast travel system. So far you only have two stations unlocked: Dirtmouth and The Forgotten Crossroads.
Use fast travel now so you can unlock it in Dirtmouth. Ride it then use the lever to open the door in the town. Once you’ve unlocked that head back to The Forgotten Crossroads.
Leave The Forgotten Crossroads Stag Station. From here you can head down and to the right if you want to fight a mini-boss and unlock Sly the merchant.
Optional: Gruz Mother Mini-Boss & Sly
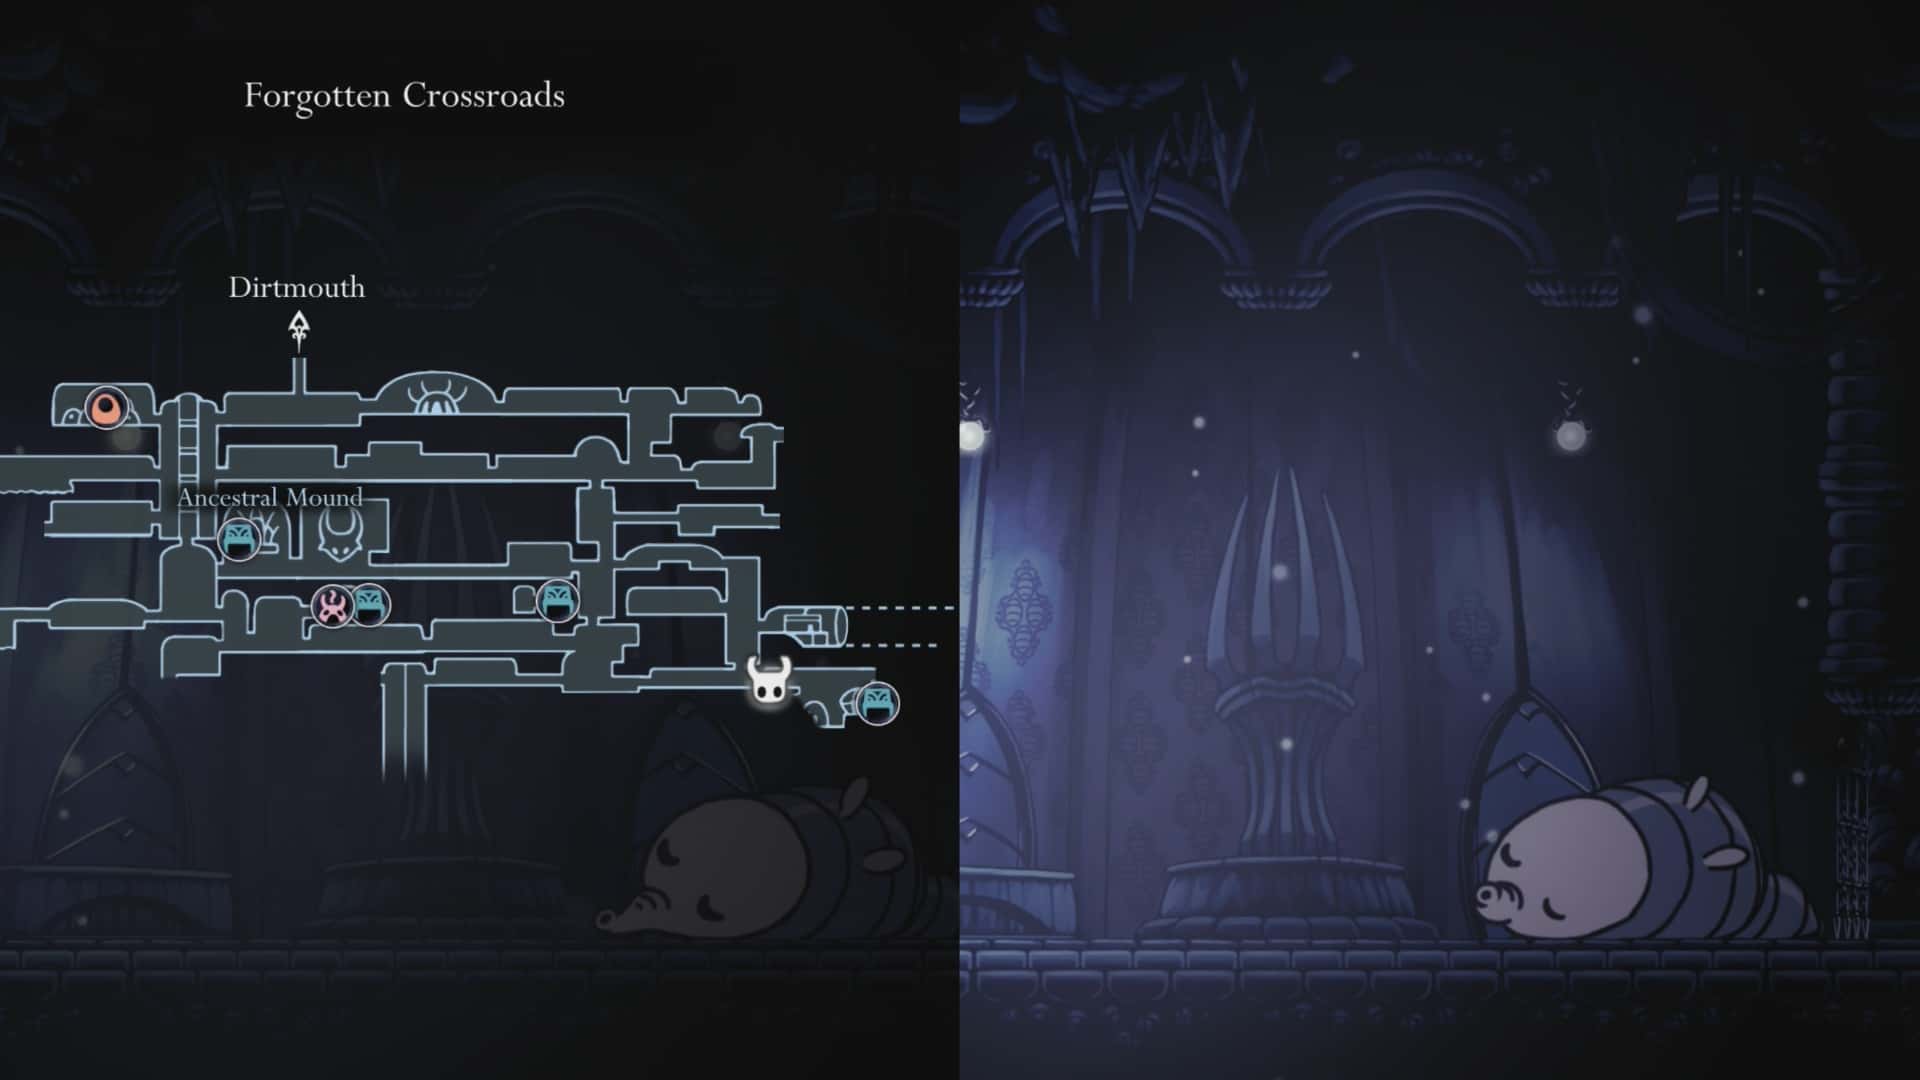
If you want to take on a mini-boss before you continue on with the main storyline, there is an optional one we can fight. If you head to the bottom right room (seen above) you can fight the Gruz Mother.
Defeating the Gruz Mother rewards you with a bunch of Geo. It also opens up a path to reach a village containing a currently inaccessible Bench and vendor named Charm Lover Salubra, and an NPC named Sly.
Sly
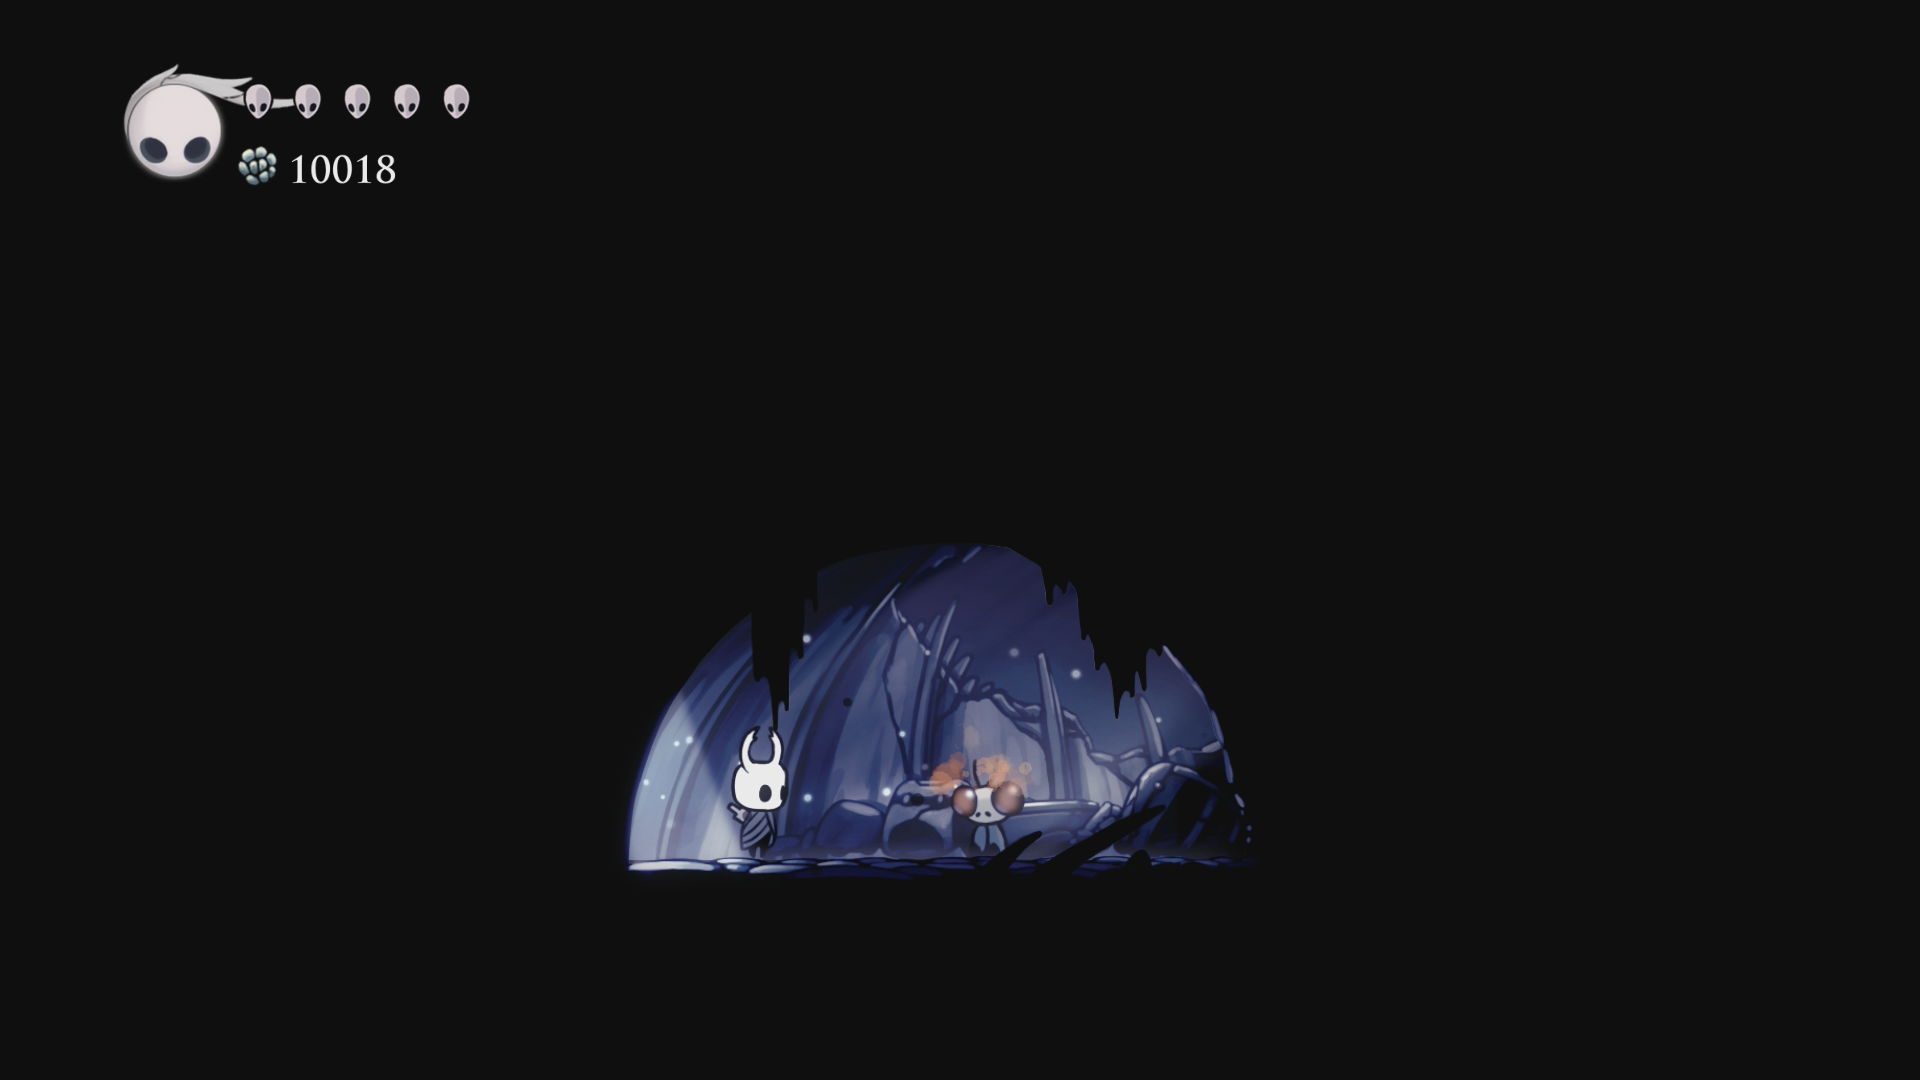
Shopkeeper Sly is located in the old village after the Gruz Mother mini-boss in The Forgotten Crossroads. He is in the small hut with the only interactable door.
After you speak to Sly he will head to Dirtmouth and open up shop to the left of the Bench. Sly sells an assortment of useful items:
| Item | Description | Cost (GEO) |
|---|---|---|
| Mask Shard | Combined 4 to make a White Mask (health). | 150 |
| Vessel Fragment | Increase Soul total. | 550 |
| Simple Key | Opens a variety of locks. | 950 |
| Gathering Swarm | Pulls Geo to you. | 300 |
| Stalwart Shell | Grants more time to recover after taking damage. | 100 |
| Lumafly Lantern | Provides light. | 1800 |
| Rancid Egg | Allows you to reclaim shadow. | 60 |
To leave the area where you met Sly, head left and destroy the wood blocking the way up. Go up. Continue going up into the room above to snag another Grub.
Grub 4
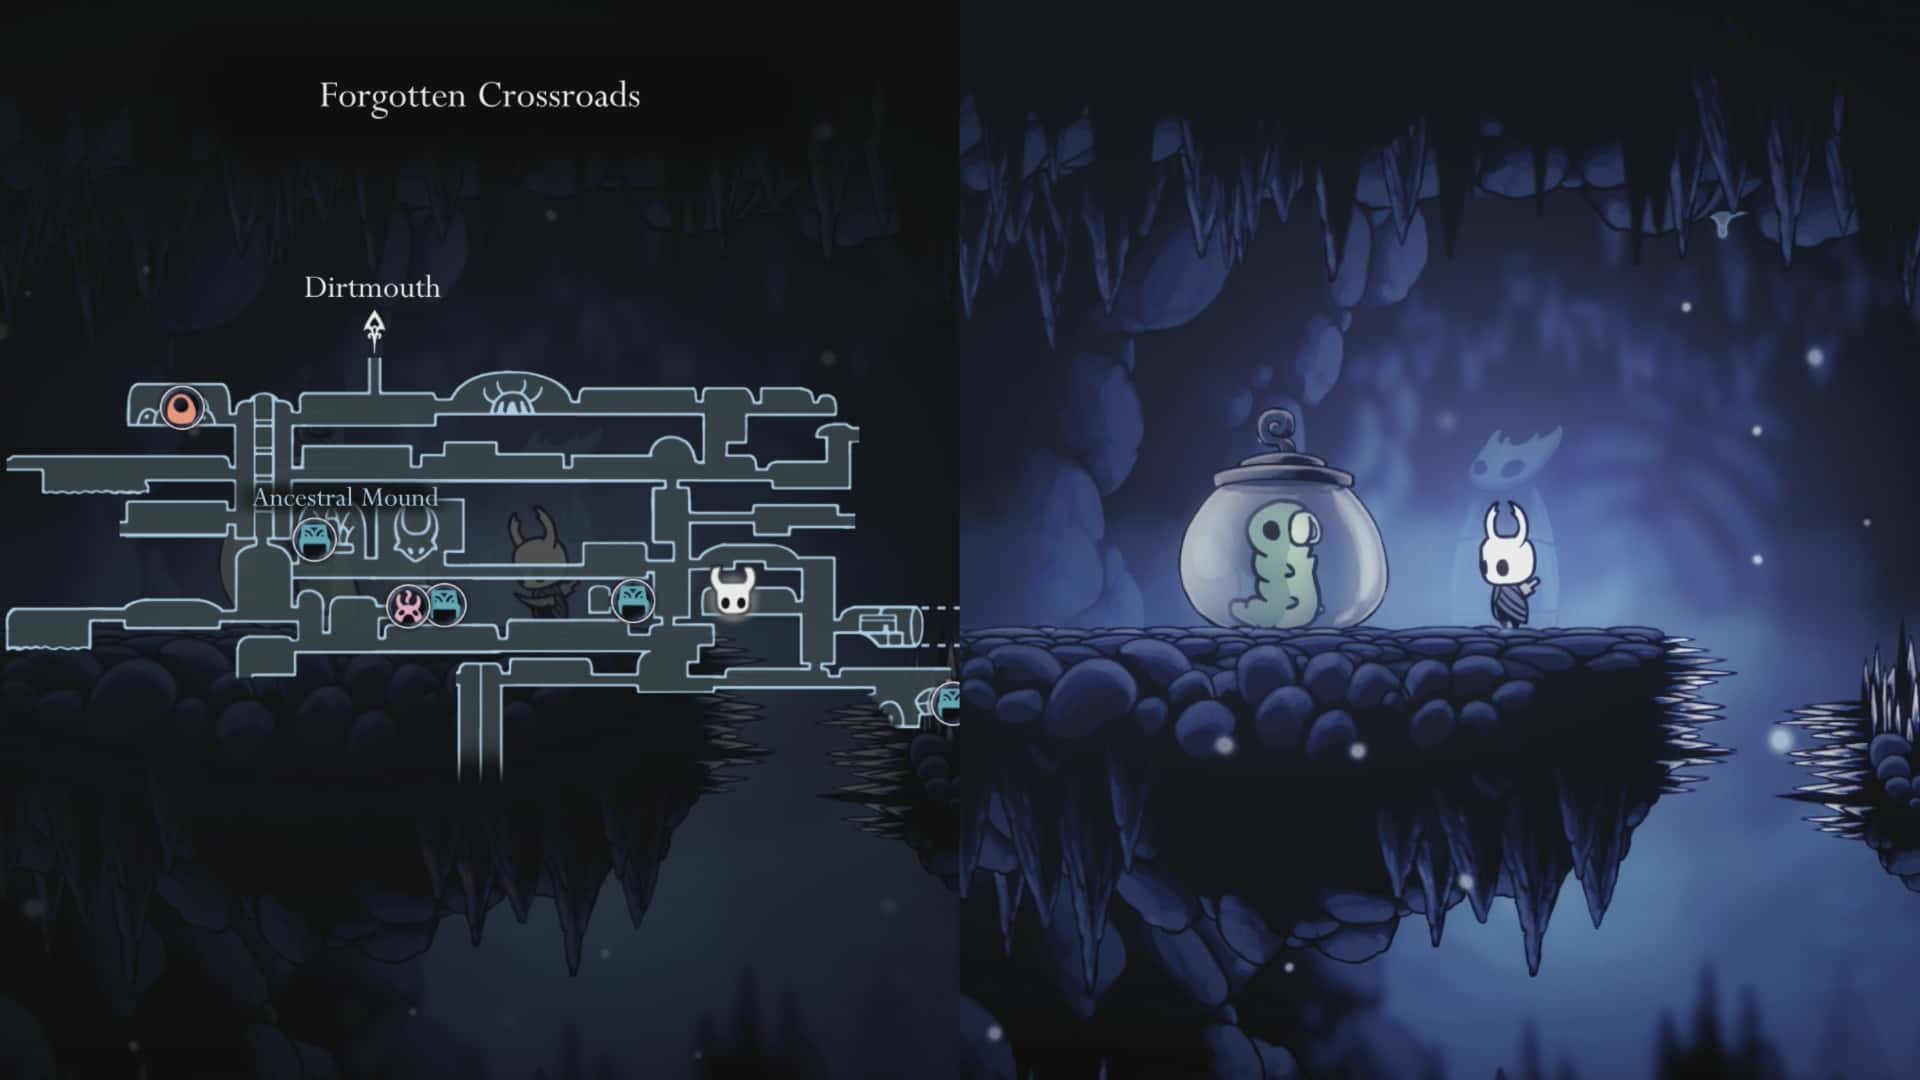
Head up this room past the entrance to the Tram. Take the first entrance on the left. Head into the room. Pogo jump left across the spikes to reach the Grub (4/46) on the far left ledge.
Return to the room on the right and follow it up and left. You will arrive back in the tall room by the Stag Station.
Grub 5
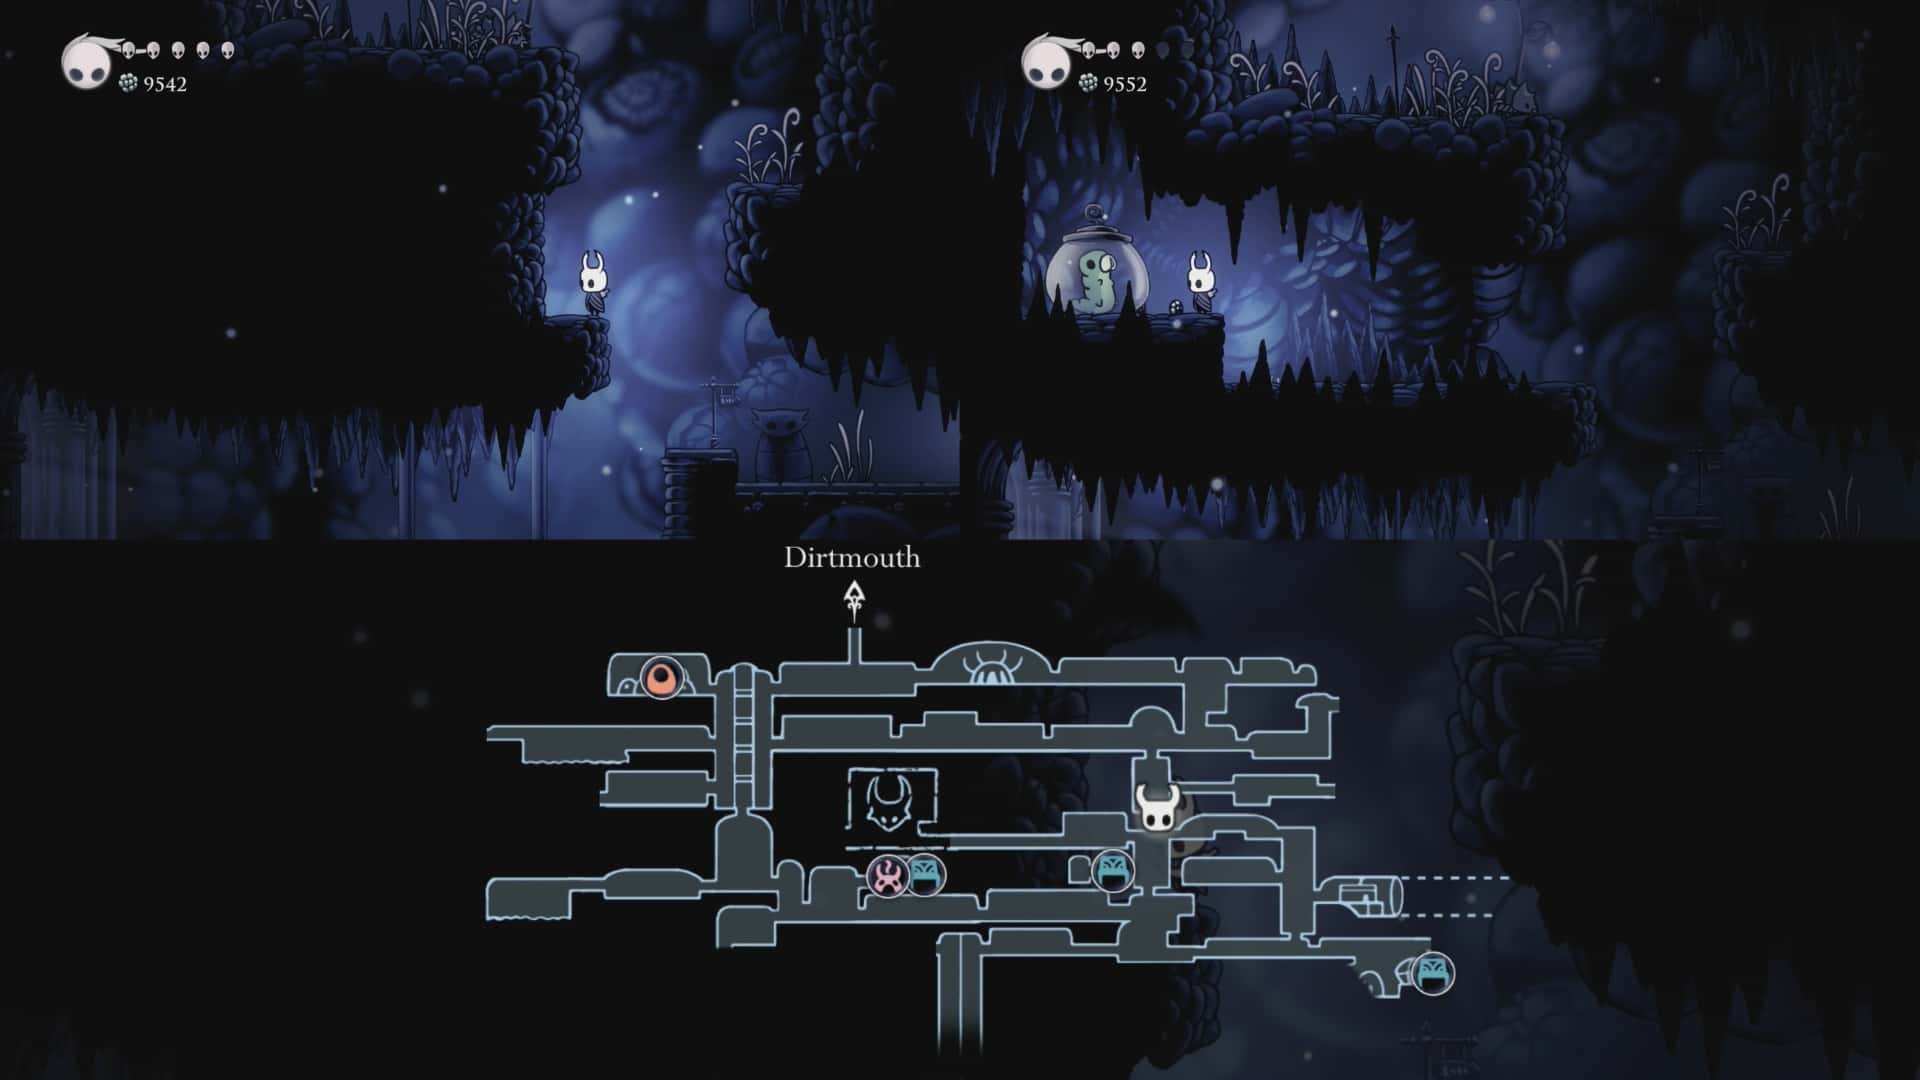
Continue up in the tall room until you reach the section shown here. There is a fake wall you can destroy here to reveal a Grub (5/46).
Shortcut Unlock
Keep going up in the room until you reach the top. You will see lever. Hit the lever. This opens the doors above which unlocks a shortcut back to the room I mentioned earlier.
With all that out of the way it is time to fight the boss! Are you ready to fight the False Knight?
Where to Find The Forgotten Crossroads Boss: False Knight
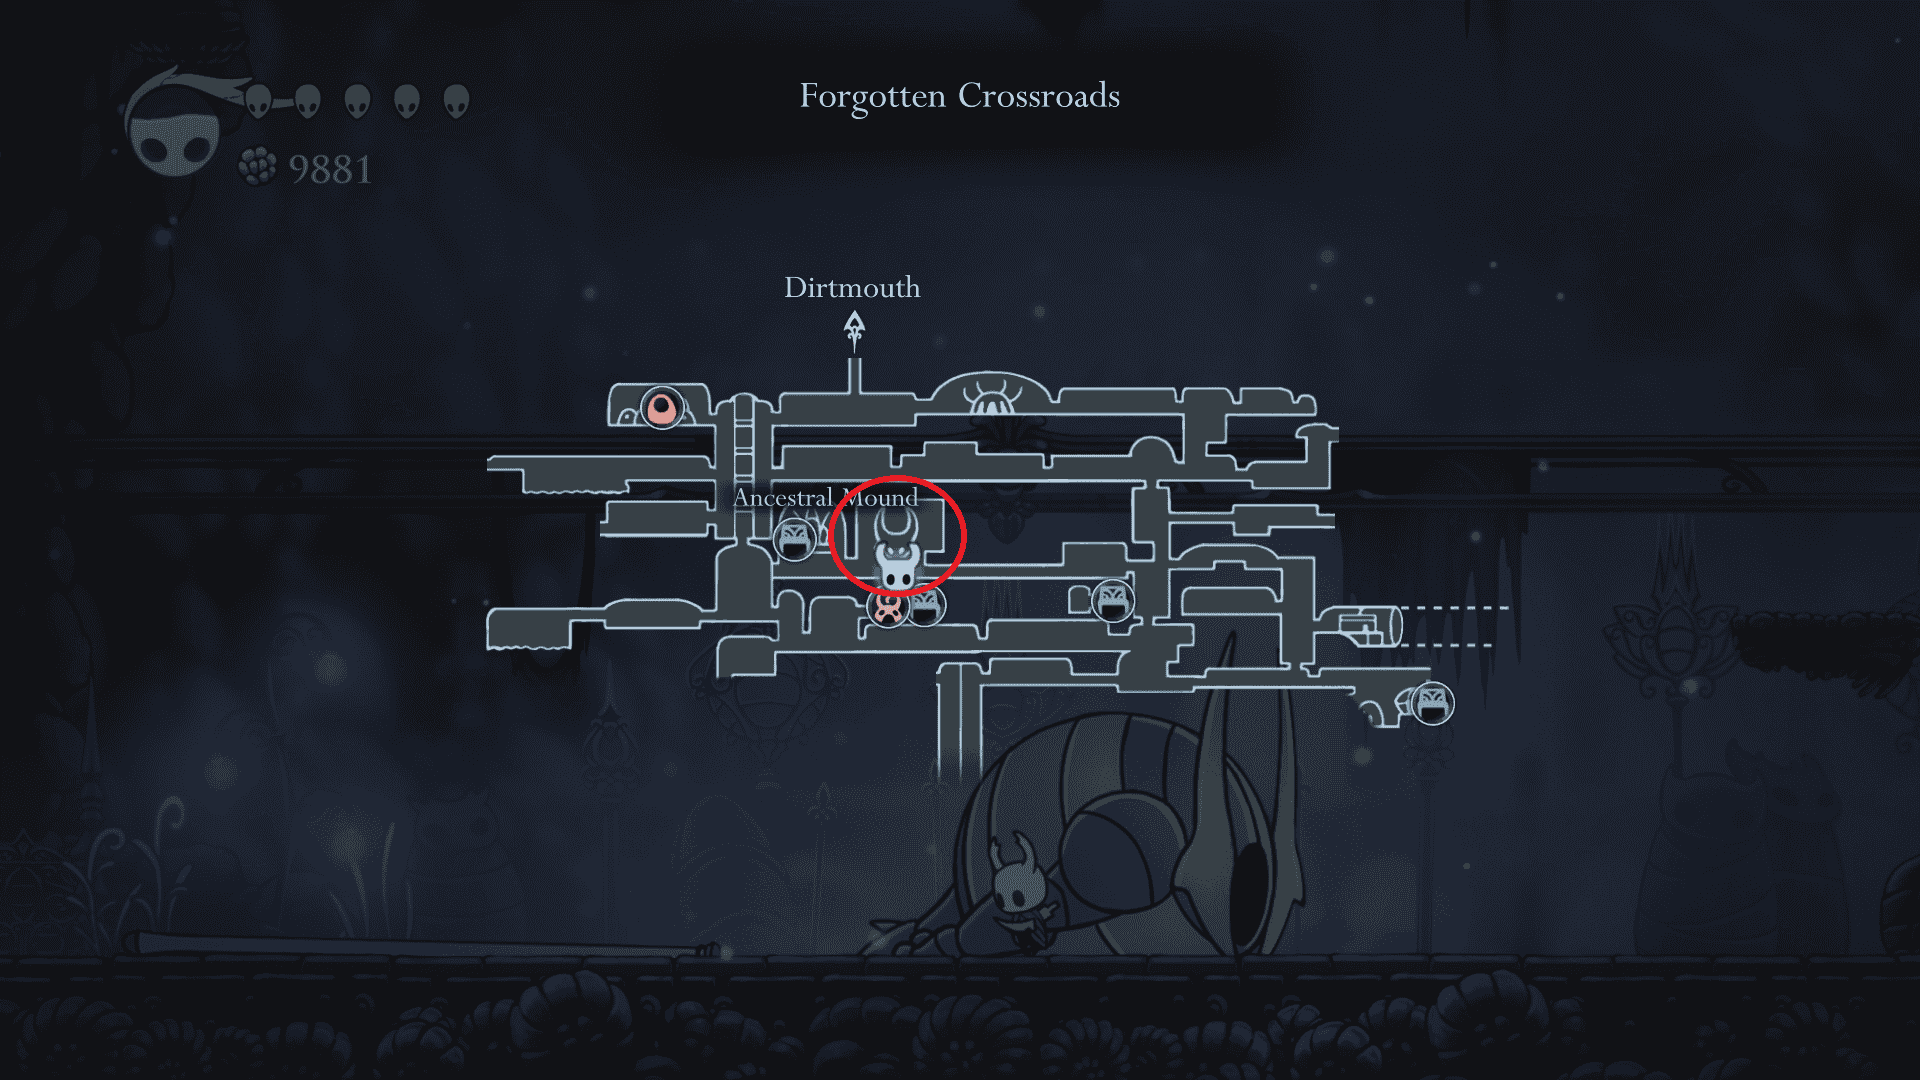
To advance the main storyline you need to find and defeat the False Knight boss in The Forgotten Crossroads. This boss is located at the boss icon in the middle of your map.
Go down the hallway until you reach the boss arena. In the arena use the platform to go up. Follow the path until you reach a closed gate on your left. The False Knight will jump down and the fight will start.
False Knight Boss Fight
The False Knight is the first real boss fight in Hollow Knight. It is a maggot wearing an armor set. This fight features three distinct phases to complete:
- Phase 1: Standard attack patterns. Deal damage to the armor.
- Phase 2: Deal damage the armor. It will fall over and the maggot appears. Hit the maggot. It will then retreat into the armor and jump into the middle of the arena. It will slam down its mace and barrels will fall from the ceiling.
- Phase 3: More barrels fall from the ceiling. Repeat damage process.
Dealing enough damage to the maggot in Phase 3 will cause the armor set to jump and break a hole in the arena’s floor. It will fall to the ground below, killing it. Pick up the City Crest item it drops.

Head left from through the now open gate. Jump up and open the chest full of Geo. Drop down and head to the left into the next room.
Spell Unlocked: Vengeful Spirit & Bench 3


In this room follow the path lit by the torches until you reach the Snail Shaman’s hut. Enter the hut and speak to the Snail Shaman. The Shaman will give you a Spell called Vengeful Spirit. Jump into it to unlock it.
What Does Vengeful Spirit Do?
This spell allows you to shoot out a projectile using SOUL.
Upon receiving the ability, you will be knocked unconscious and taken to an area called the Ancestral Mound where you are locked in. The Snail Shaman wants you defeat a creature before they will let you out. This area acts as a tutorial for using Vengeful Spirit.
At the end of the area you will face a Elder Baldur that will cover itself if you get to close. Stand away from it and shoot it with Vengeful Spirit when it’s body is exposed. Repeat until it dies.

To the left of the Elder Baldur is the Soul Catcher Charm which, when equipped, increases the amount of Soul you gather.
Drop down and speak to the Snail Shaman. They will let you out. Sit at the Bench in the hut and then leave to the room with the torches. Go back down the torch room until you reach the bottom.
Go left and use the lever to open a shortcut back to the room where we met the cartographer.
How to Get to Greenpath
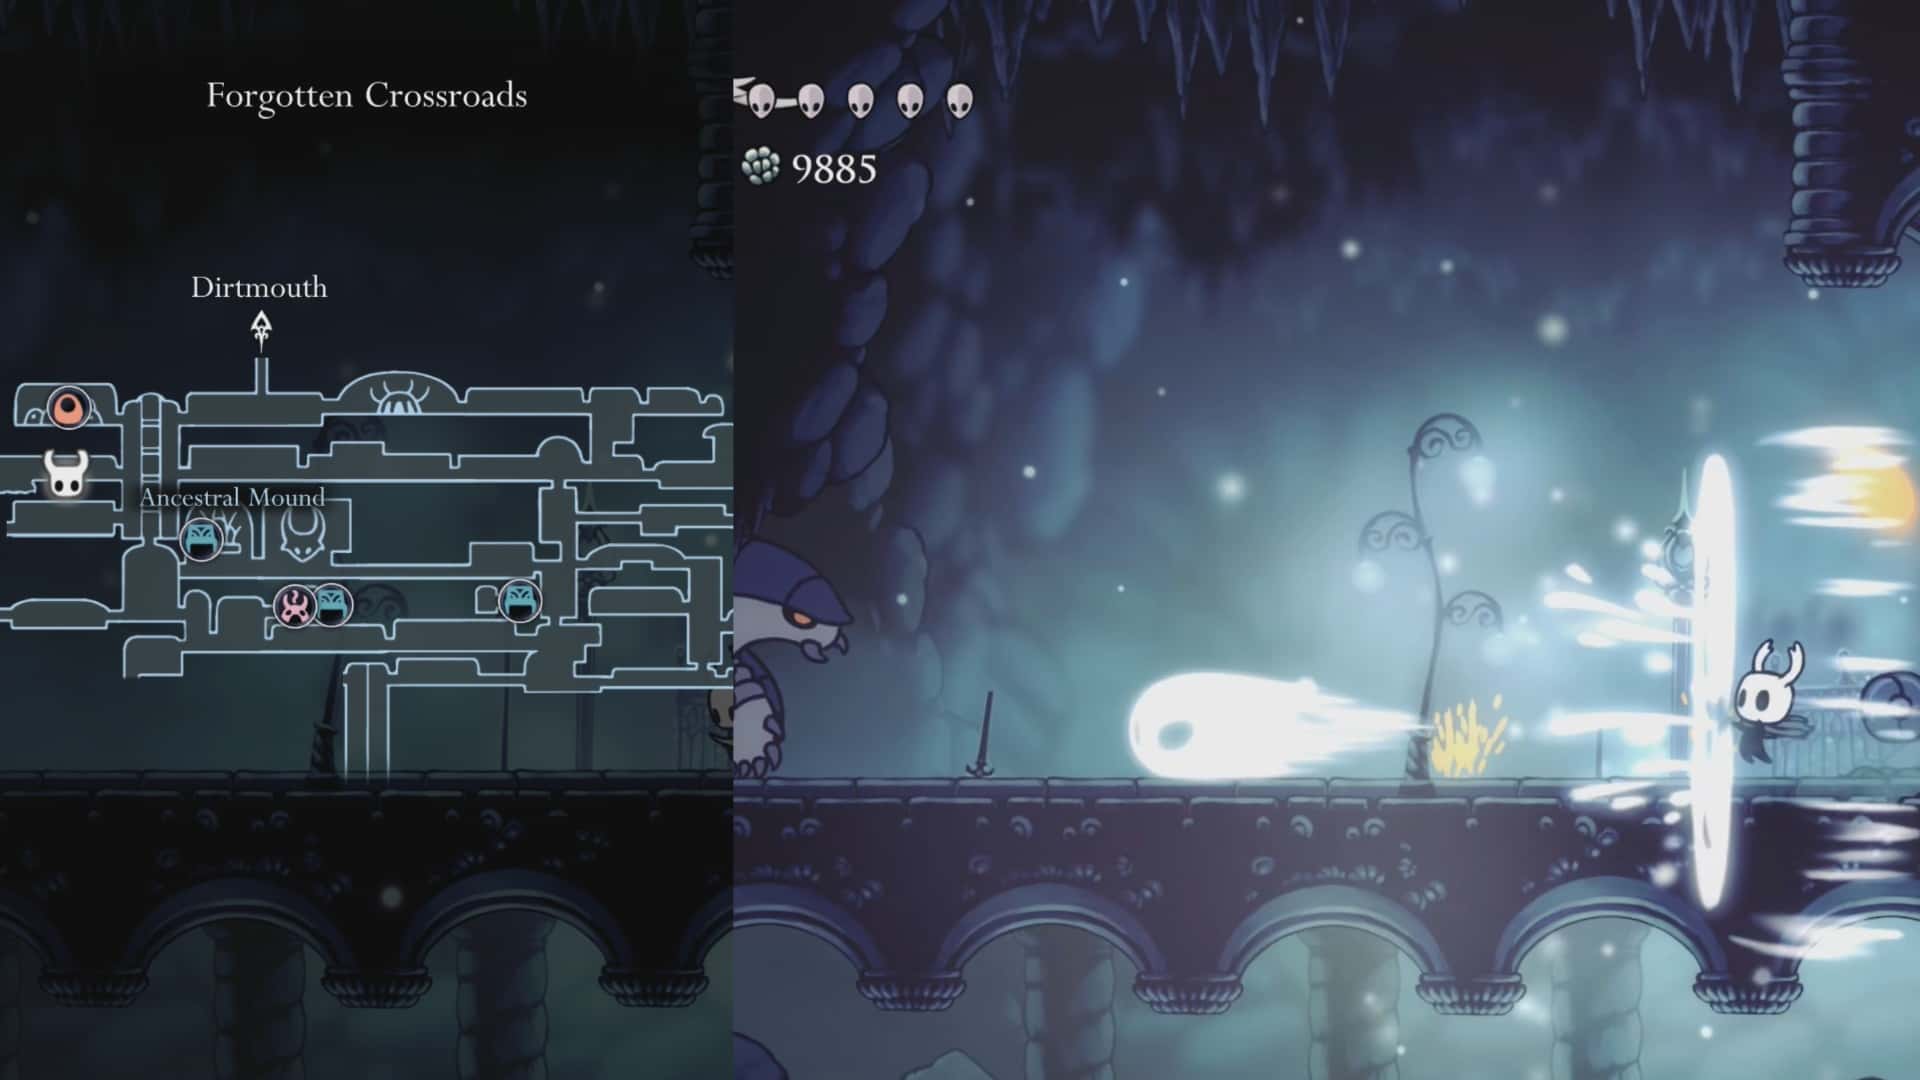
When you are ready to advance the storyline you need to head to Greenpath. This location is accessible via the right side of The Forgotten Crossroads.
Head to the large room above where we got the map. You will see path with shrubs growing out of it. Go over to this path and head to the left into the next room.
Make your way left until you encounter the same Elder Baldur we fought in the Ancestral Mound. Stand away and use Vengeful Spirit to defeat it. Complete the platforming sequence to the left to reach the next area called Greenpath.
This guide is part of our Hollow Knight guide and walkthrough. Check out the hub for more guides about this game.
Thoughts on our Hollow Knight Forgotten Crossroads guide. Drop them in the comments below.