Bring The Crunch Guide – South Park The Fractured But Whole
The Bring The Crunch DLC for South Park: The Fractured But Whole is now available, and it takes you to the spooky and mysterious Lake Tardicaca. In this guide, we’ll walk you through everything you need to know to navigate this new content, from accessing the DLC to completing your objectives and collecting loot. Let’s get started!
How to Access the Bring The Crunch DLC
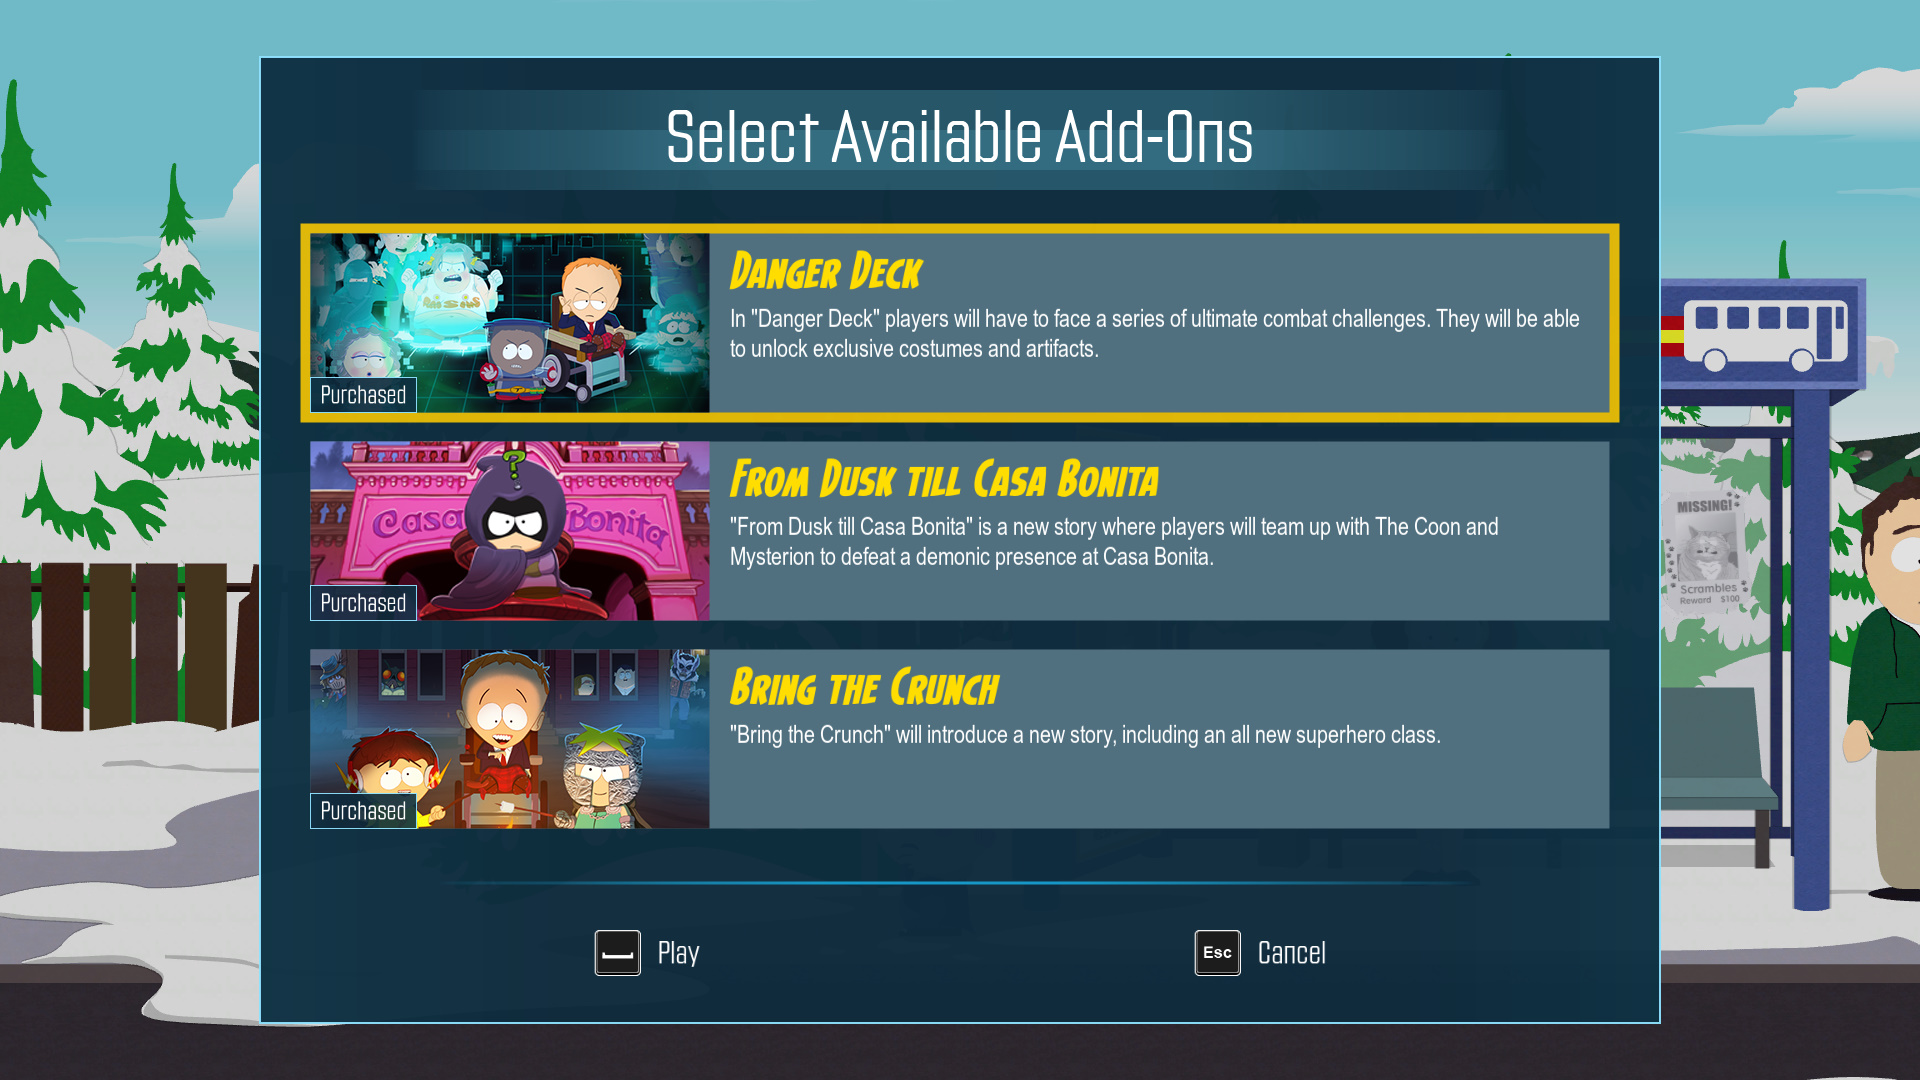
To access the Bring The Crunch DLC, head to the South Park Bus Stop, which can be found west of your house in South Park. At the Bus Stop, select Bring The Crunch from the available DLC options, and you’ll be transported to the DLC location.
Bus Stop – Report to Lake Tardicaca


Upon arrival, you’ll be outside Loomis Gasoline. Here are some key lootables to pick up before continuing:
- Lunch bag near the Bus Stop.
- Lock Box by the out-of-order gas pump.
- Backpack in the trees to the right of the green truck (contains a Spirit Board consumable).
- Box by the red gas tank behind the Old Mechanic.
- Backpack in the trees to the left of the “Welcome to Lake Tardicaca” sign.
- Backpack in trees across the pathway to the left of the Lake Tardicaca sign.
Once you’ve looted these items, follow the red arrows and proceed left towards Lake Tardicaca.
Lake Tardicaca – Arrival at Camp Tardicaca

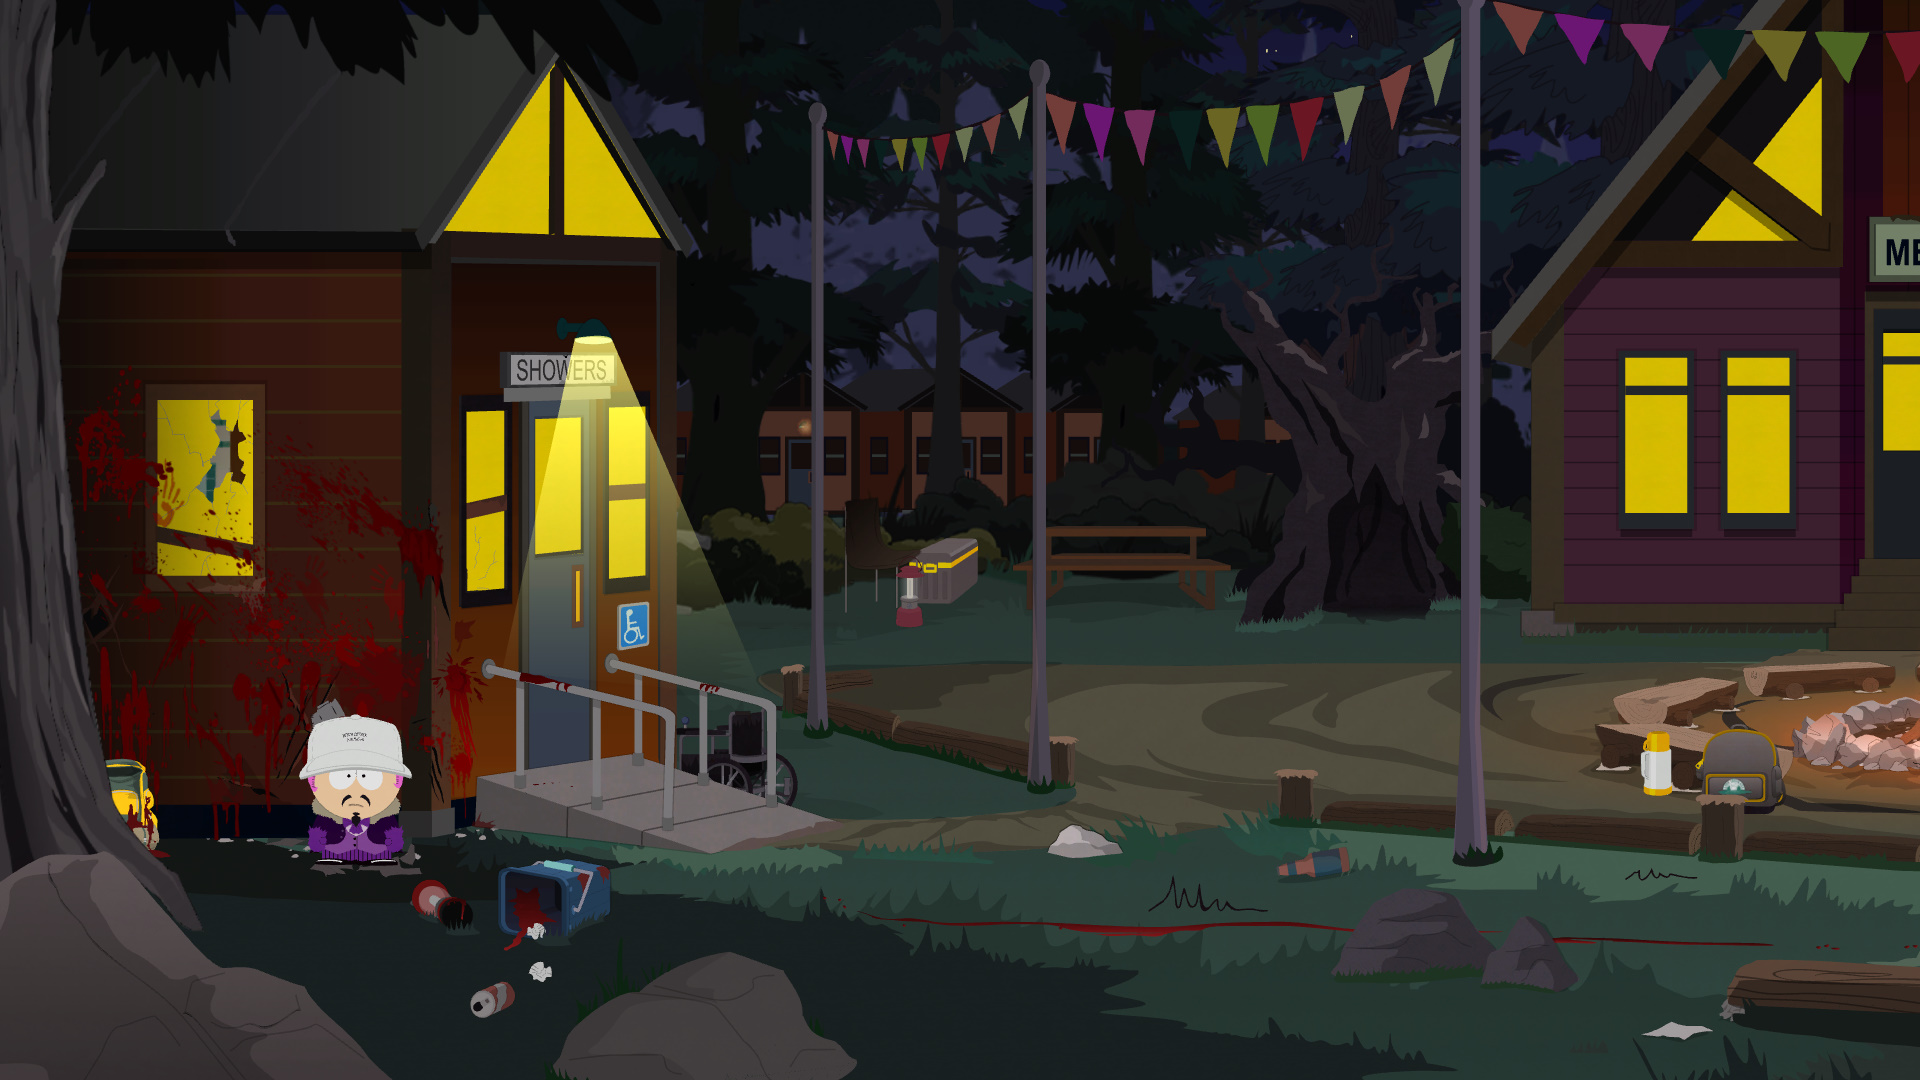
As you enter Lake Tardicaca, you’ll trigger a cutscene and meet Mintberry Crunch (Bradley Biggle), a new hero who will join your party. After the cutscene, take some time to explore the area and grab the following loot:
- Bag by tree (right of entrance) – contains the Spiral Braids hairstyle.
- Bloody backpack near the entrance.
- Grade School Avenger Lunch Box on a log to the left of the entrance.
- Bloody backpack near the Showers.
- Paper lunch bag beside Butters.
- Thermos and Backpack near the fire in front of the Mess Hall.
- Cooler by the picnic table near the Mess Hall.
- Behind the third bunkhouse: Throw a firecracker at the propane tank and use a fart to blow up the canoe to reveal the Rainbow Roller Suit and Party Bowl hairstyle.
Once you’ve looted the area, head to the Showers to inspect the bloody wall and axe, which will trigger the next objective: “Meet Fastpass in the Misty Forest”.
The Misty Forest – Meeting Fastpass

Before you can progress into the Misty Forest, you’ll need to solve a Haywire puzzle. To do this:
- Shoot the electrical panel with a firecracker.
- Use Haywire’s ability to turn off the electricity.
With the electricity out, continue to the Misty Forest.
In the Misty Forest, you’ll meet Fastpass and Mintberry Crunch. Inspect the bloody object nearby to trigger a battle with Monsters. During this battle, you’ll experience a spontaneous Bootay event, where you’ll need to run to a cabin for safety.
Cabin – Find Weapons to Defeat the Monsters
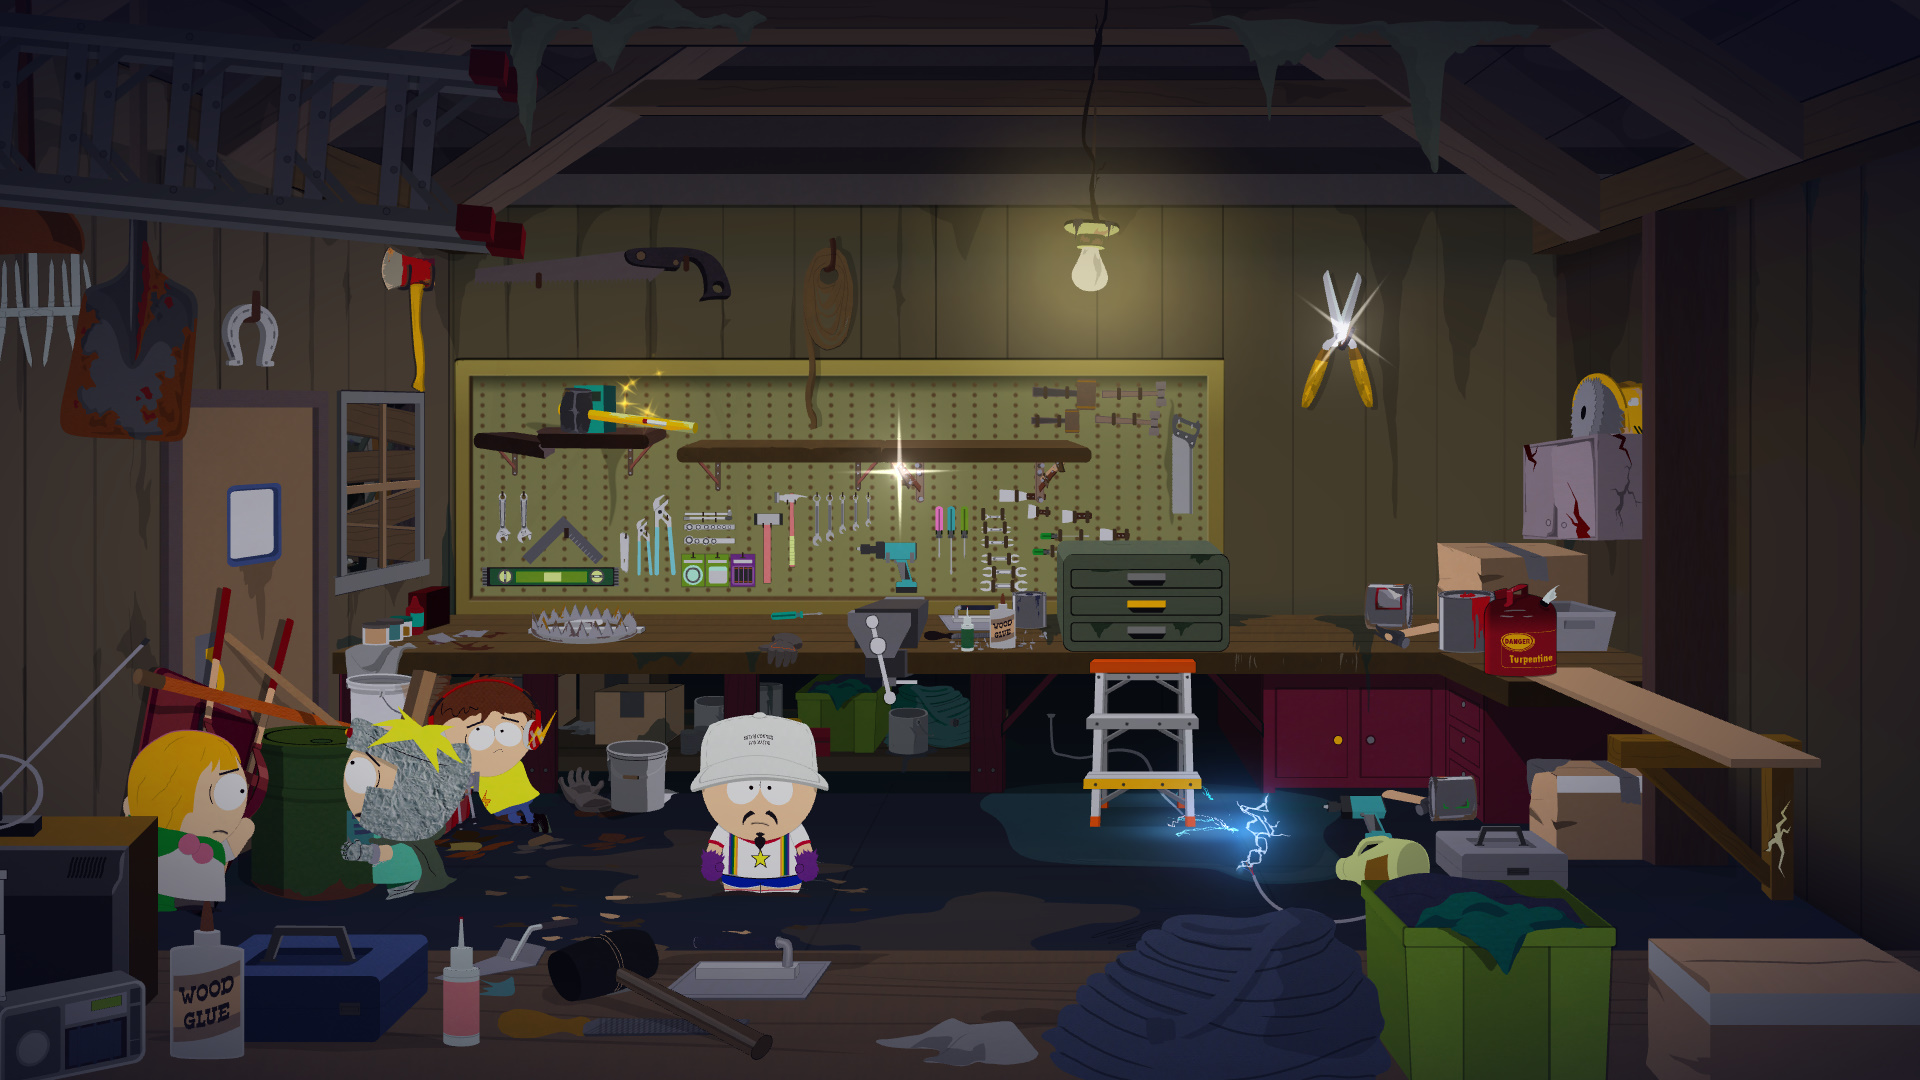
Inside the cabin, you’ll need to collect four weapons to defeat the monsters:
- Axe: Shoot the Axe with a firecracker to make it fall onto the workbench. Shoot the broken shelf above the bear trap, climb the ladder, and grab the axe.
- Hedge Clippers: Shoot the Hedge Clippers with firecrackers to make them fall onto the workbench. Pause time and move the ladder underneath them, climb up, and grab the Clippers.
- Circular Saw: Hit the Turpentine with a firecracker to ignite it. Use a fart to blow up the box holding the Circular Saw. Shoot the wood above the 2×8 to create a ramp leading to it.
- Sledgehammer: Pause time and move the ladder to the left, climb it, and shoot the right side of the shelf to access the higher shelf. Walk across it and grab the Sledgehammer.
Once you’ve collected all four weapons, talk to Fastpass to unlock the Final Girl class. This new class will help you in your next battle.
Mess Hall – Find the Missing Counselors
After the cabin, head back to the Mess Hall where you’ll meet Butters and a large amount of blood. Here, you’ll need to search the Shower Building and the Burial Grounds for the missing counselors.
- Shower Building lootables:
- Cabinet beneath the sink.
- Gym bag on the bench.
- Laundry hamper near the open grate.
- Bag in the shower stall.
- 3x Brain pieces scattered around.
Afterward, explore the Old Mines (optional area) beneath the Showers. Here, you’ll find several more lootables, including a Manic Mess Wig.
Burial Grounds – Collect Burial Dirt
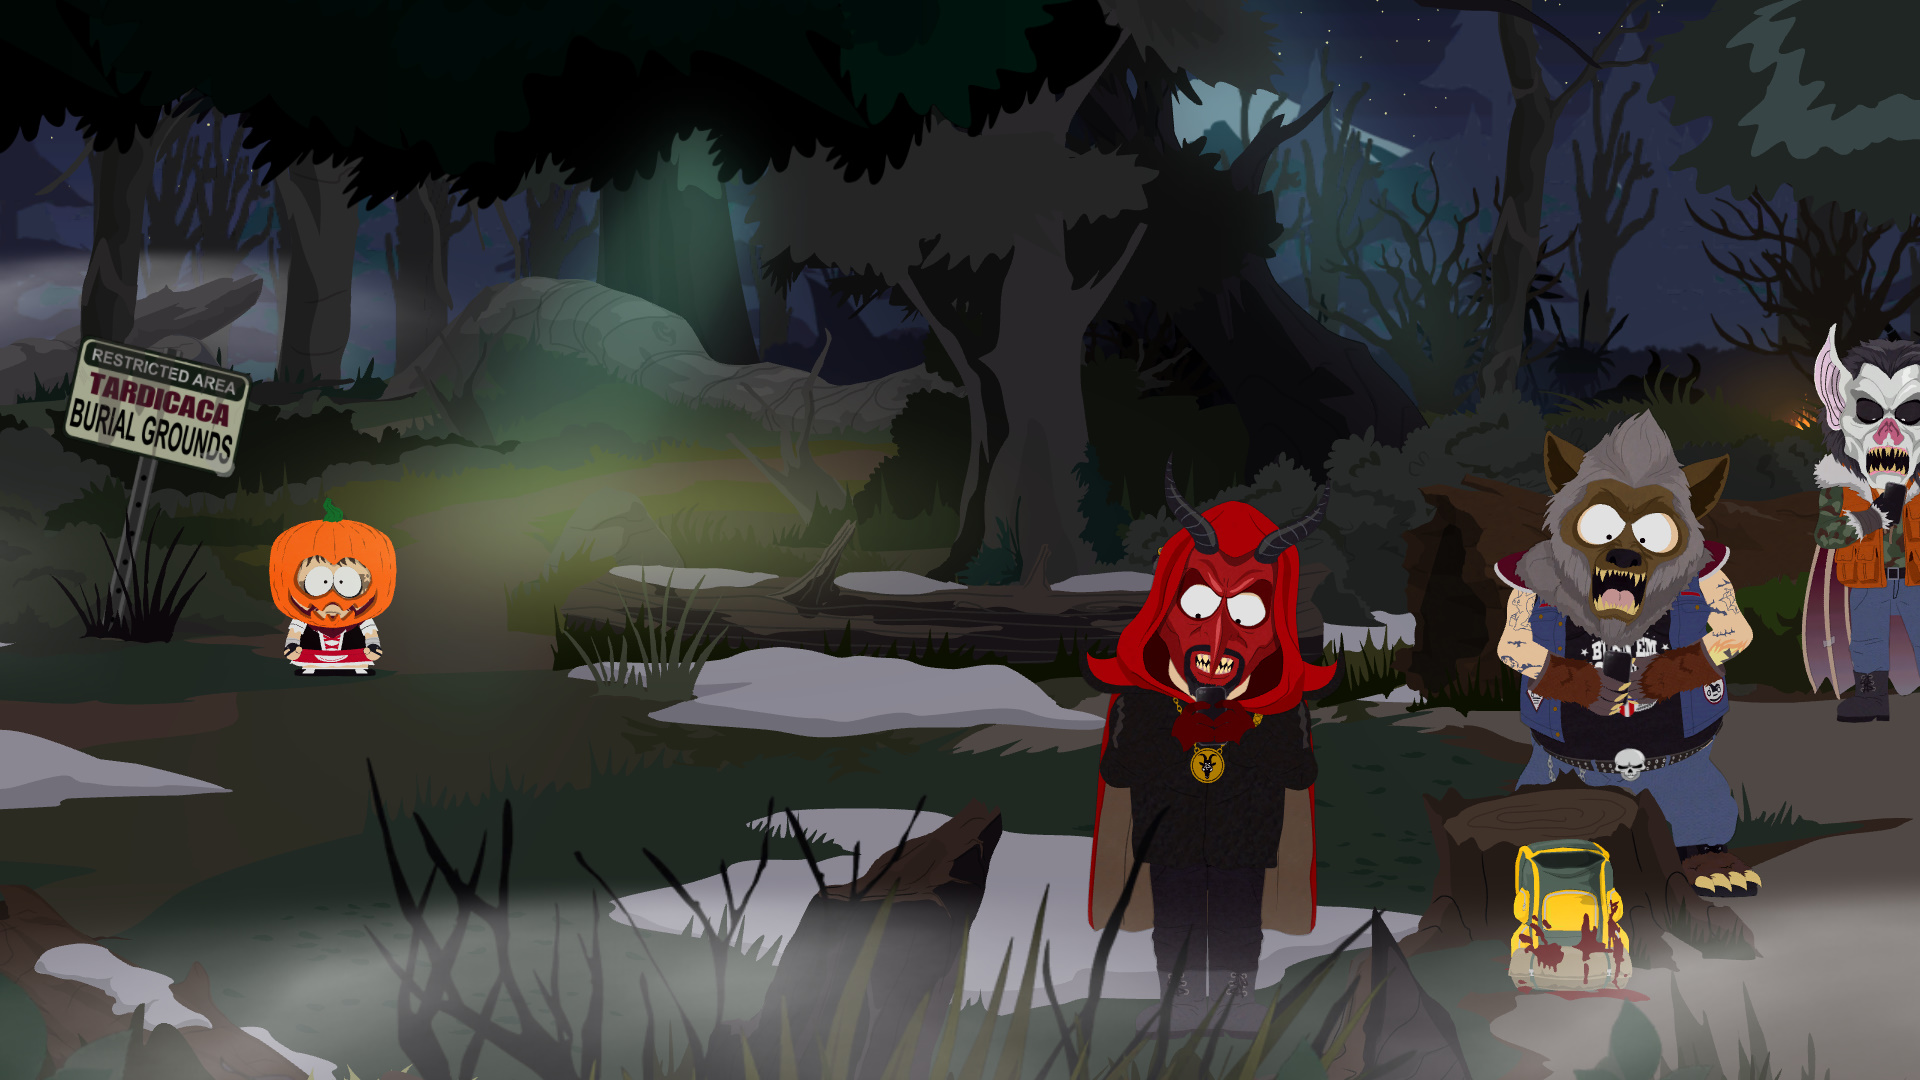
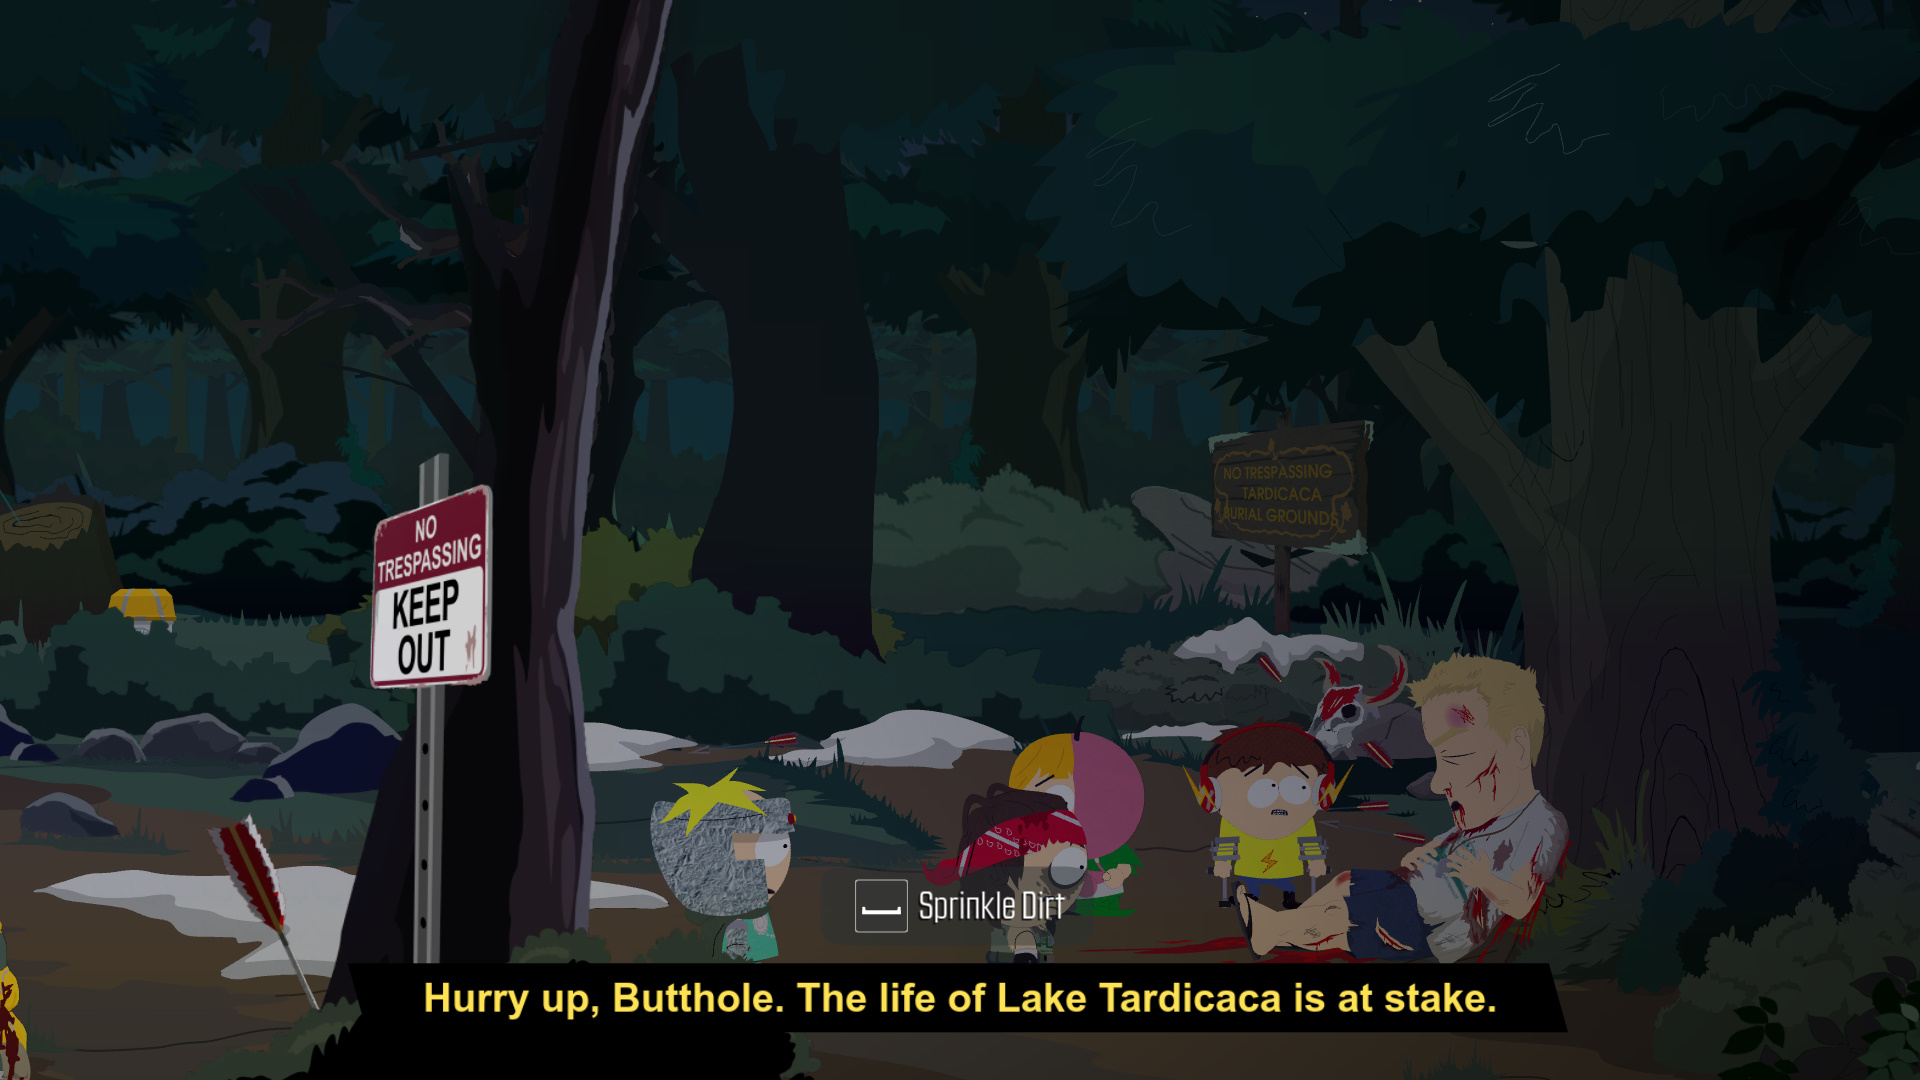
At the Burial Grounds, you’ll face more monsters before receiving the next objective: to collect 12 pieces of Burial Ground dirt. The dirt can be gathered from three locations marked by teepees and cow skulls.
Once you’ve collected all the dirt, return to the counselor and sprinkle it on him, only to discover that it doesn’t work.
Camp Center – Investigate the Psychic Disturbance

Once you’ve completed the Burial Grounds, head to the Camp Center to investigate the psychic disturbance. After a brief interaction with Fastpass, you’ll unlock Nathan’s Cabin. Inside, you’ll find more loot and eventually acquire the Boathouse key.
Boat House – Confront Nathan
In the Boat House, you’ll loot several items, including the Lakewatch costume. A cutscene will trigger on the pier, where you’ll confront Nathan. Defeat him and his mind-controlled allies to unlock the Lagooned Costume and the Psychotic Episode DNA.
Mess Hall – Retrieve Milk From The Mess Hall


As you make your way to the Camp Center, Timmy will tell you he can help, but he requires sustenance. This sustenance comes in the form of Milk that can be found in the Mess Hall. Make your way to the Mess Hall and you should see the Milk Bottle on the counter to the far right.
To grab it, move the Used Oil container between the Canola Oil and the edge of the countertop to make a stairway. Climb the stairway and destroy the soda machine. Shoot the left side of the glass shelf the milk is on then freeze time and run and grab it. With milk in hand it is time to pay Timmy a visit just in front of the Mess Hall.
Alien Boss Fight

Preparation
- Level Up: Max out your characters and abilities before entering the fight.
- Gear: Equip defensive and offensive gear for your team, focusing on increasing health and attack power.
- Healing Items: Ensure you have a good stock of healing items to keep your team alive.
- Team Composition: Choose a balanced team with a strong healer and high damage dealers. Mintberry Crunch and Fastpass are excellent picks.
1: Alien’s Initial Form
- Attacks:
- Laser Beam: Hits characters in a line.
- Tentacle Whip: Strikes characters in a row.
- Mind Control: Temporarily controls one of your characters.
- Strategy:
- Spread out your characters to avoid the laser beam.
- Focus on consistent damage output.
- Use your healer to maintain the team’s health, and be ready to counter Mind Control with debuff skills.
2: Alien’s Evolved Form
- New Attacks:
- Magma Blast: Area-of-effect damage.
- Teleport: Moves to new positions.
- Psychic Shockwave: Stuns characters.
- Strategy:
- Buff your characters to resist Psychic Shockwave and deal with Magma Blast damage.
- Keep characters spaced out to avoid large area attacks.
- Prioritize damage output and interrupt the Alien’s attacks as much as possible.
3: Alien’s Final Form
- New Attacks:
- Gravity Well: Pulls characters toward the Alien.
- Minion Summon: Adds extra enemies to the fight.
- Energy Beam: Deals heavy area damage.
- Strategy:
- Eliminate summoned minions to prevent being overwhelmed.
- Avoid the Gravity Well by staying spread out.
- Use healing items and focus on dealing high damage to the Alien while keeping your team alive.
Final Tips
- Monitor the Alien’s health closely; the fight escalates quickly.
- Coordinate your attacks and keep your team in optimal positions.
- Patience is key—take your time and manage your resources effectively.
Rewards
- Reptilia Costume
- Alien Evolution DNA
- Lagooned Costume
- Achievement unlocked
Selfies
Once you complete the DLC you can get a number of selfies from characters you interacted with during it. Below is a list of followers you can add at the end of Bring The Crunch.
- Nathan (Camp Center)
- Mimsy (Camp Center)
- Collette Francis (Camp Center after earning Paranormal Badge)
- Timmy (Camp Center after earning Disability Awareness Badge)
- Libby Perkins ( Camp Center after earning Native Heritage Badge)
- Chad Handler (Camp Center while wearing DLC costume)
- Reggie Burke (Camp Center after earning Marine Life Badge)
- Dennis Murray (Camp Center, burn marshmallow on fire)
- Bradley Biggle (Bus Stop)
- Old Mechanic (Bus Stop)
To wrap up, defeating the Alien Boss is a significant accomplishment in South Park: The Fractured But Whole – Bring The Crunch DLC. With the right strategy and preparation, you’ll be able to overcome the challenge and claim your rewards. For more tips and strategies on navigating the DLC, be sure to check out our comprehensive guide on From Dusk Until Casa Bonita, where we break down everything you need to know to succeed in that adventure as well. Happy gaming!
Thoughts on our Bring The Crunch guide? Drop them in the comments below.
In the mess hall, how do I retrieve the milk if the electricity is on or how do I turn the electricity off to be able to get the milk?
Pause time and run across the electricity to grab the milk
Well, but what if the gas is in its original place? It’s impossible to move it to the spot next to the boxes …
One of the boys by the camp fire wanted a burnt marshmallow, and none of them required me to wear the Jack O’ costume. I was however wearing the scout outfit, so they may have accepted any dlc outfit.
There is also a fishing mini game at the docks and you fought crab people
You can get selfies with the Crab People after you beat them.
aaaand you can fish up a shark that gets you a relic.
Omg i found the safe code… it is in nathans room… Pull the step ladder towards the note that is taped up… climb the ladder.. boom theres the code…
Thanks a ton. I will add the location to the guide.
Also to get the bag behind the table with the fish tank to power the safe. there is a wig. Do the same for the chest in the cave. freeze time destroy both legs.
Post when you find the code location 😡 i checked everywhere in camp… it may be back in town idk..
Also found out how to get the chest in the cave. Freeze time and blow up both at the same time. Code not in there just a wig :/
The code is Jimmy loves drugs from guessing alot but then cartman tom bradys us. so i guess we have to find it somewhere idk where…
I tried including everything I could find so far in this guide. There is still a few things missing I hope the readers can help me out with filling in:
Nathan’s safe code
Chest in old mines in middle of river
Drop a comment if you know anything and I will add it.
Hope it helped. Best of luck to everyone 😀
Thanks a ton for the tips!