Radobaan Guide: How to Hunt, Defeat, and Craft Gear
After spending some time in the Coral Highlands, you’ll be given the option to explore the Rotten Vale, home to dangerous monsters, including the rolling brute wyvern, Radobaan. Covered in sharp bones that serve as both armor and offensive tools, Radobaan can be a challenging fight. To track it, look for Strange Ruts and Tarred Bones scattered across the map. Use the tips in this guide to bring down this mighty beast.
Radobaan Information

- Difficulty: Expert (4⭐)
- Location: Rotten Vale
- Size: Large
- Species: Brute Wyvern
- Weaknesses: Dragon (3⭐), Ice (2⭐)
- Weak Points (Severable/Breakable): Tail, Head (weak point), Back, Legs (weak point)
- Hunting Quest Text: “The bones covering Radobaan’s body are gonna be tough to get through, but if we want to continue our survey of the Rotten Vale, you’ll need to find a way!”
Radobaan Characteristics
Radobaan is a massive Brute Wyvern that feeds on the bones of fallen creatures in Rotten Vale, using some as natural armor. It can also roll into a ball, using its sheer size and momentum to attack or travel quickly across the map.
Useful Tip: To damage Radobaan, you’ll need to break its bone armor or knock it over to attack its vulnerable underside.
Materials and Rewards
Low Rank Carves & Rewards:
- Radobaan Scale (5⭐)
- Radobaan Shell (4⭐)
- Radobaan Oilshell (4⭐)
- Radobaan Marrow (3⭐)
- Sleep Sac (3⭐)
- Monster Bone (L) (3⭐)
High Rank Carves & Rewards:
- Scale+ (5⭐)
- Carapace (4⭐)
- Oilshell (4⭐)
- Medulla (3⭐)
- Wyvern Gem (⭐)
Radobaan Fight Guide
Main Fight Mechanic: Bone Armor, Sleep Gas, and Roars
- Bone Armor:
- Radobaan’s tough exterior is covered in bone armor that acts as both a defensive and offensive tool.
- You need to either knock Radobaan over to expose its underside or break the bone armor.
- If you let the fight go on too long, Radobaan may return to its den to reapply armor, which can extend the fight unnecessarily.
- Sleep Gas:
- Radobaan releases a sleep-inducing gas. Once affected, you’ll need to either be hit by a friendly player, hit by Radobaan, or wait until the sleep effect wears off.
- Keep an eye on the “ZZZ” icon above your health bar to avoid becoming too vulnerable.
- Roar:
- Radobaan’s roar stuns players briefly, disrupting any ongoing attacks. Keep your distance to avoid being caught mid-action.
Radobaan’s Attacks:
- Roll (Vertical/Horizontal): Radobaan can roll in both directions, shedding some of its bone armor along the way. This can deal significant damage if you follow too closely.
- Slam: Radobaan rears up on its back legs and slams its upper body into the ground.
- Tailwhip: This can be triggered in front or behind Radobaan, causing it to spin 180°.
- Jump: A rare move where Radobaan leaps to close the gap between you and itself.
- Head Attacks: Radobaan uses its head to attack, both vertically and horizontally.
Battle Tips
- Eat Up: Always eat a meal from the Canteen before the fight to boost your stats.
- Avoid Sleep: Keep your distance when Radobaan releases its sleep gas to avoid being put to sleep.
- Stagger Radobaan When Rolling: Radobaan can be staggered during its rolling attack, throwing it off balance.
- Break the Bone Armor: Focus on breaking the bone armor to deal significant damage to its vulnerable points.
- Keep Radobaan Away from Its Den: Radobaan will return to its den to reapply bone armor, so try to prevent it from getting there.
- Exploit Elemental Weakness: If farming for materials, Radobaan is weak to Dragon-elemental weapons. While you may not have access to these early on, it’s useful to remember for later.
Pro Tip: If you need assistance, send out an SOS and get help from the Monster Hunter World community.
Armor Set: Baan Set (Rarity 3)
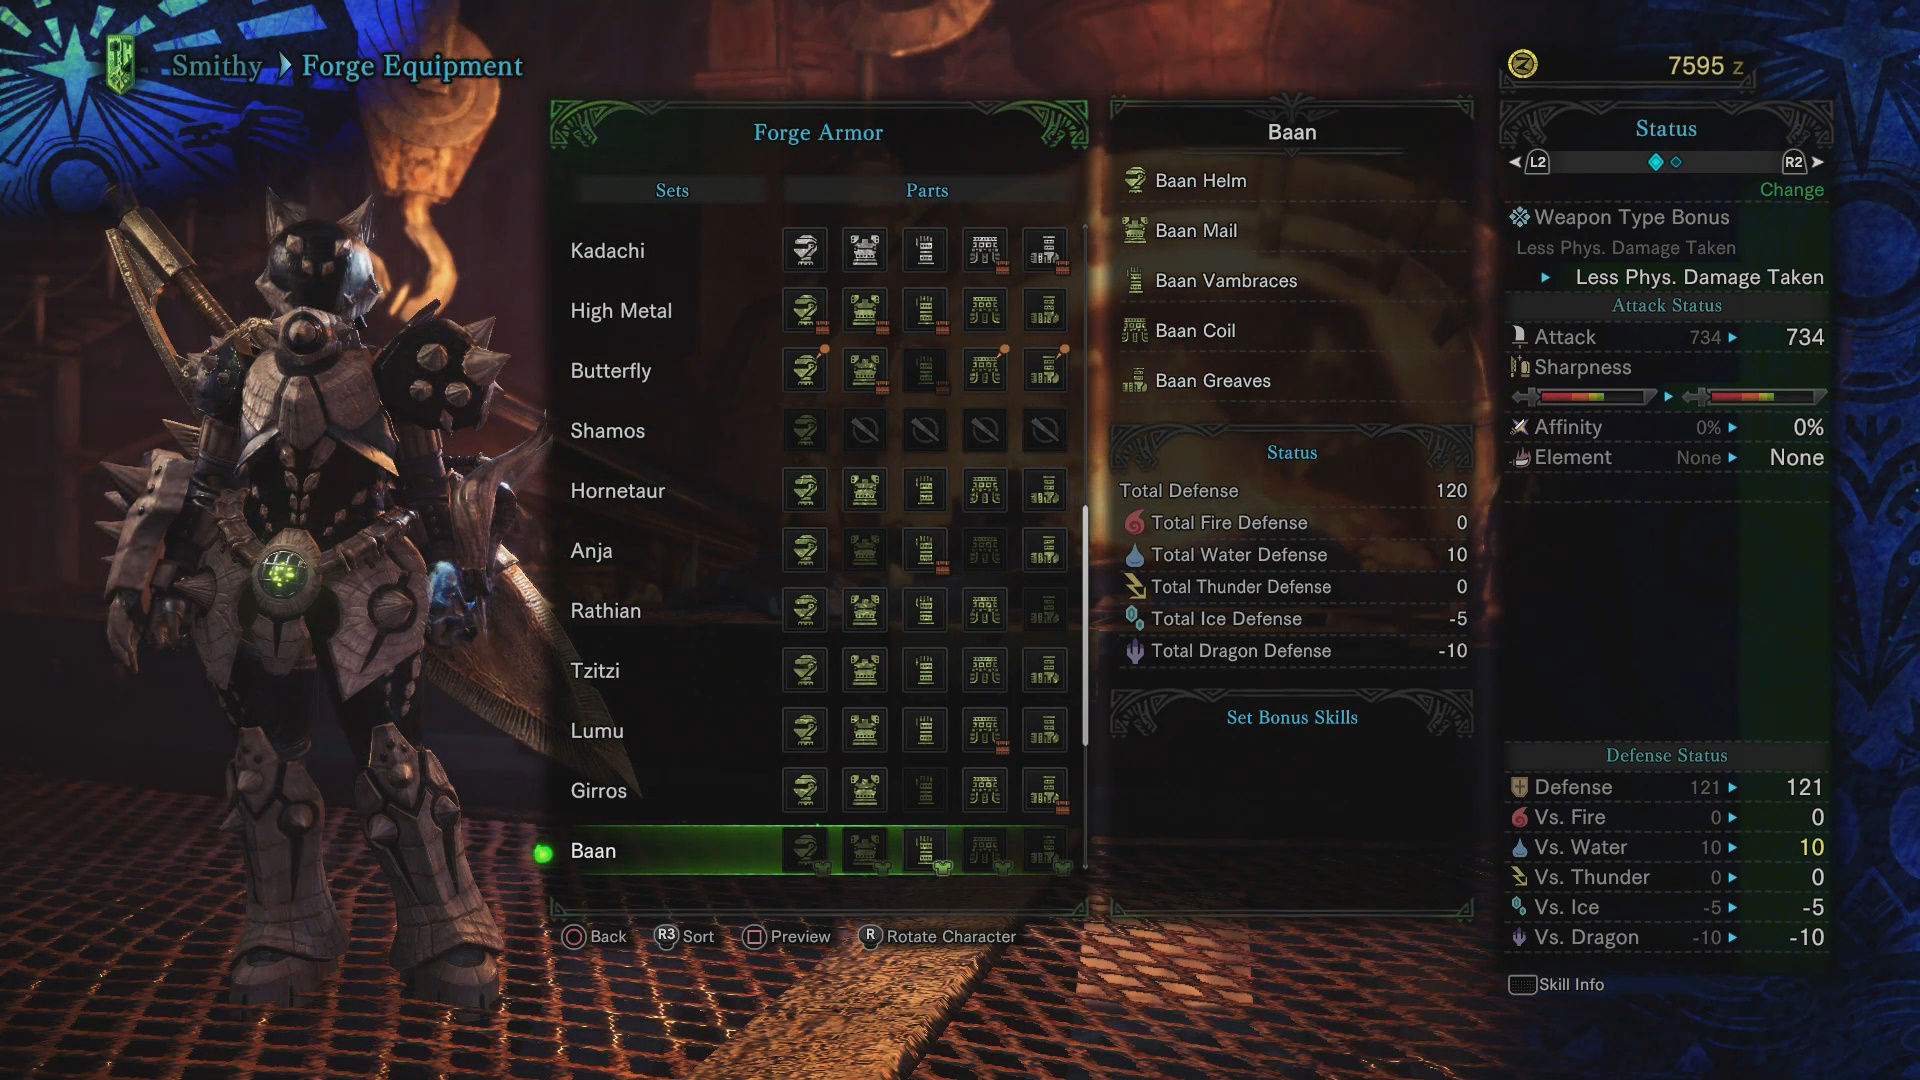

- Set Requirements:
- Helm: 3x Shell, 2x Oilshell, 2x Wyvern Bonemass, 1x Radobaan Marrow
- Mail: 2x Scale, 1x Shell, 1x Oilshell, 1x Sleep Sac
- Vambraces: 2x Scale, 1x Shell, 1x Oilshell, 3x Sturdy Bone
- Coil: 2x Scale, 1x Oilshell, 1x Sleep Sac, 3x Monster Bone L
- Greaves: 2x Shell, 2x Scale, 2x Wyvern Bonemass, 2x Warped Bone
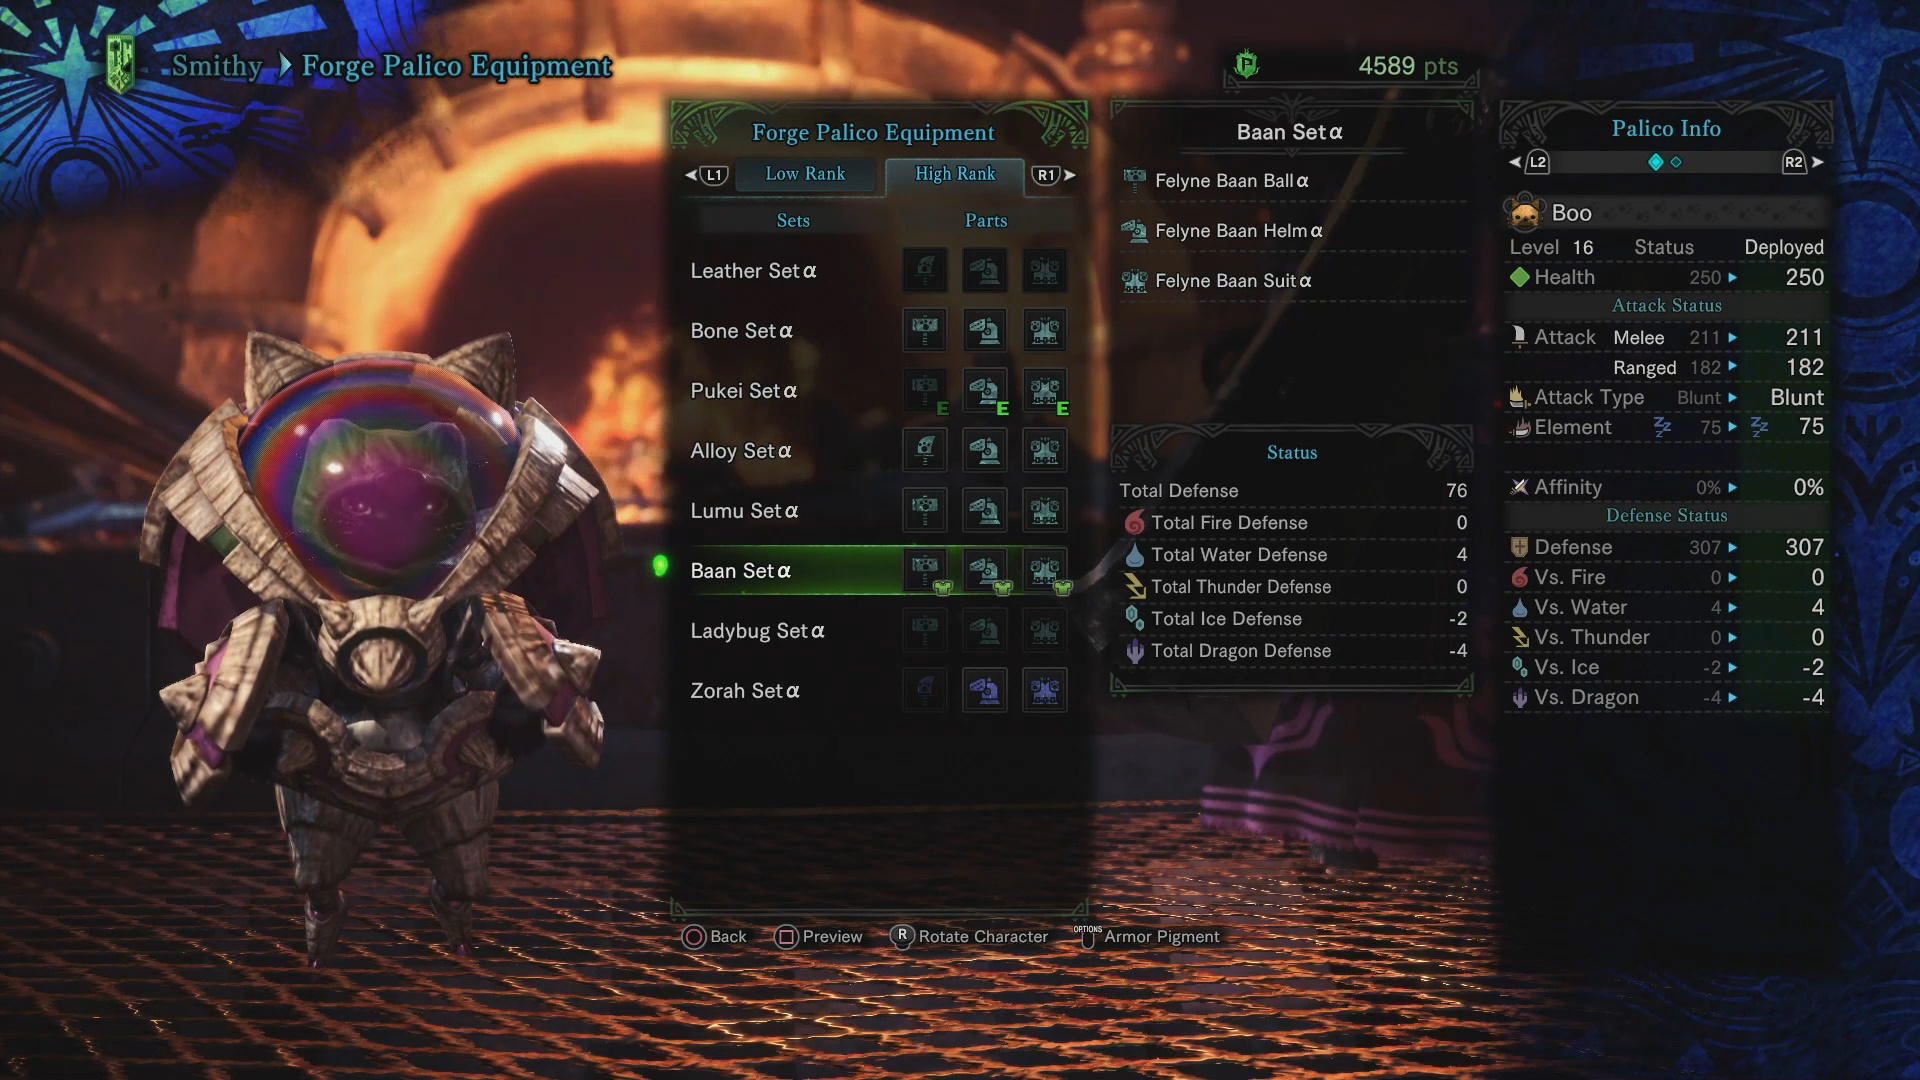
- Palico Armor:
- Ball: 1x Wyvern Bonemass
- Helm: 1x Oilshell
- Suit: 1x Scale
Armor Set: Baan α + β Sets (Rarity 6)


- Set Requirements:
- Helm: 6x Carapace, 4x Scale+, 1x Medulla, 1x Wyvern Gem
- Mail: 4x Scale+, 3x Carapace, 2x Coma Sac, 6x Quality Bone
- Vambraces: 4x Scale+, 3x Carapace, 2x Oilshell, 8x Sturdy Bone
- Coil: 4x Scale+, 3x Carapace, 2x Coma Sac, 5x Wyvern Bonemass
- Greaves: 4x Carapace, 4x Scale+, 2x Oilshell, 5x Wyvern Bonemass
Palico Armor:
- Ball: 1x Carapace, 1x Wyvern Bonemass
- Helm: 1x Scale+, 1x Oilshell
- Suit: 1x Scale+
Now that you’ve taken down Radobaan, it’s time to face even more challenges. Check out our Great Girros guide for tips on battling this venomous menace and advancing your hunt!
Thoughts on our Radobaan guide? Drop them in the comments below.