Poppy Playtime Chapter 2 Fly in a Web Full Guide
In Poppy Playtime Chapter 2: Fly in a Web, you’ll explore a new section of the Playtime Co. factory and face new puzzles, mini-games, and creepy encounters. This chapter picks up where Chapter 1: A Tight Squeeze left off, and features a new antagonist, Mommy Long Legs. In this guide, we’ll walk you through the essential steps to complete the chapter, find hidden collectibles, and solve key puzzles.
Chapter 2 Key Notes
- Collectibles: 9 Statues, 6 VHS Tapes.
- Death Mechanics: Collectibles still count even if you die after collecting them.
- Playtime: Approximate playtime is between 2-5 hours, depending on skill level.
How to Start Chapter 2: Fly in a Web
When you begin Chapter 2, you’ll need to select it manually from the main screen. Here’s how:
- Launch the game and choose “Select A Chapter.”
- Select Chapter 2: Fly in a Web to begin.
Getting Started – First Steps
Once you enter Chapter 2, you’ll watch a cutscene that transitions into the Poppy’s case room, a familiar setting from the end of Chapter 1. Follow these steps:
- Exit the case room and walk back down the hallway to the room with dollhouses.
- On the right side of the room, you’ll find a wardrobe near a white door. Open the door to enter a new section of the factory.
Get the Key to Elliot Ludwig’s Office


- Follow the hallway and you’ll reach a junction where you can go straight into Elliot Ludwig’s office, or turn left or right. For now, go right.
- Continue forward to a gap with a pipe overhead. Use the grapple feature to swing across the gap.


- Move forward until you reach a room blocked by barrels. Move them aside to access the storage closet. In the closet, you’ll find the key to Elliot Ludwig’s office.
- Head back to the red door near the start and use the key to enter Elliot Ludwig’s office.
Inside Elliot Ludwig’s Office – Meeting Poppy

- Once inside, grab the Daisy statue from the desk. You’ll also find a Black VHS Tape. Insert the tape into the machine for some lore about the factory.
- Behind the desk, you’ll notice a vent cover with handprints on it. Remove the vent cover and crawl through to find a mechanical room.
- Poppy will speak to you in this room and reveal an electrical plug. Use your blue hand to connect the plug to the posts, then shoot your other hand at the second outlet to complete the circuit.
Poppy Gets Grabbed – Chase Begins
- Head back through the vent, through Elliot Ludwig’s office, and out into the hallway. The gate, outside the office, that was previously powered off is now on, so use both hands to open it.
- Swing across another gap and continue forward through the white door. In this new area, you’ll see Poppy standing near a large hole. As you approach her, she’ll be grabbed by a long arm.
- Jump into the hole after her to continue your adventure.
Restoring Power to the Game Station
At the bottom of the hole, you’ll enter a new part of the factory with three doors. One is marked “Power” and that’s where you need to go.
- Solve the puzzle in the power room to restore power to the Game Station. We’ve provided the above video tutorial to help you through the puzzle.
Entering the Game Station – Mommy Long Legs
Once the power is restored, leave the power room and head towards the Game Station.
- Activate the switch on the door to enter the Game Station. This is where you’ll meet Mommy Long Legs, the main antagonist of Chapter 2.
- Mommy Long Legs will take your Red Hand, leaving you with only the Blue Hand to use.
- Pull the lever inside the Game Station to open the door, and enter the main area where you’ll find several mini-games and a large train—your ticket out of the chapter.
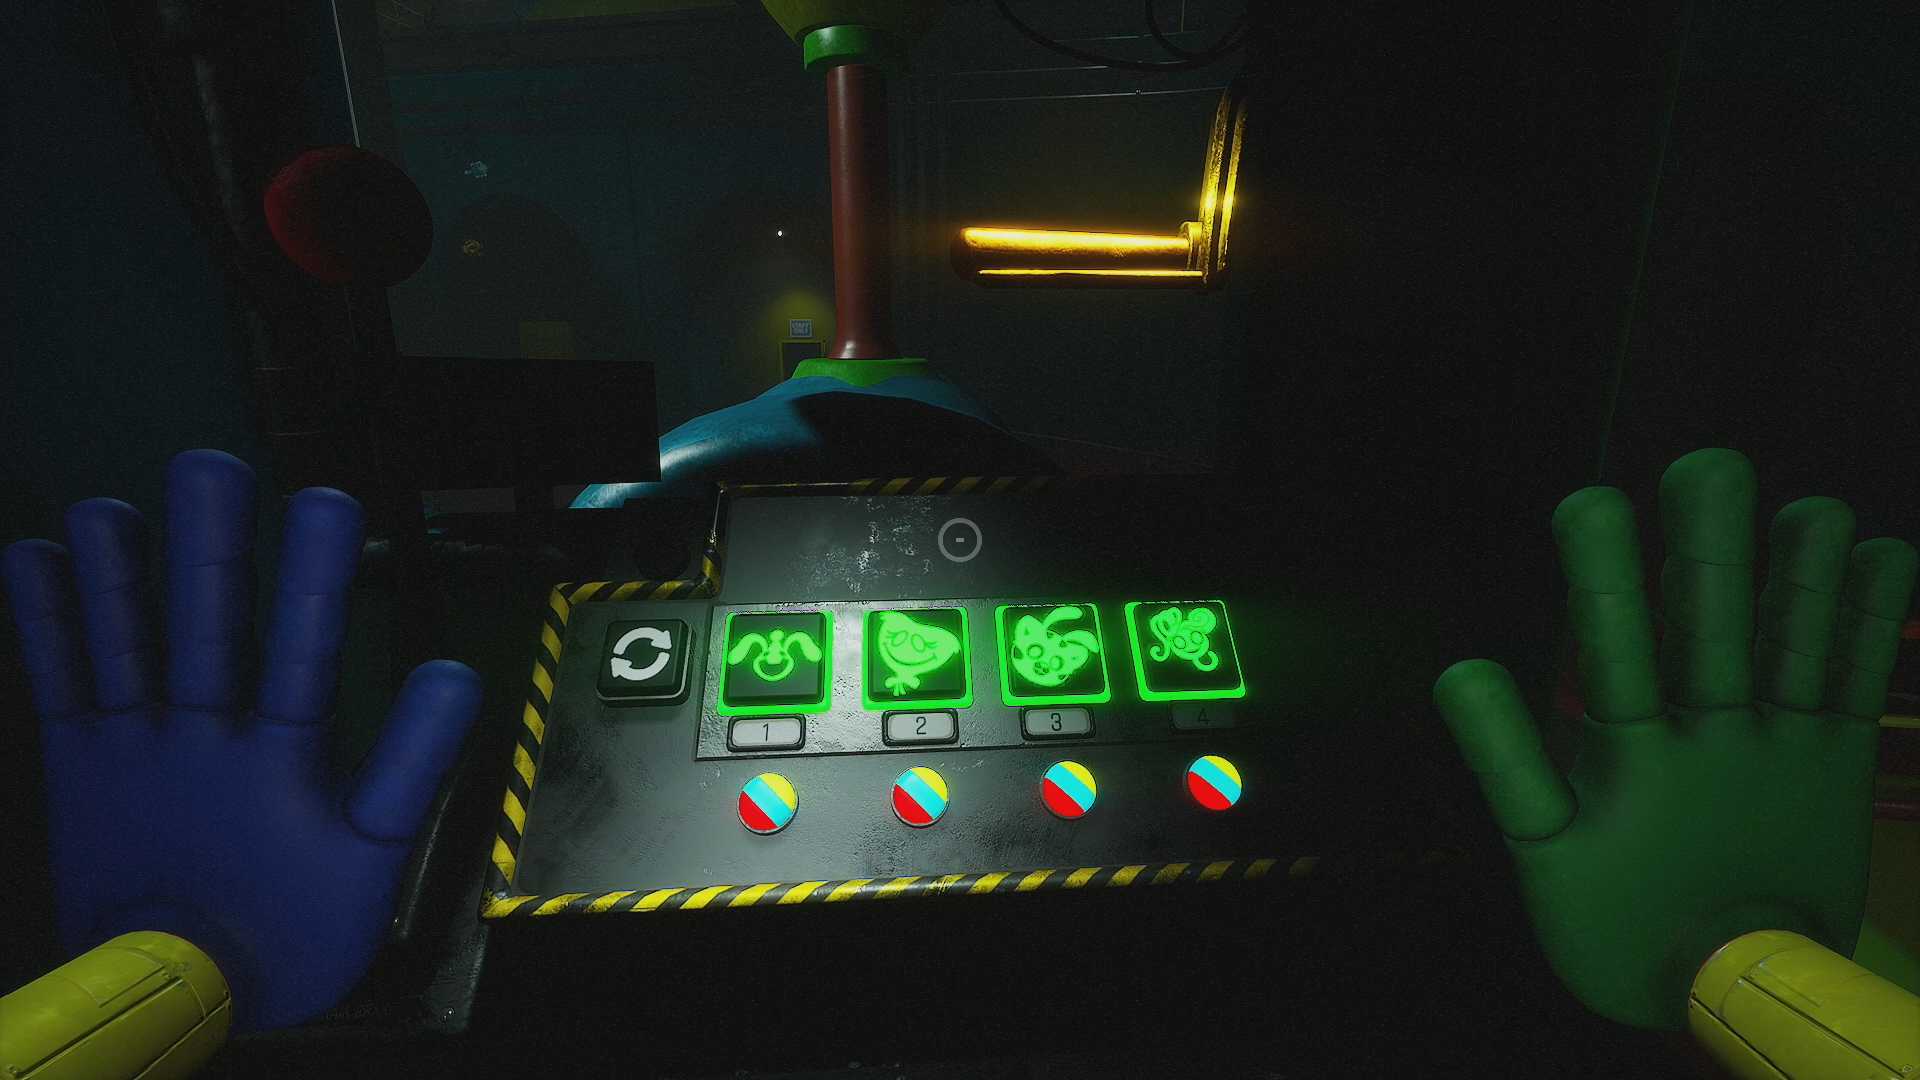
Musical Memory
1. Making the Green Hand and Going to Musical Memory
- On the left playground near the train, grab the Train statue from the yellow slide.
- Pull the lever on the train platform to open the Musical Memory area.
- Once inside, you’ll encounter the Molding Room, where you need to craft the Green Hand.
- Follow the steps in the video above to make the Green Hand.
- The Green Hand let’s you store electric charges in it.
- Before advancing you can grab the Green VHS Tape (2) which is sitting next to the first red button we pressed. The Green Hand (3) statue is on top of the large square hand machine.
- Use the Green Hand to open the conveyor door to reach the Musical Memory room.
2. Complete the Musical Memory Game
- Musical Memory is a memory game, similar to Simon Says, where you need to repeat button sequences shown by colored lights. Be careful—failing too many times results in being caught by Bunzo Bunny.
- Once you complete the game, you’ll receive Train Clue 1: Playtime Co. Train Access Instructions, which will help you unlock the train.
Return to the Game Station

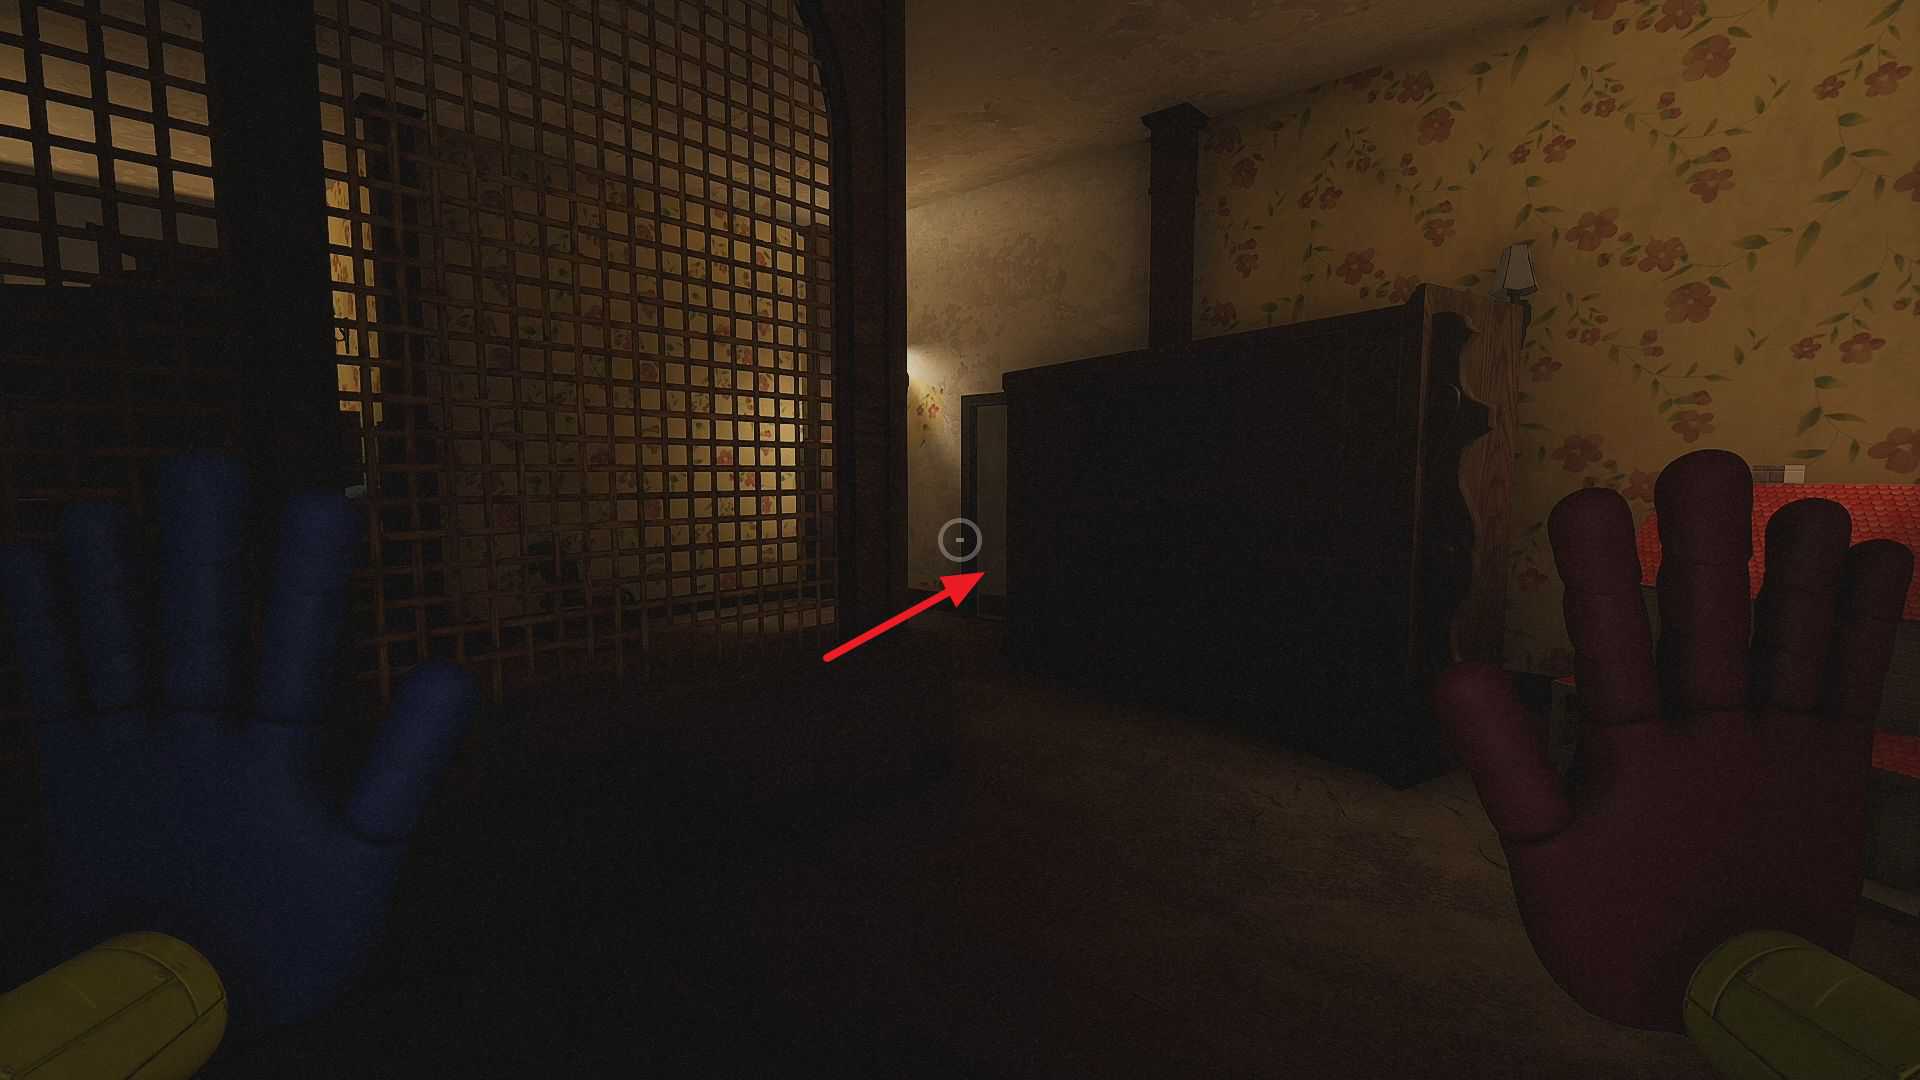
After you solve the clue, a platform will appear that allows you to cross over to the door. However, just as you’re about to make it across, the platform falls, and you tumble to the ground.
Now, you’ll need to find your way back to the Game Station hub. To do this, look for the vent in the room (as shown in the picture above). Open the vent, crawl through, and you’ll enter a new room filled with toys. In this room, you’ll need to solve a puzzle to move forward.
Stock Room Puzzle Solution
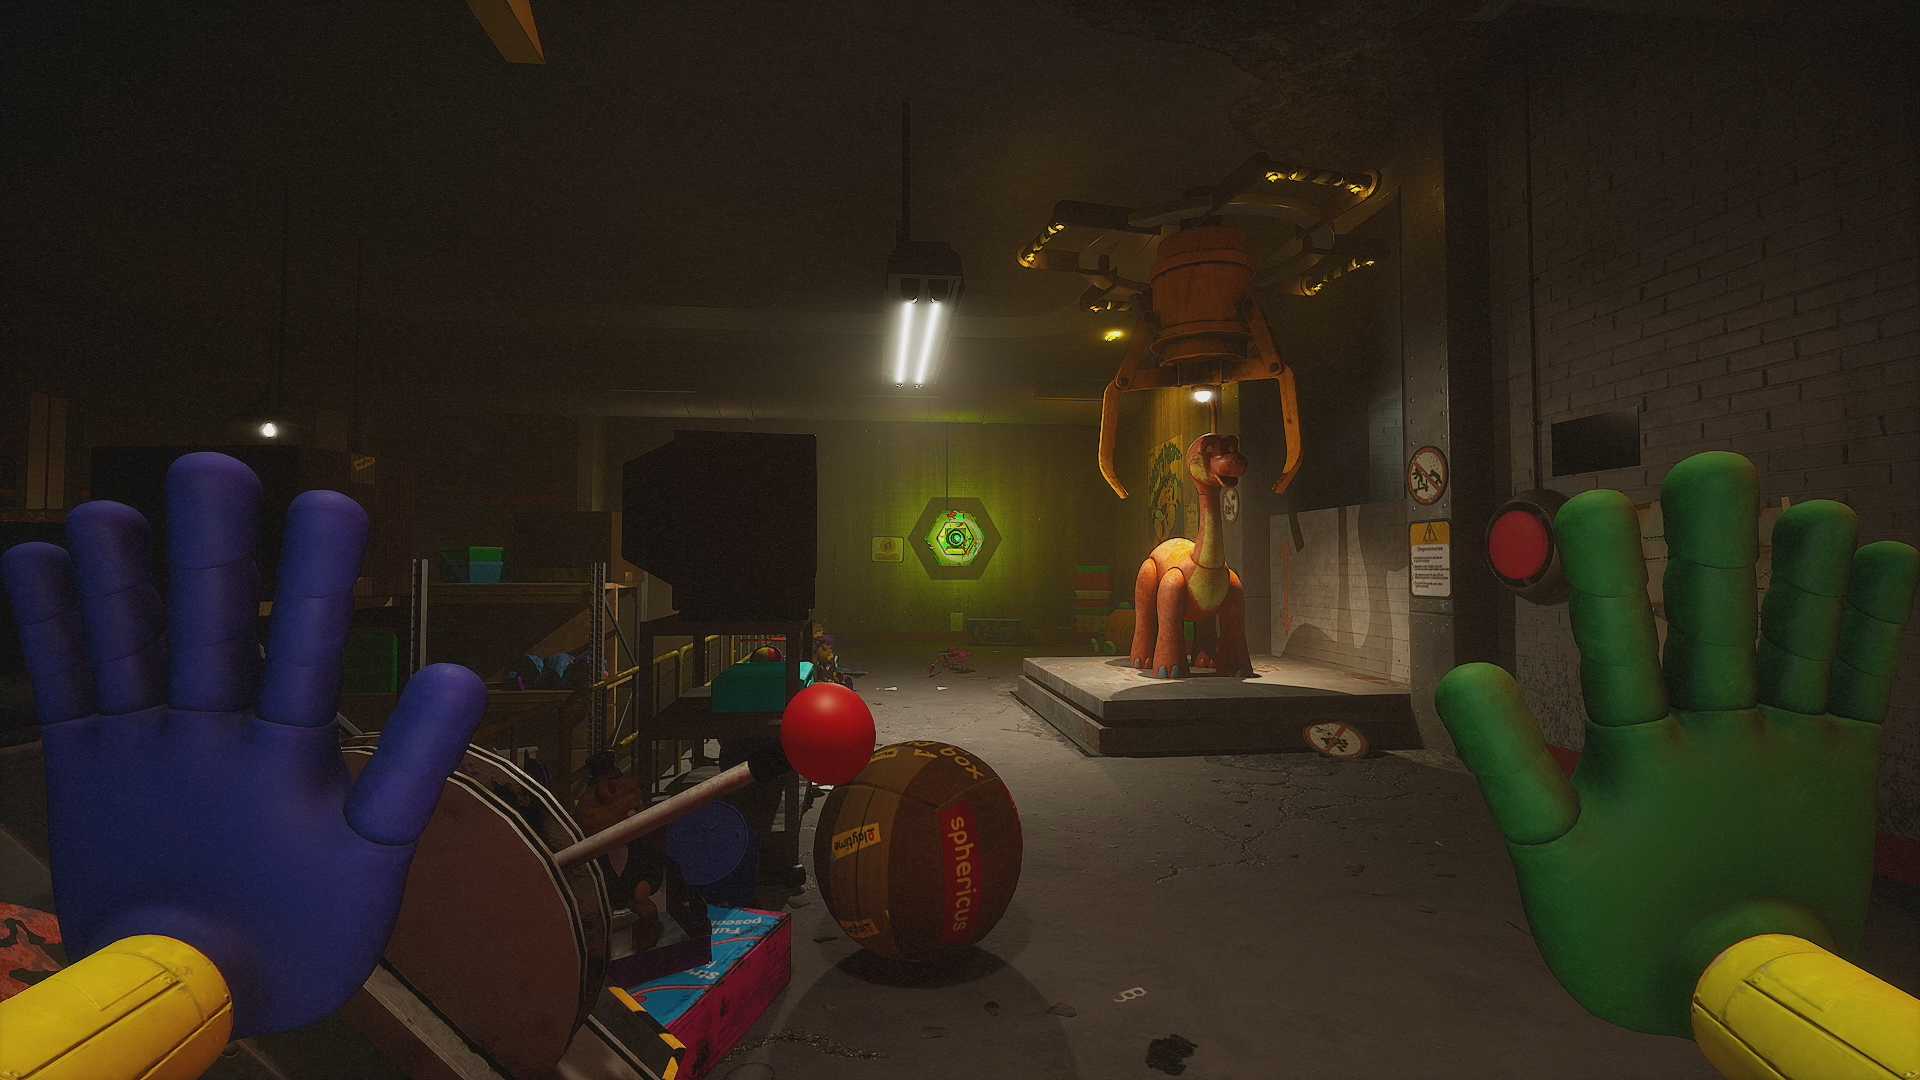
In the stock room, head to the far side of the room where you’ll find a large toy sitting on a scale. The scale won’t rise until the toy is removed. To move the toy, you’ll need to use the crane hanging from the ceiling. First, power up the crane by using the nearby lever. Then, move the crane along the tracks above (if you want to, you can use the crane on the Bunzo statue in Aisle C5). Position the crane directly over the toy on the scale.
Once the crane is in place, charge your Green Hand and use it to lower the crane. Move the toy off the scale and then stand on the scale yourself. When you press the red button, the scale will raise you up to the ledge above.
Before you leave, make sure to grab the Cyan VHS Tape from the ladder in Aisle C1, leaning against the wall.
Raising Platform Power Puzzle
Continue down the hallway until you reach a power puzzle. Once you’re there, plug into the first outlet and walk around the first pole. Next, stand on the platform that rises, and when you reach the top, step off. Unplug from the outlet, crouch, and then plug into the outlet again. Wrap around the pole on the ledge with you, then step off the ledge and back down. Next, wrap around the pole that controls the platform and plug into the second outlet to complete the circuit. Stand on the raised platform and press the red button to go up.
Follow the path forward and climb the stairs. At the top, you’ll find a door blocked by a chair. Move the chair out of the way to open the door. Then, head back to the Game Station hub area.
Go to Wack-A-Wuggy and Complete its Mini-Game
Go back to the train platform where we pulled the lever to open the door to Musical Memory. Pull the middle lever that is now active. This opens the door to the Wach-A-Woogy area. The first part of this area immediately puts you into a mini-game called Wack-A-Wuggy.
The Wack-A-Wuggy mini-game is straightforward and follows the same concept as the classic carnival game, Wack-A-Mole. Huggy Wuggys will crawl out of pipes in the walls, and your goal is to hit them with your hands before they reach you. Once you complete this challenge, Mommy Long Legs will give you Train Code 2: Color Sequence.
If you’re struggling with the mini-game, try increasing your brightness or adjusting your mouse DPI for easier targeting.
After receiving the code from Mommy Long Legs, the vent she handed it through will open. Crawl through the vent into the background area. Continue forward until you reach a room with a broken stairway. Climb the stairs, then look up. You’ll see a pole on the ceiling that you can hook onto. Use this to grapple to the top. From there, descend the broken stairs to reach the Kissy Missy statue.
Complete the Cart Corridors

Walk forward until you reach some tracks. Follow the tracks and turn left to reach a gate. Stand at the gate until Kissy Missy appears. This toy will open the gate for you and then will disappear. Continue heading forward.
The next sequence is fairly simple. All you are doing is moving a cart along the track. To do this simply use your Green Hand to charge the different ports so you can move further down the hallways along the tracks. As you progress you will encounter levers to pull. These open gates along the track. Keep pulling levers, opening gates, and moving the cart. About halfway you will encounter the Blue VHS Tape out in the open.
Bring the cart to the end of the track and push it down to make a path through the boards. Walk down the tracks and turn right at the bottom. Go through the door and drop down through the hole in the floor there. Head back to the Game Station hub.
Go to Statues
Return to the platform where you pulled the previous two levers and pull the final lever. This will cause a handle to appear on the door leading to the “Statues” area. Use both hands to pull the handle to the right, which will open the door and reveal a set of stairs. Go down the stairs to enter the Statues area.
Power Puzzle
To proceed, you’ll need to solve a power puzzle. Enter the room at the end of the hallway. Inside, grapple up to the ledge on the left side and use your Blue Hand to hook onto the point. Once attached, drop down and walk around the poles. Next, grab a charge with your Green Hand. Use the Green Hand to shoot the switch on the wall, which will change the active grapple point to the right. Grapple up to the new point and hook in to complete the circuit. Now, return to the hallway and enter the newly opened door.
Stop and Go
The next room houses a mini-game like stop and go. This mini-game tasks you with making your way across the room while the lights are dark. If you move when the lights are on you will get eaten. As you go through the room about mid-way there is a slide selection. Go through the Hard Slide to get the PJ-Pugapillar. At the end of the course hook up to the window to smash through it into the control.
In the control room there is a hole in the floor. Drop down through this hole. Walk forward and swing across the gap to the other side. Continue forward on the other side and look up at the end of the hallway. Grapple to the floor above. Walk forward through the next section and grapple up again. Walk forward again and look for a vent on your left. Crawl inside the vent and go through it. Go forward and grapple up again. Follow the path forward up the stairs to reach the Water Treatment plant.
Water Treatment Part 1 (Going to Room C2)
Walk forward to the platform and press the “rotate button” to turn it 90 degrees. Repeat this three times to create a path leading to the room on your left. Once the path is clear, descend to the red platform and face forward to grab the Green Tape on the ledge next to the Game Station doors. Afterward, continue forward into the room labeled C2.
Room C2: Get a Bunzo Bunny
In room C2 of the Water Treatment center there is an elevator you can rid. This elevator is controlled by two levers: one going up and one going down. To complete this room you need to make the Bunzo Bunny toy reach the top of the room so you can get one. To do this follow these steps:
- Push first red button so conveyor goes to the left.
- Use lever to go up stop about halfway.
- Push blue button so conveyor goes left.
- Push yellow button so conveyor goes left.
- Use lever to go up to the top.
- Push first red button so conveyor goes left.
- Push second red button when Bunzo Bunny is on the last conveyor belt so it comes to you.
Once you have the Bunzo Bunny raise the elevator up as high as it can go. Look for a conveyor belt with the Barry statue on it. Grab it then head back to the bottom of the room. Return to the Water Treatment controls.
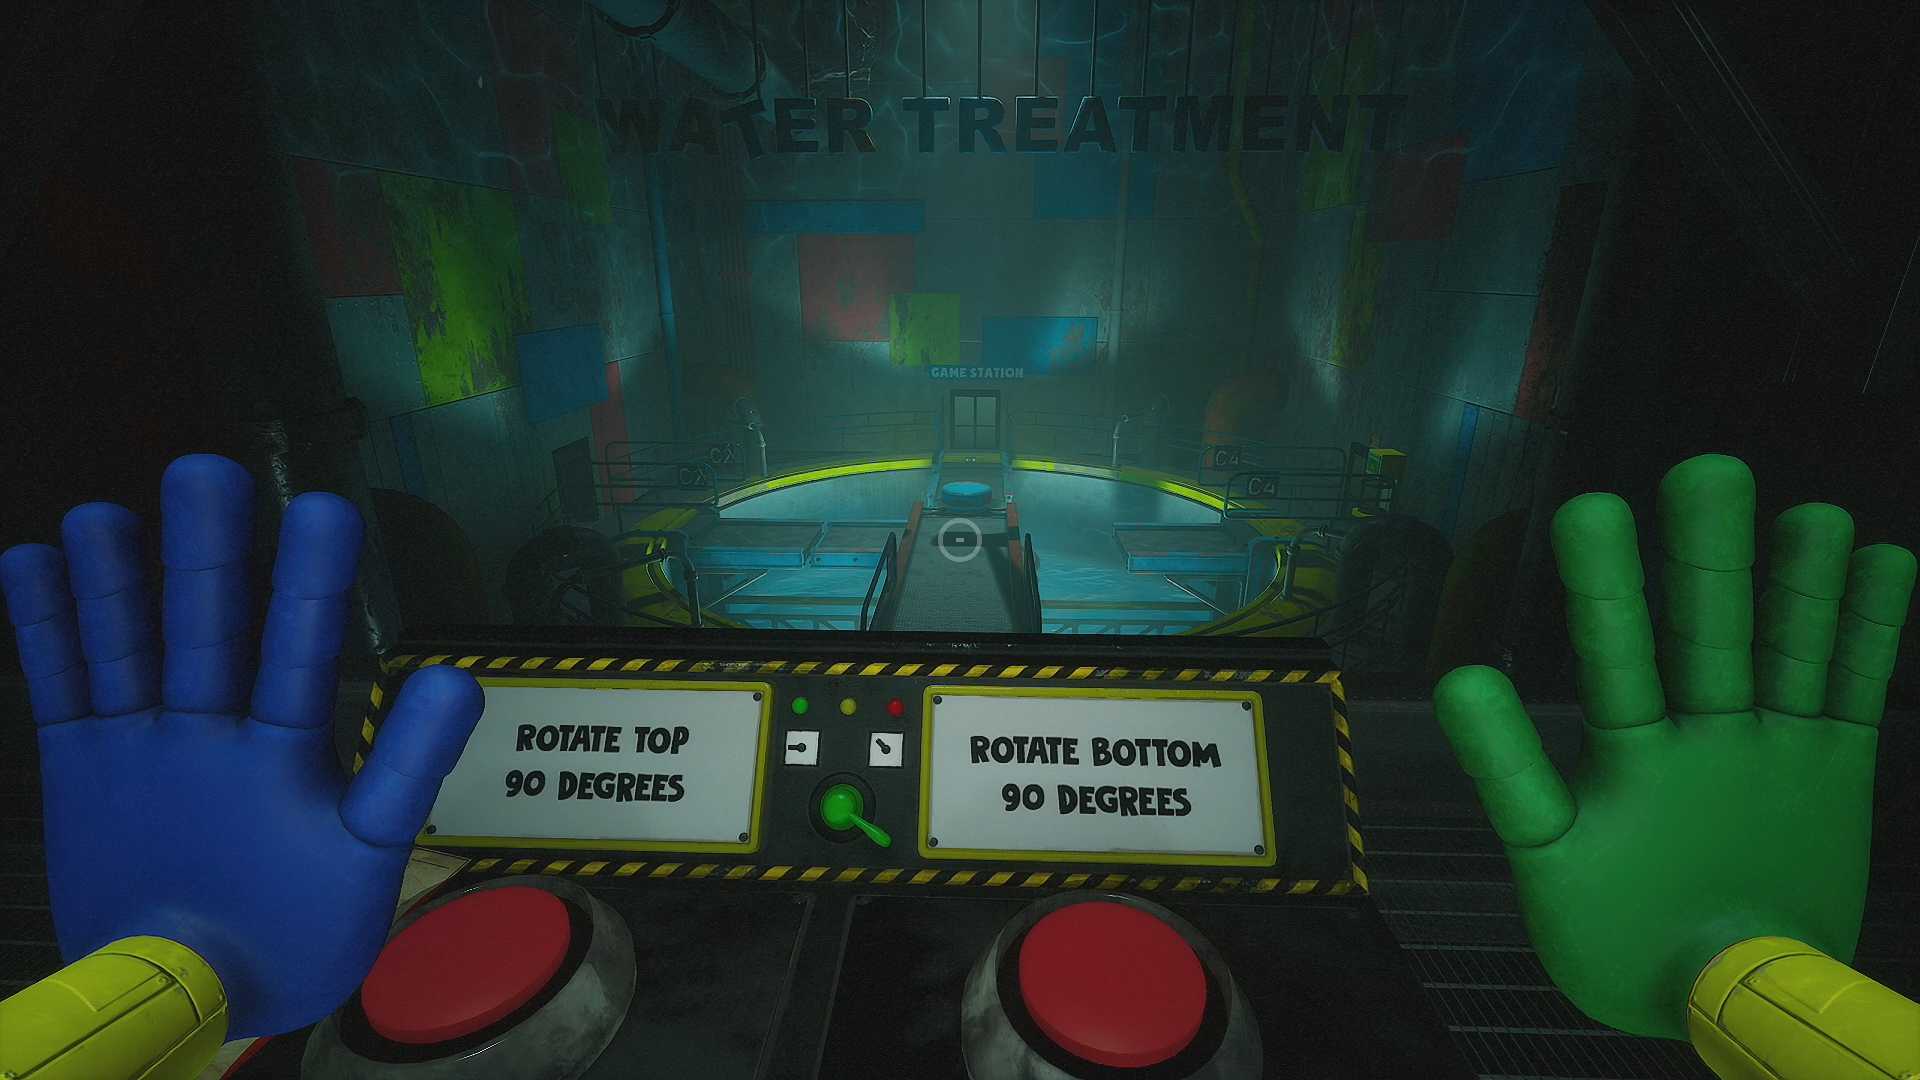
Water Treatment Part 2 (Room C4)

Once you’re back at the controls, you need to rotate the platforms to access the other side of the Water Treatment plant, where Room C4 is located. Follow these steps to align the platforms correctly:
- Rotate the top platform 90 degrees.
- Rotate the bottom platform 90 degrees twice.
- Rotate the top platform 90 degrees twice.
After setting the platforms as shown in the screenshot above, head down the path leading to Room C4. Once you arrive, place the Bunzo Bunny into the Toy Scanner to unlock the entrance to Room C4.
Room C4: Power Puzzle
Enter Room C4 and walk forward until you reach a dead end. On your left, you’ll find a vent in the wall—enter it. Ignore the first right turn and keep following the vent until you reach a room with a large hole in the center. Swing across the hole to the other side, where you’ll find a power puzzle waiting for you.
Start by connecting to the electrical outlet. Wrap around the two poles, then look for the Green Hand outlet. Release the hand to drop the guard, allowing you to plug in the Green Hand. Grab the Pink VHS Tape from inside, then charge the Green Hand and swing back across the gap. Trigger the green outlet, then run through the newly opened door into the next room. Afterward, head back through the other door that opened to return to the room with the poles. Wrap around the poles again, look through the open door, and complete the circuit.
Once the circuit is complete, head back through the vent. As you approach the door you just opened, you’ll fall into the room below. Walk forward toward the end of the hallway, where there’s a hole in the ceiling. As you near it, Mommy Long Legs will drop down through the hole. Turn and run away to avoid her attack.
Mommy Long Legs Chase #1
Run through the door behind you when it opens. Head down the stairs and follow the linear path ahead. Don’t worry too much; Mommy Long Legs doesn’t actively chase you here. If you get stuck along the way, look for holes in the walls and a red conveyor belt. Use the red handle to turn it on. As you ride the conveyor belt, keep an eye out for the Mommy Long Legs statue across the gap at the end. Drop down the hole to continue.
Basement
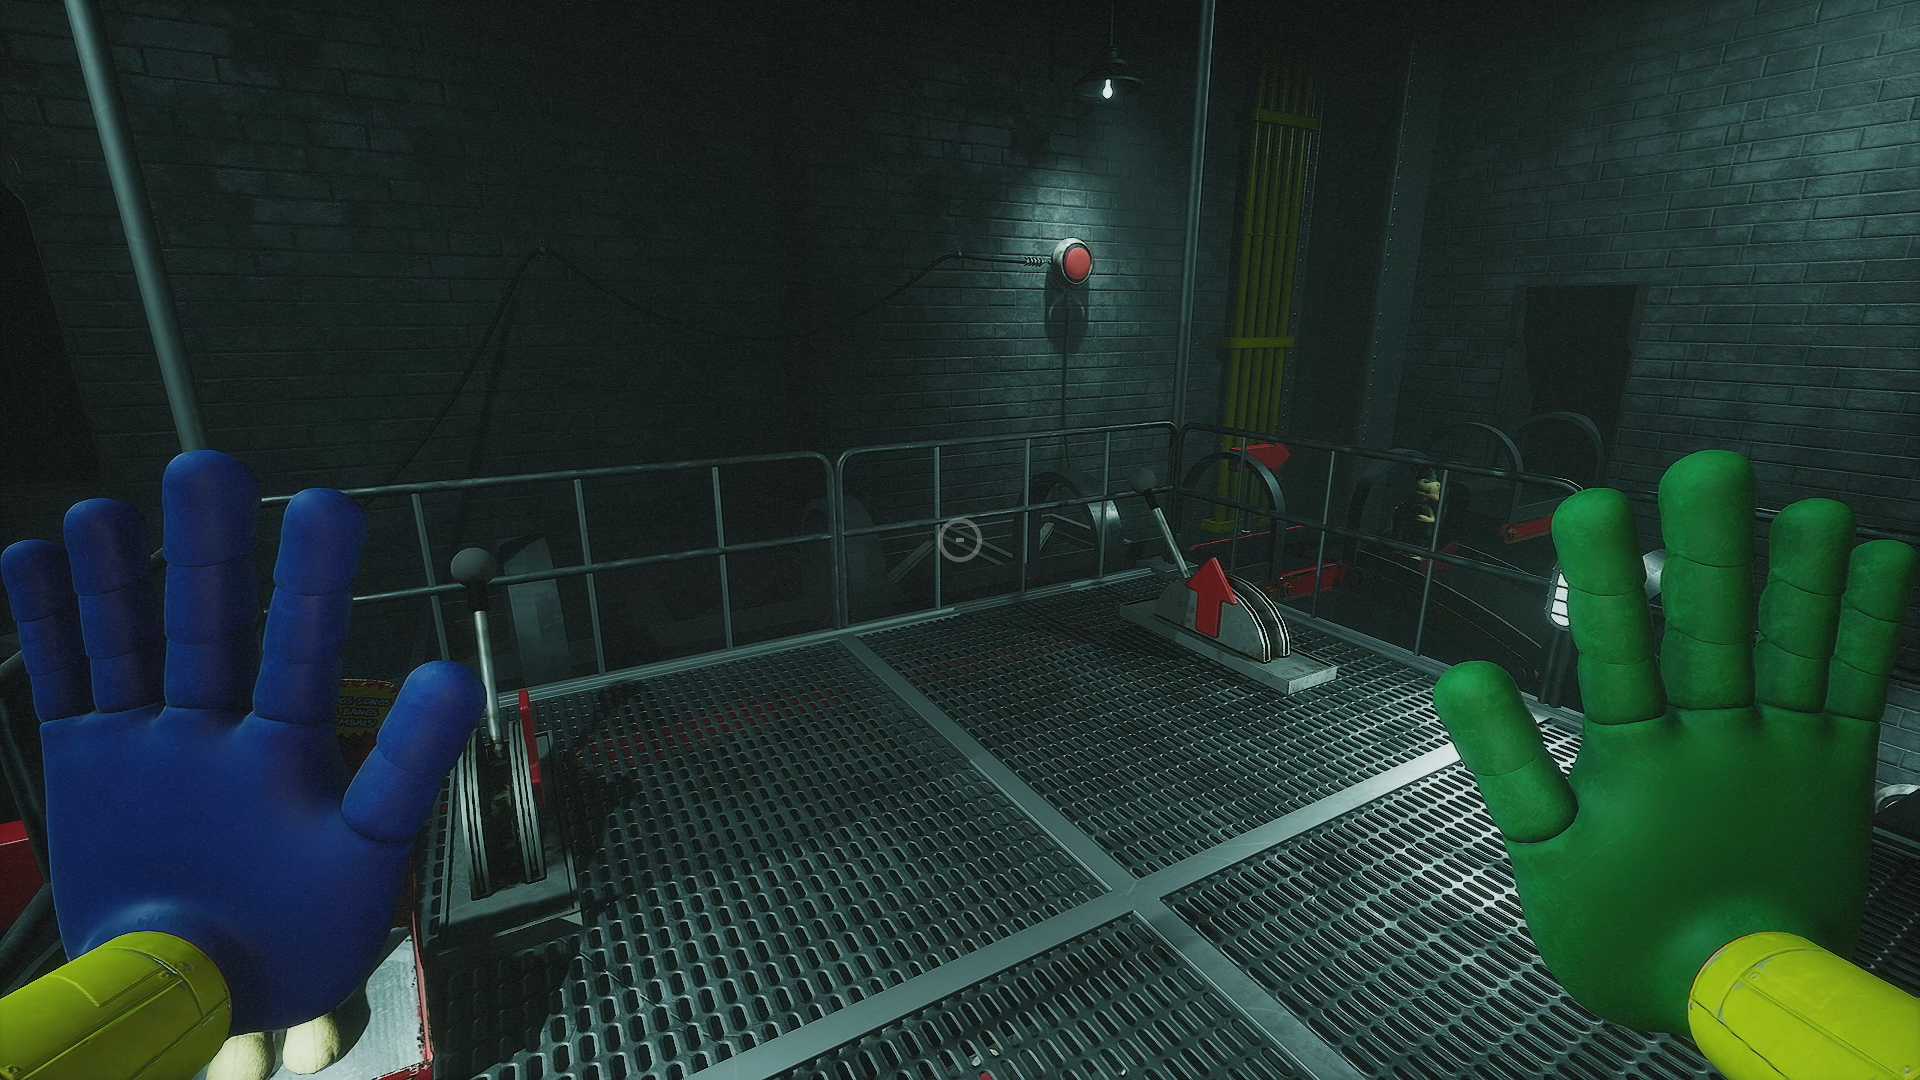
You’ll find yourself in a super dark basement. There’s a large door ahead that you’ll need to open, but before you do that, turn around and head the other way. Go down the hallway and pass through both brown doors. This will bring you to Bay 2.
Bay 2 Puzzle

In Bay 2, you’ll see four colored switches—two on each wall. To open the gate, you need to pull the switches in the correct order. To figure out the order, head to the middle of the room and look up for a hole in the ceiling. Grapple up into this hole (you’ll need to remember this spot for later). While you’re up there, you’ll see four battery packs, each labeled with a number for its corresponding color. The correct order is:
- Red
- Blue
- Green
- Yellow
Once you’ve noted the order, pull the levers in that sequence. Then, head down the hallway. Mommy Long Legs will appear. Quickly run back to Bay 2 and climb back up into the ceiling hole. Stay there until she passes. Once she’s gone, return to the hallway where she chased you out and continue forward until you reach the next room with a large furnace.
Missing Cog and Furnace Room
In this room, you need to create a new cog to open the door. First, grab the mold from the shelf. Then, head up the stairs and place the mold inside the furnace. Go back downstairs and charge your Green Hand. Start the furnace, then open the furnace doors when it’s heated, and grab the cog once it’s forged. Place the cog into the door mechanism and pull the lever to open the door.
Walk through the newly opened doors and onto the walkway. As you proceed, Mommy Long Legs will appear. Quickly run back to the forge. Charge your Green Hand again and use it to ignite the furnace while running inside of it. The flames will shoot up, creating a barrier between you and Mommy Long Legs. Once she’s gone, continue walking across the walkway until you see a lever on your left. Pull it, and Mommy Long Legs will reappear, triggering the final chase.
Mommy Long Legs Chase #2
The final chase is much more intense than the previous one. In this chase, Mommy Long Legs will actively follow you, similar to how Huggy Wuggy chased you in Chapter 1. Follow the path as shown in the video to reach the end. Once you get to the end, pull the lever next to the machine to turn it on. This will activate the machine, pulling in Mommy Long Legs and ultimately killing her. Once she’s taken care of, you’re safe.
Getting the Final Train Code

Follow the linear path forward from the shredder room, and you’ll eventually end up above the Game Station. Enter the building and speak to Poppy. She’ll give you the Train Code 3: Order Sequence. If you’re looking for the final statue collectible, look across from the building into the rafters. You’ll spot the Claw statue there.
Start the Train and Beat the Chapter
Now, all that’s left is to start the train. To do this, make your way along the rafters to the left of the building. Slide down to reach the platform where the train is parked. Use the Green Hand to open the train door, then input the Train Code clues to start the train.
Once you’ve entered the correct code, you can move the train. Pull the train accelerator on the upper right side of the windshield to get it going. The train will begin moving, and Poppy will speak to you. As the ride nears its end, you’ll be prompted to pull the brakes. If you don’t, the train will continue to ride indefinitely. Pull the brakes with your hands to trigger a cutscene and the game’s end credits.
Now that you’ve completed Chapter 2 and watched the end credits roll, you’re ready for the next chapter in the Poppy Playtime saga! In Chapter 3, new challenges await as you dive deeper into the mysteries of the Playtime Co. factory. The stakes are higher, and the puzzles even more devious. Make sure to check out our full Poppy Playtime Chapter 3 guide for detailed tips, tricks, and strategies to help you navigate this thrilling continuation of the story. The adventure doesn’t stop here—stay tuned for more!
What do you think of the “Poppy Playtime Chapter 2: Fly in a Web” guide? Let me know your thoughts in the comments below!
My most favourite game, Thank for sharing this hold to rest team.
Guy8i8ez
😤😡😠🤬
Truly one of the best games to play it is. The most amazing feature is the leg’s stretch throughout the game.
The personality of Mommy Long Legs unfolds throughout the game. At the start of Poppy Playtime chapter 2, we see her as a warm and welcoming personality who lures the player to participate fully in the game. However, we see a different version of mommy as the player proceeds further in the game.
Mommy Long Legs Chase #2 i cant climb fast my son and i have tried about 30 times 2 restarts incase of bug