Poppy Playtime Chapter 3 Deep Sleep Guide
Following the ending of Poppy Playtime Chapter 2: Fly in a Web, the player ends up crashing the train on the way to the Playcare. Chapter 3 starts following the train crash and tasks with making your way through the depths of the factory to continue your journey. To make your journey easier, and see everything there is, use our Poppy Playtime Chapter 3 Deep Sleep guide below.
Chapter 3 Contains (see Links for Guides)
How to Start Chapter 3: Deep Sleep
To start Poppy Playtime Chapter 3: Deep Sleep, select Poppy Playtime on your PC/Console. Open it and you will see a chapter select screen. Select Chapter 3 to be taken to the chapter’s main menu. Pick New Game to start playing the chapter.
Escape the Trash Compactor
At the start of Chapter 3, CatNap drags you to a trash chute and drops you down it. Once you take control you will notice the walls are closing in on you. You are in the Trash Compactor and must escape it!
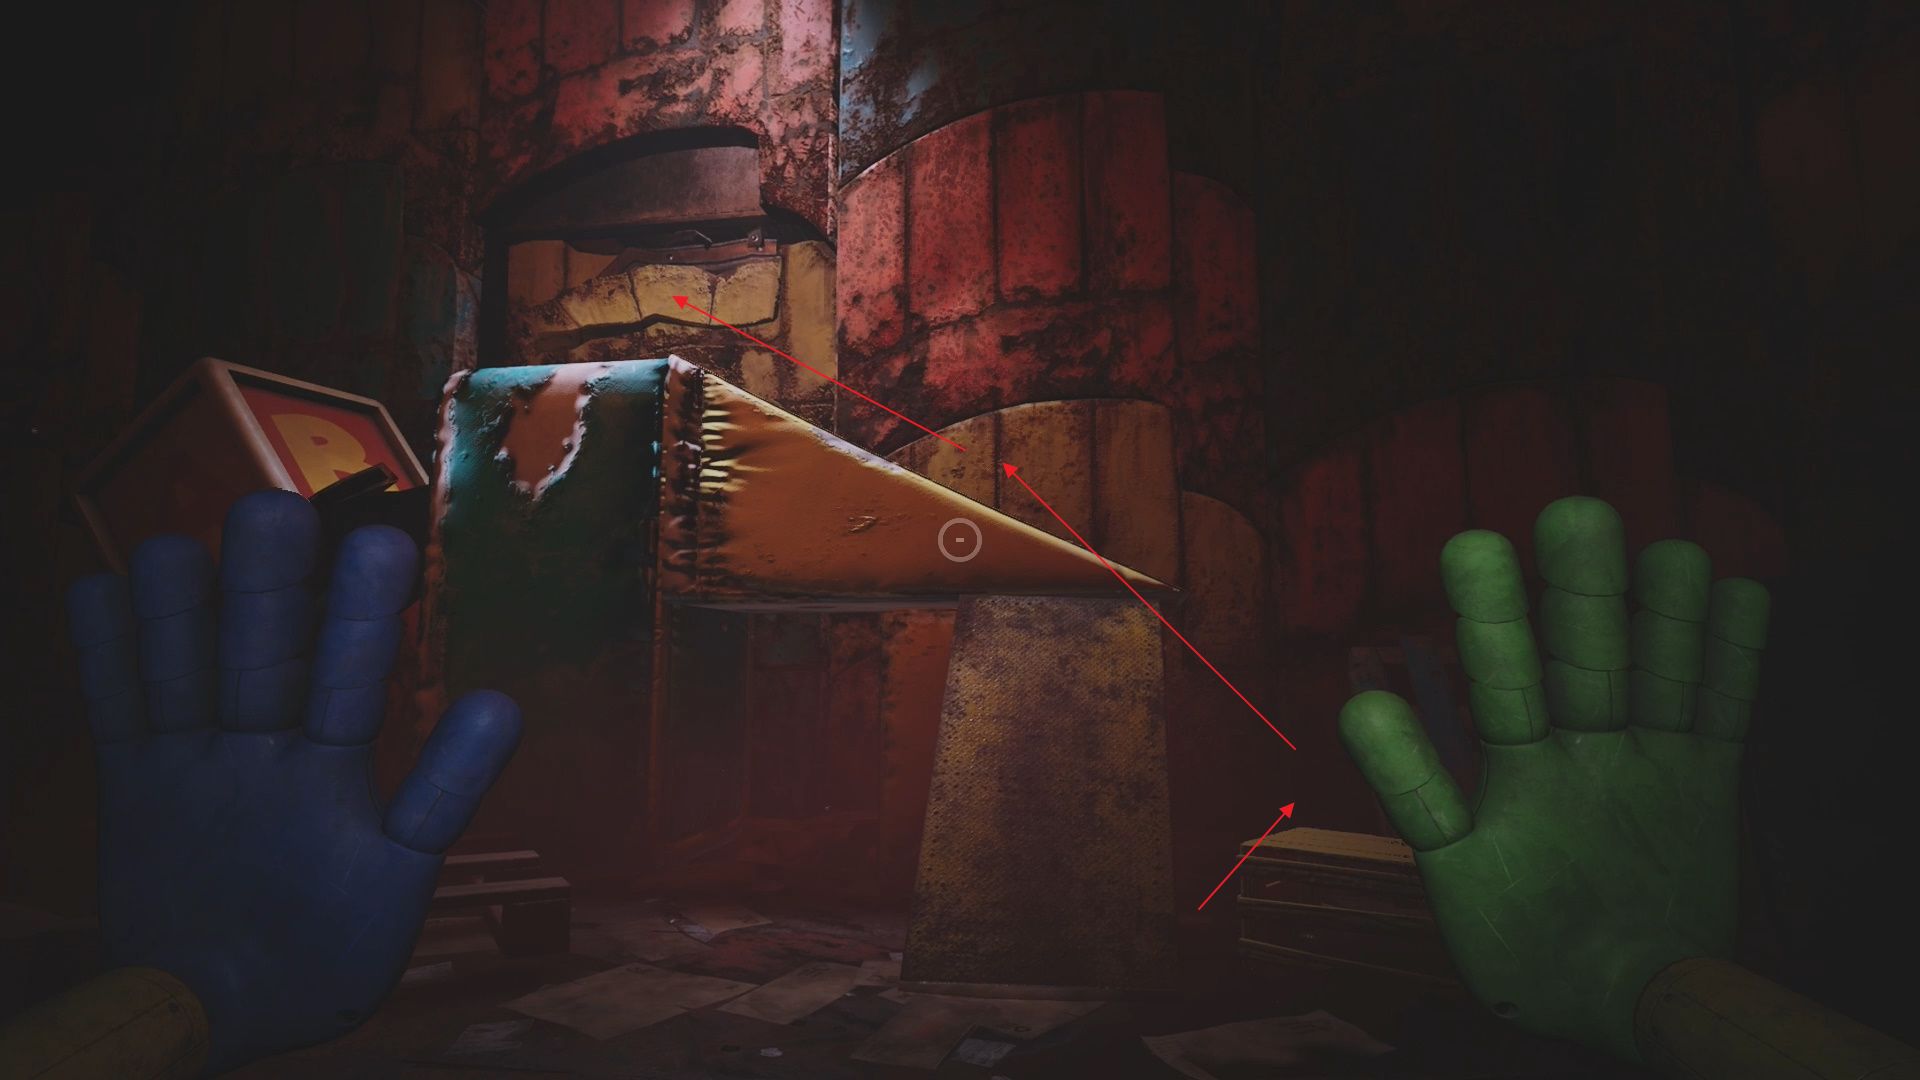
To get out of the Trash Compactor, look along the wall to your left. Here you will see some pallets and other trash setup to make a bit of a ramp. Go up this ramp and go through the hole in the wall that is left by the hydraulic.
Drop down below the hydraulic and walk straight forward until you reach a wall that has a ladder on it. Look up and use the GrabPack to hook to the ceiling and pull yourself up. Go through door into the next section with more hydraulics.
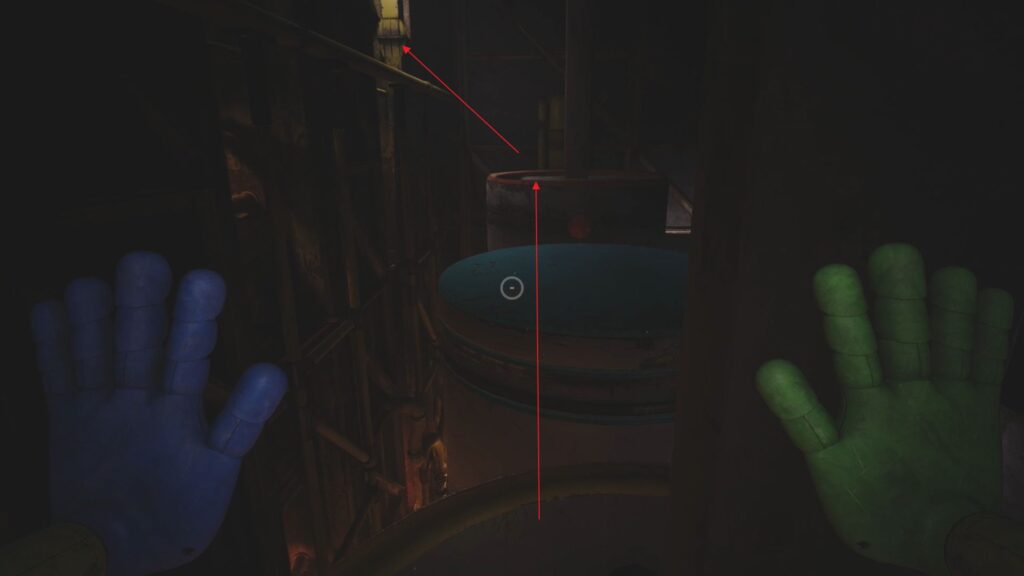
In the next room you will find hydraulic platforms that move up and down. Jump along them (when it is safe) to reach the hole in the wall to the top left. Go through the hole into the next room and then go through the red door. Go forward until you reach a new platforming section with gas and red platforms.
Red Gas Room
In this room you will find red hydraulic platforms that rise and fall into the gas. Wait for the first section to rise and jump across them to reach the catwalk in the middle of the room. Wait for the next set to rise and do the same to reach the other side.
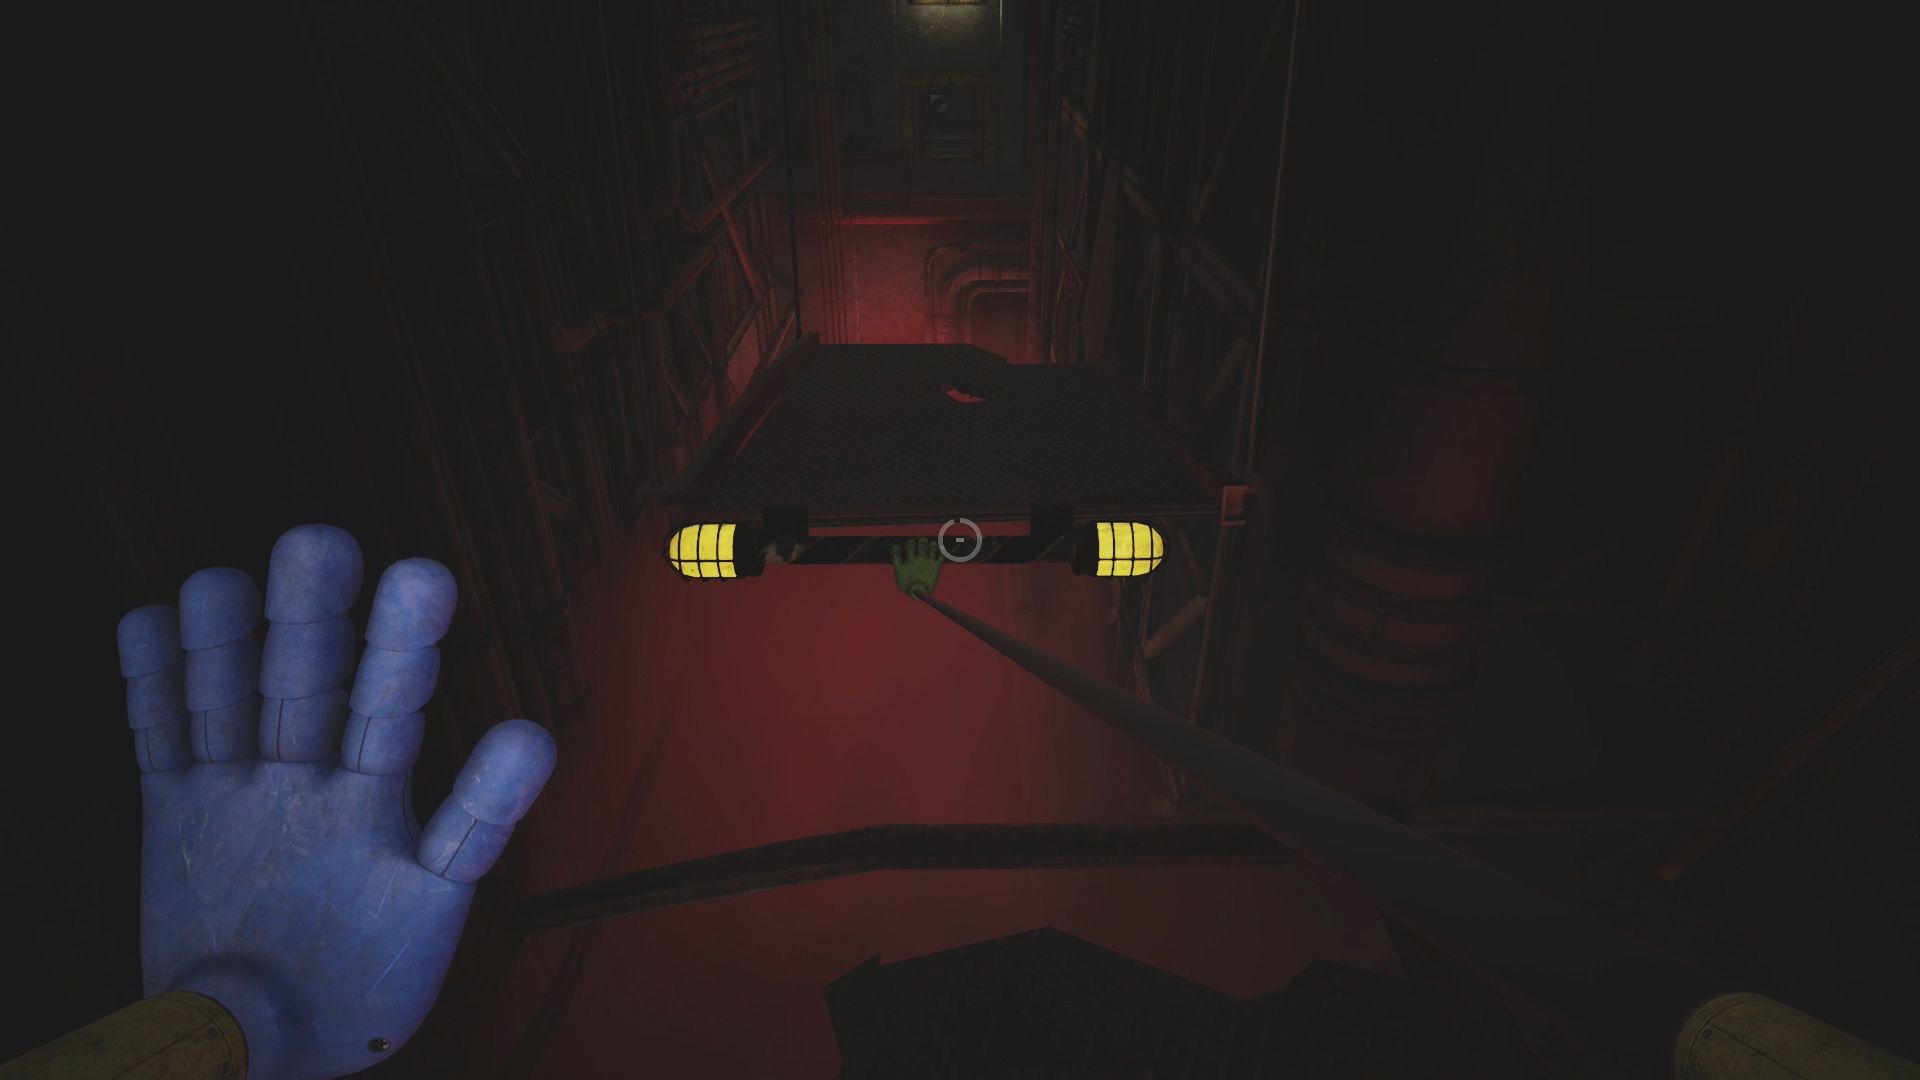
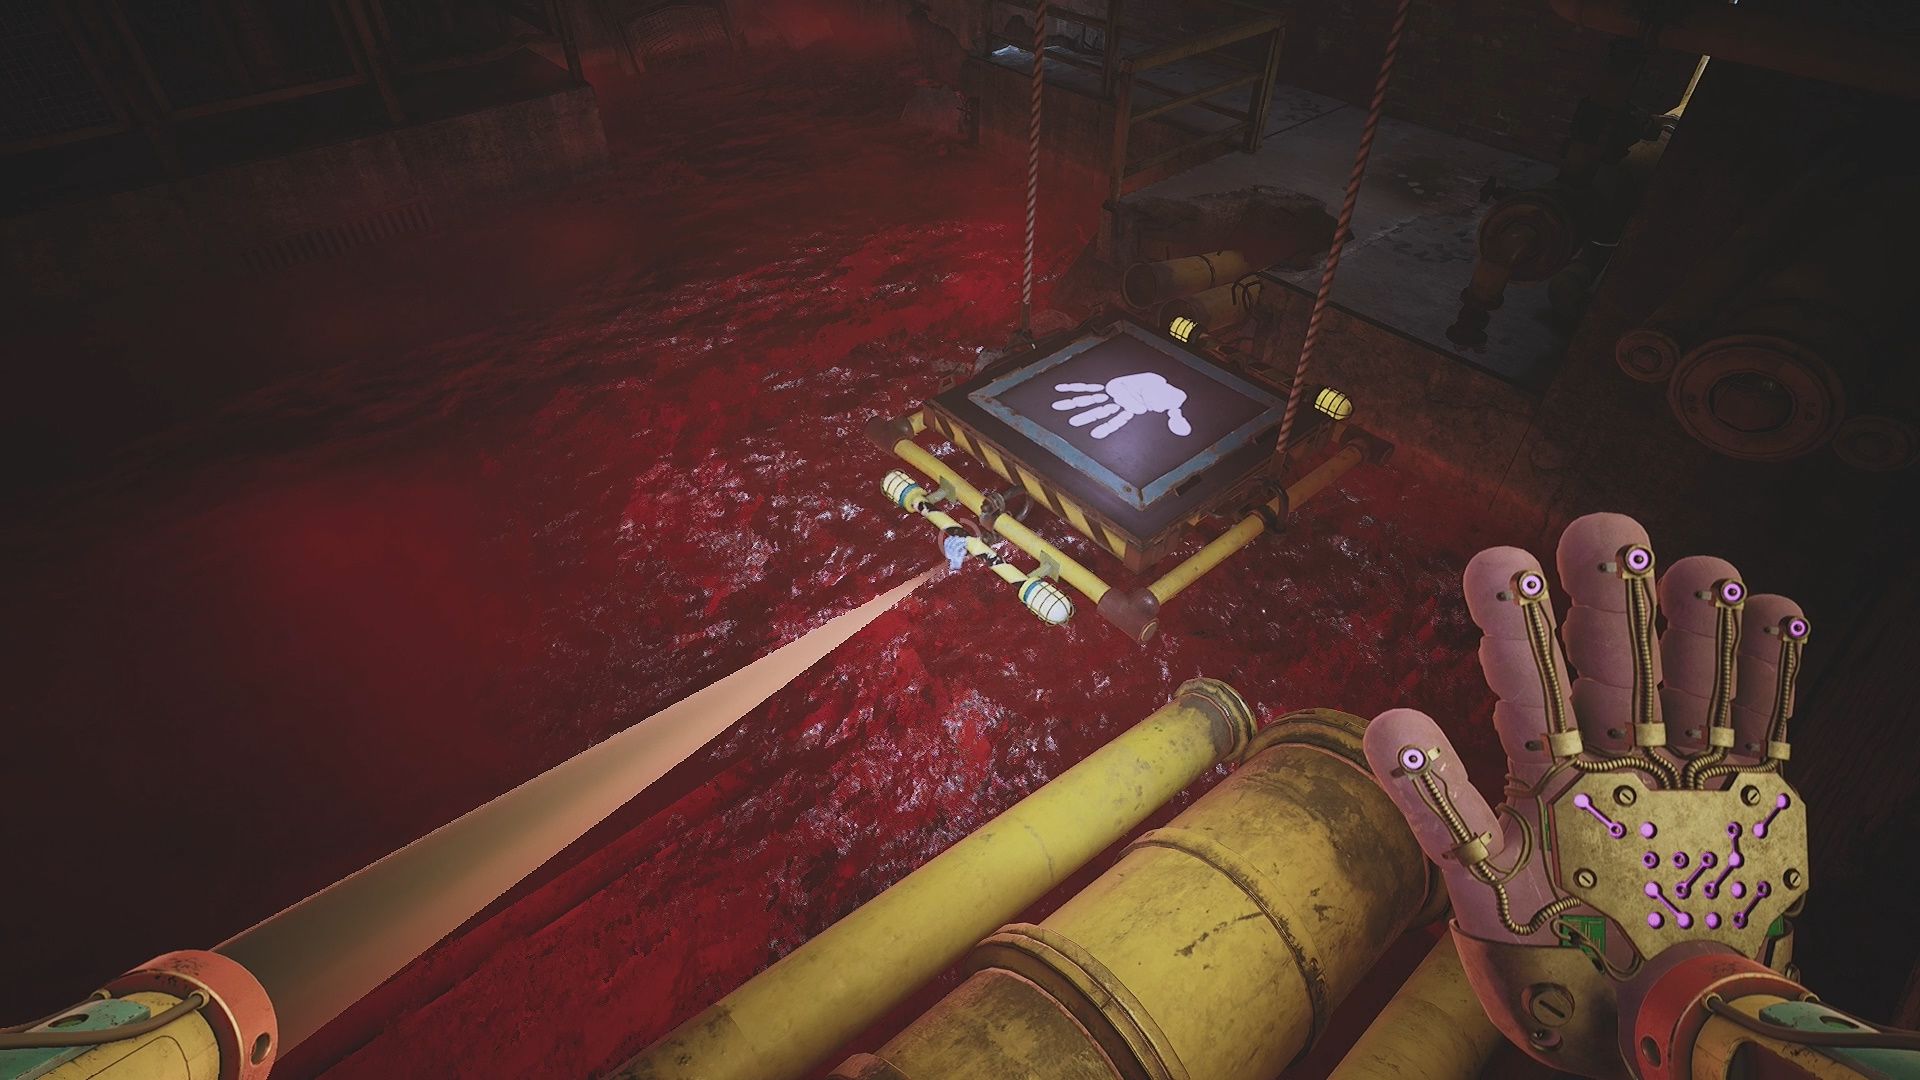
Walk forward. You will see CatNap and a platform on the other side of the gap. Use the GrabPack to grab the platform and pull it towards you. HOLD the platform while you jump on it. Release hold and it will take you across the gap to the vent.
Go through the vent. Make your way right at the T and then push open the first cover on your left. Go through it to reach the Break/Storage Room which has our first puzzle in it!
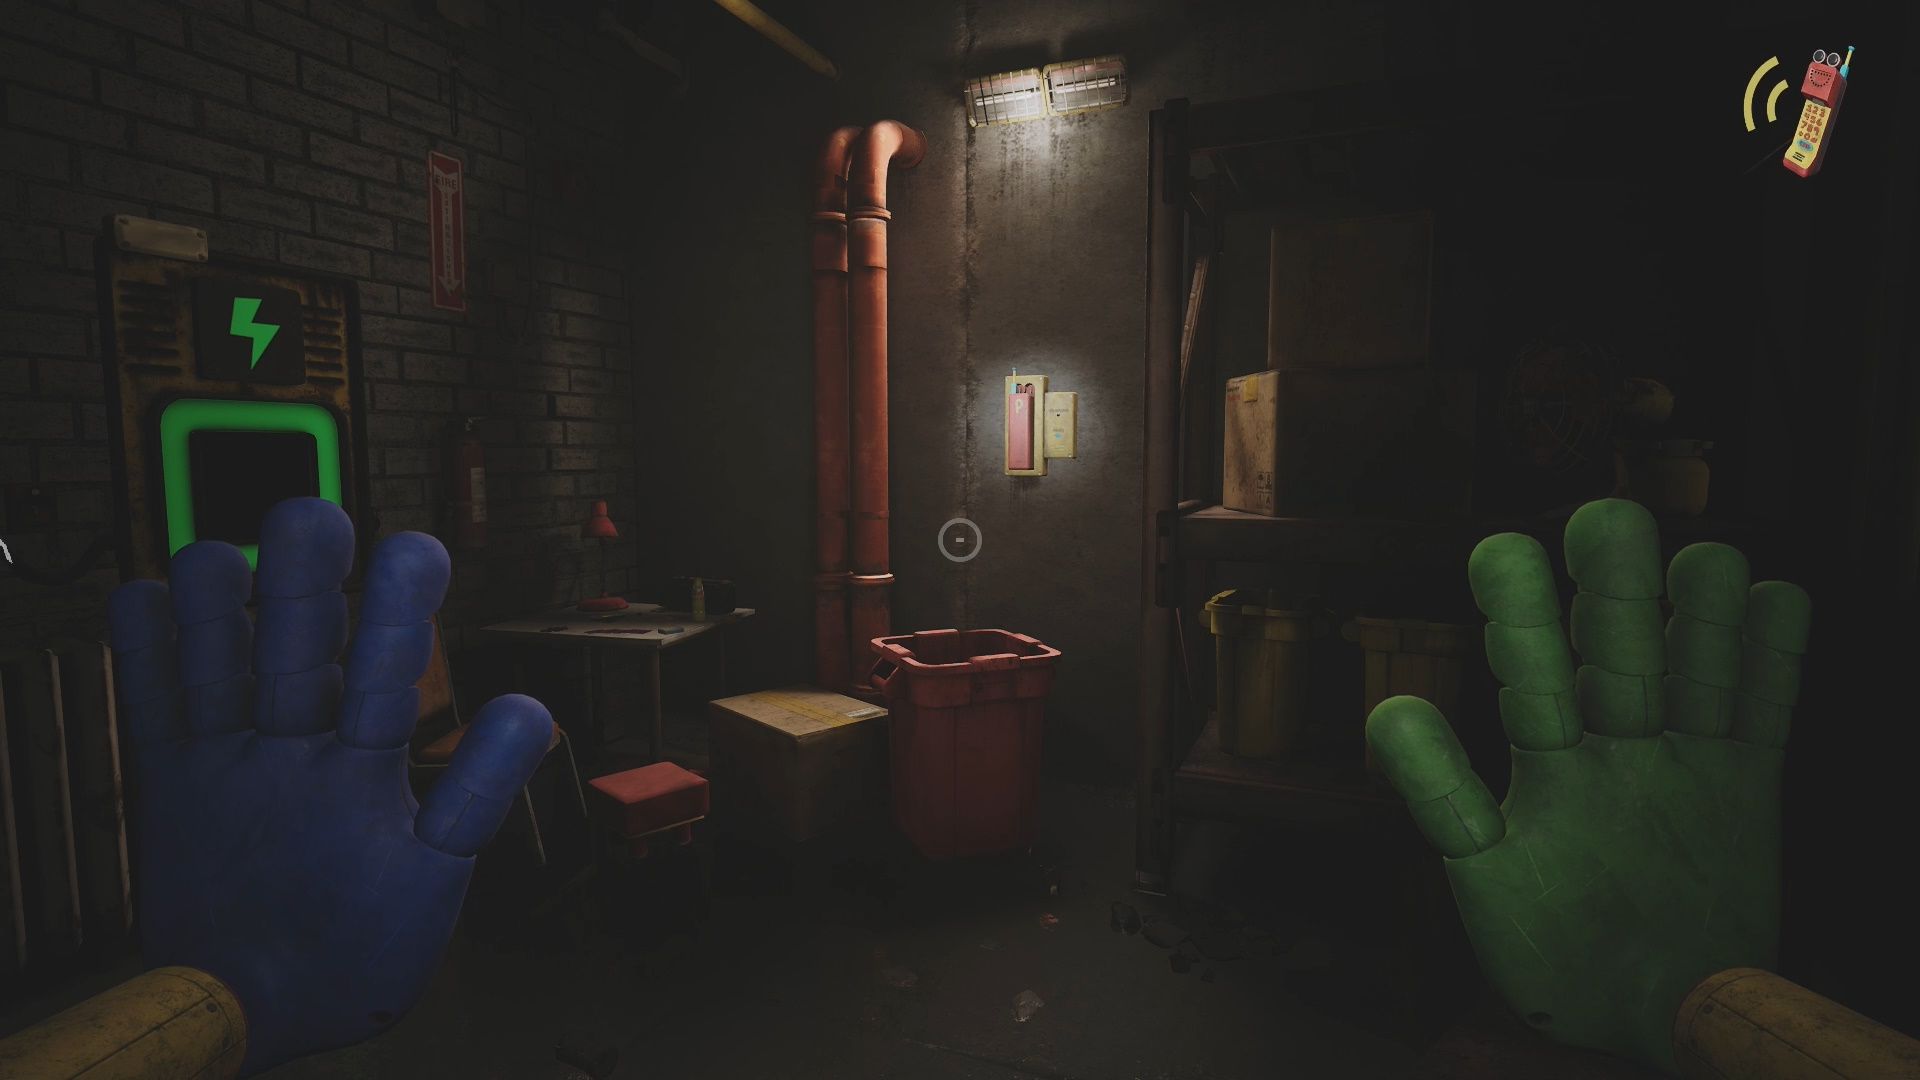
Storage Room Missing Batteries Puzzle Solution
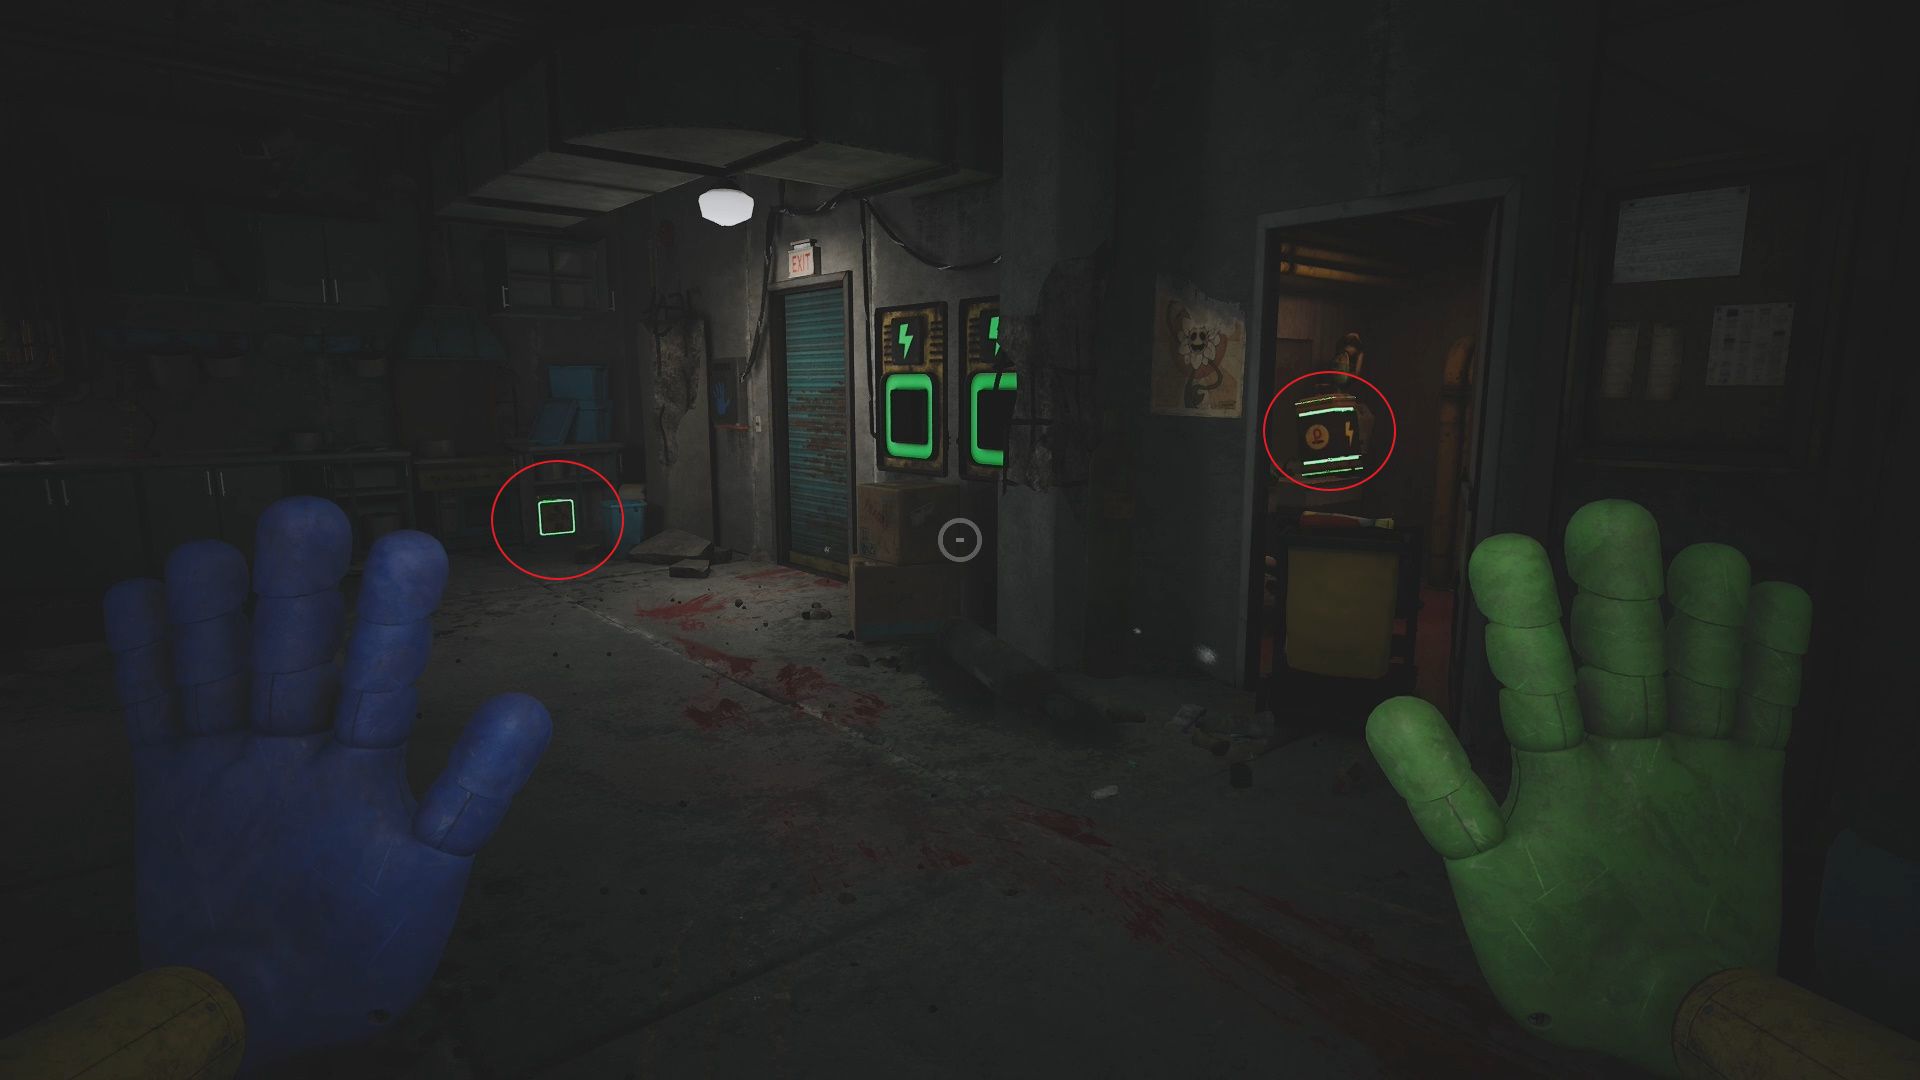
In the Break/Storage Room you will find two empty battery sockets next to a locked shutter. To advance we need to find the batteries. This is easy to do:
- A battery is on the shelf to the left of the shutter.
- A battery is in the utility room with the door propped open by the janitor’s cart. Shoot your arm at it to grab it.
Collect both using your GrabPack and place them in the battery sockets. Use your Blue Hand on the sensor to open the shutter so you can advance.
Open the Door, Get the Phone, and Meet Ollie
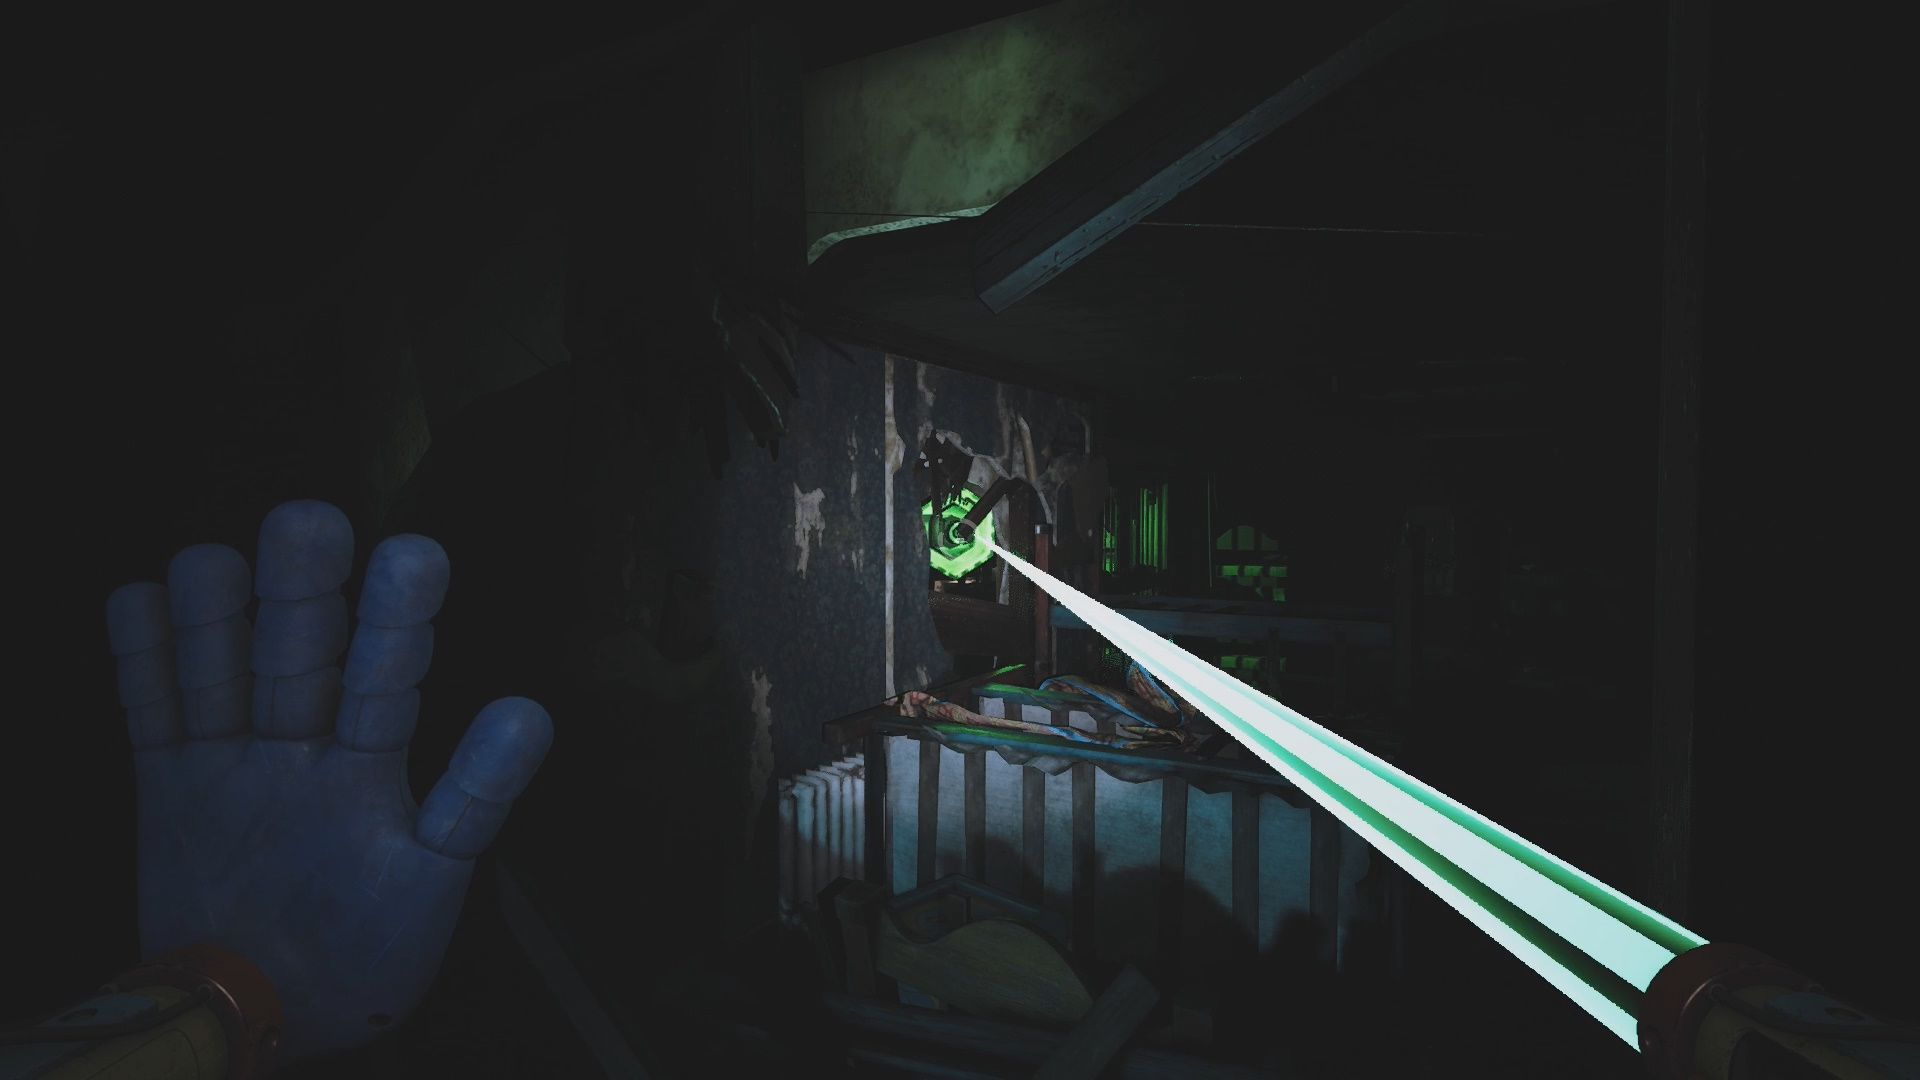
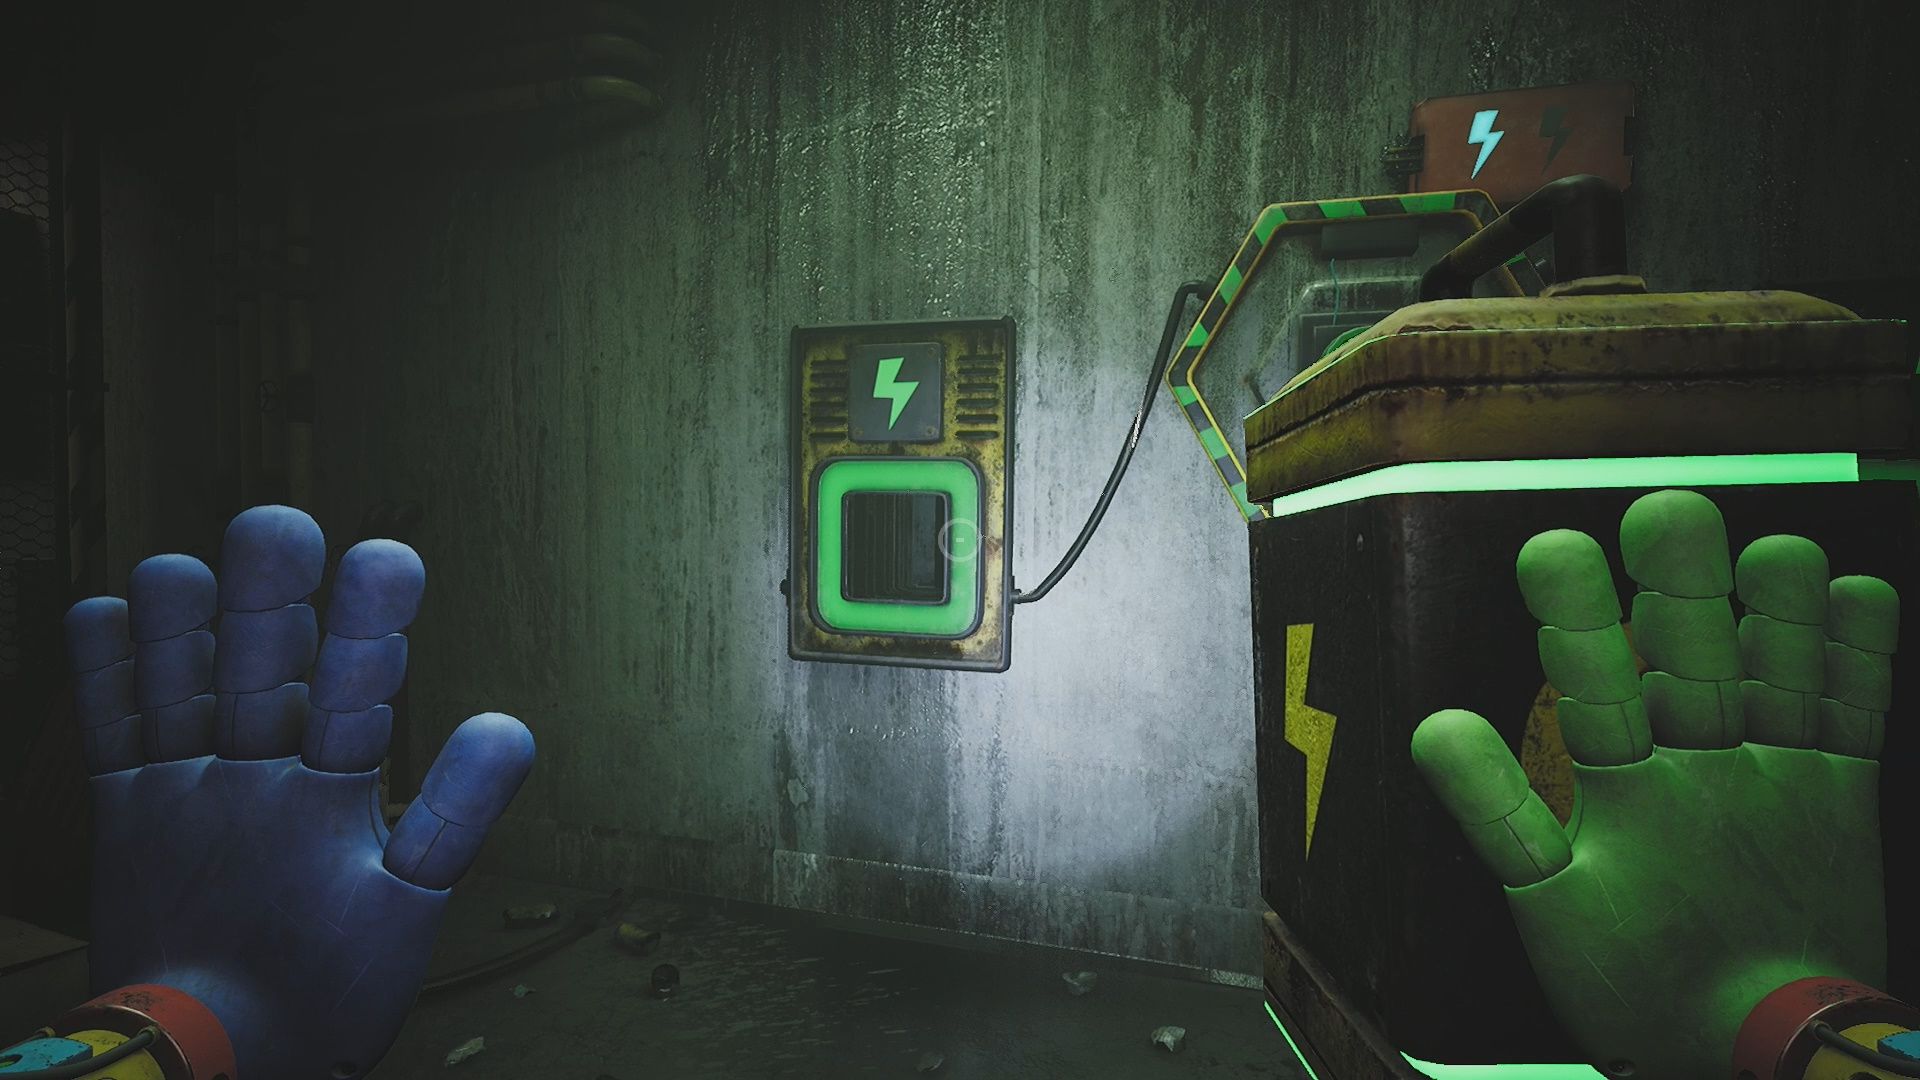
Walk down the hallway until you reach a T withstairs to your right and a Green Plug on the wall to your left. Use the Green Hand on the plug to charge it. Take the charged hand up the stairs and use it on the Green Plug to open the nearby door. Go into the now open room.
Inside this room there is a Red Playtime Co. Phone on the wall. Pick it up to meet Ollie. Ollie will be our guide for much of this chapter.
After you speak to Ollie, grab the Battery he dropped you from the floor and place it into the Battery Socket by the door. Go through the door into the next area.
Find A Way into Playcare
Through the door you will end up in the Train Tunnels. You will get a new objective to find a way into the Playcare. Walk forward through the tunnel until you reach the platform with the Huggy Wuggy statue on it.
On this platform make your way into the room marked Security. Go through the door into the Maintenance room where you will find another power puzzle to complete.
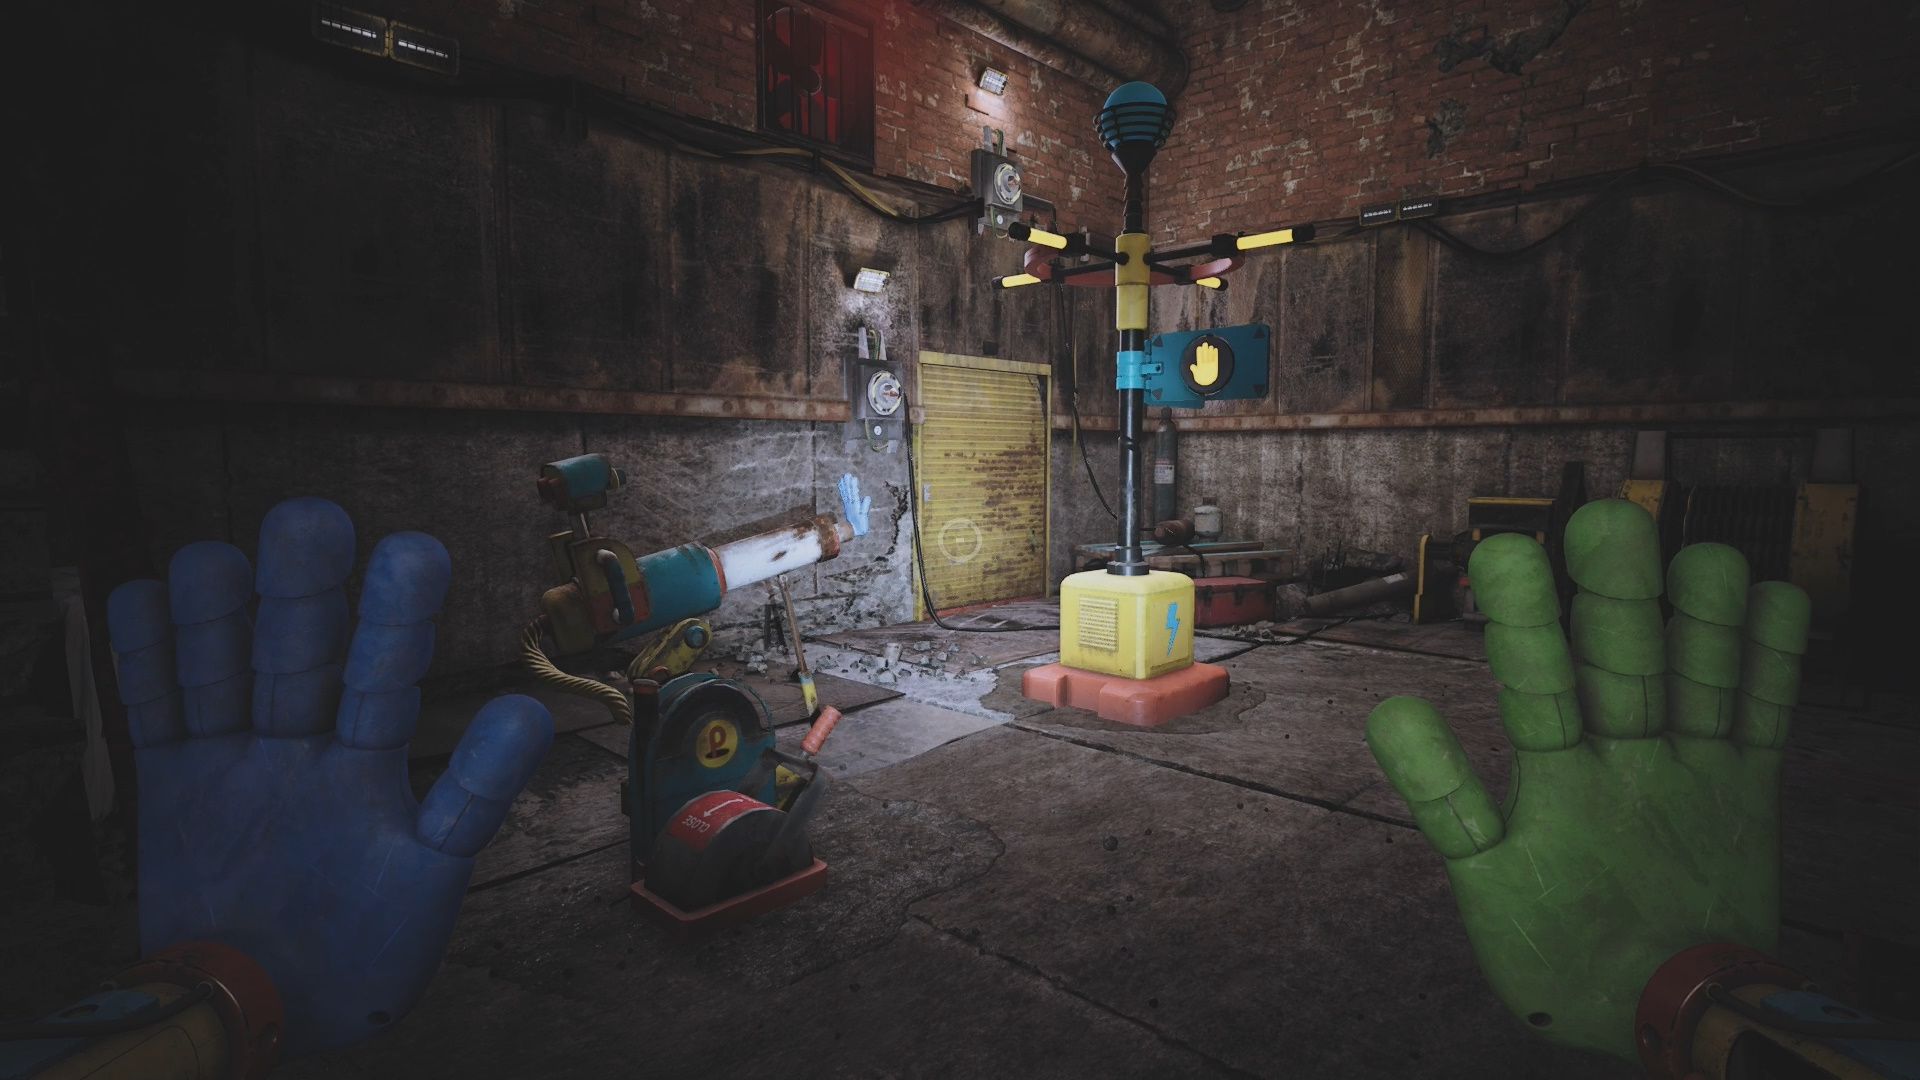
Maintenance Room Power Puzzle Solution
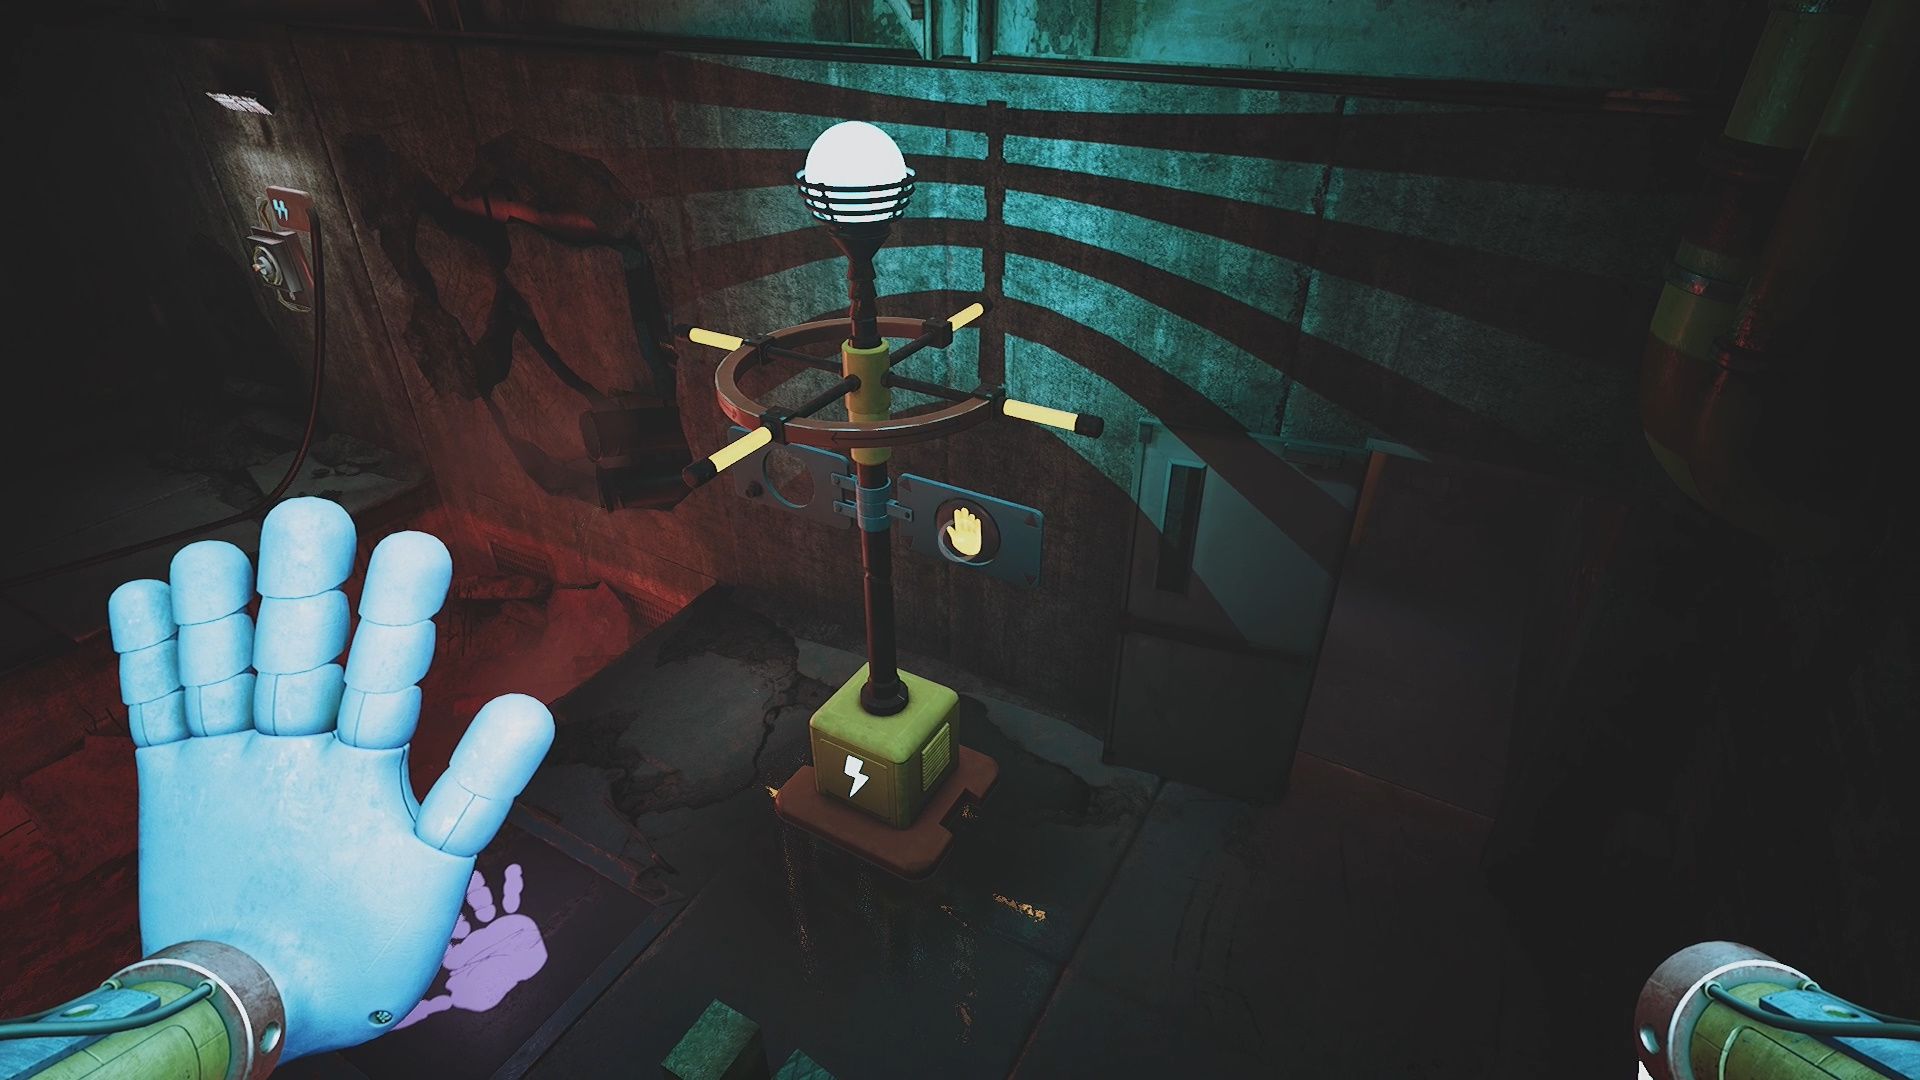
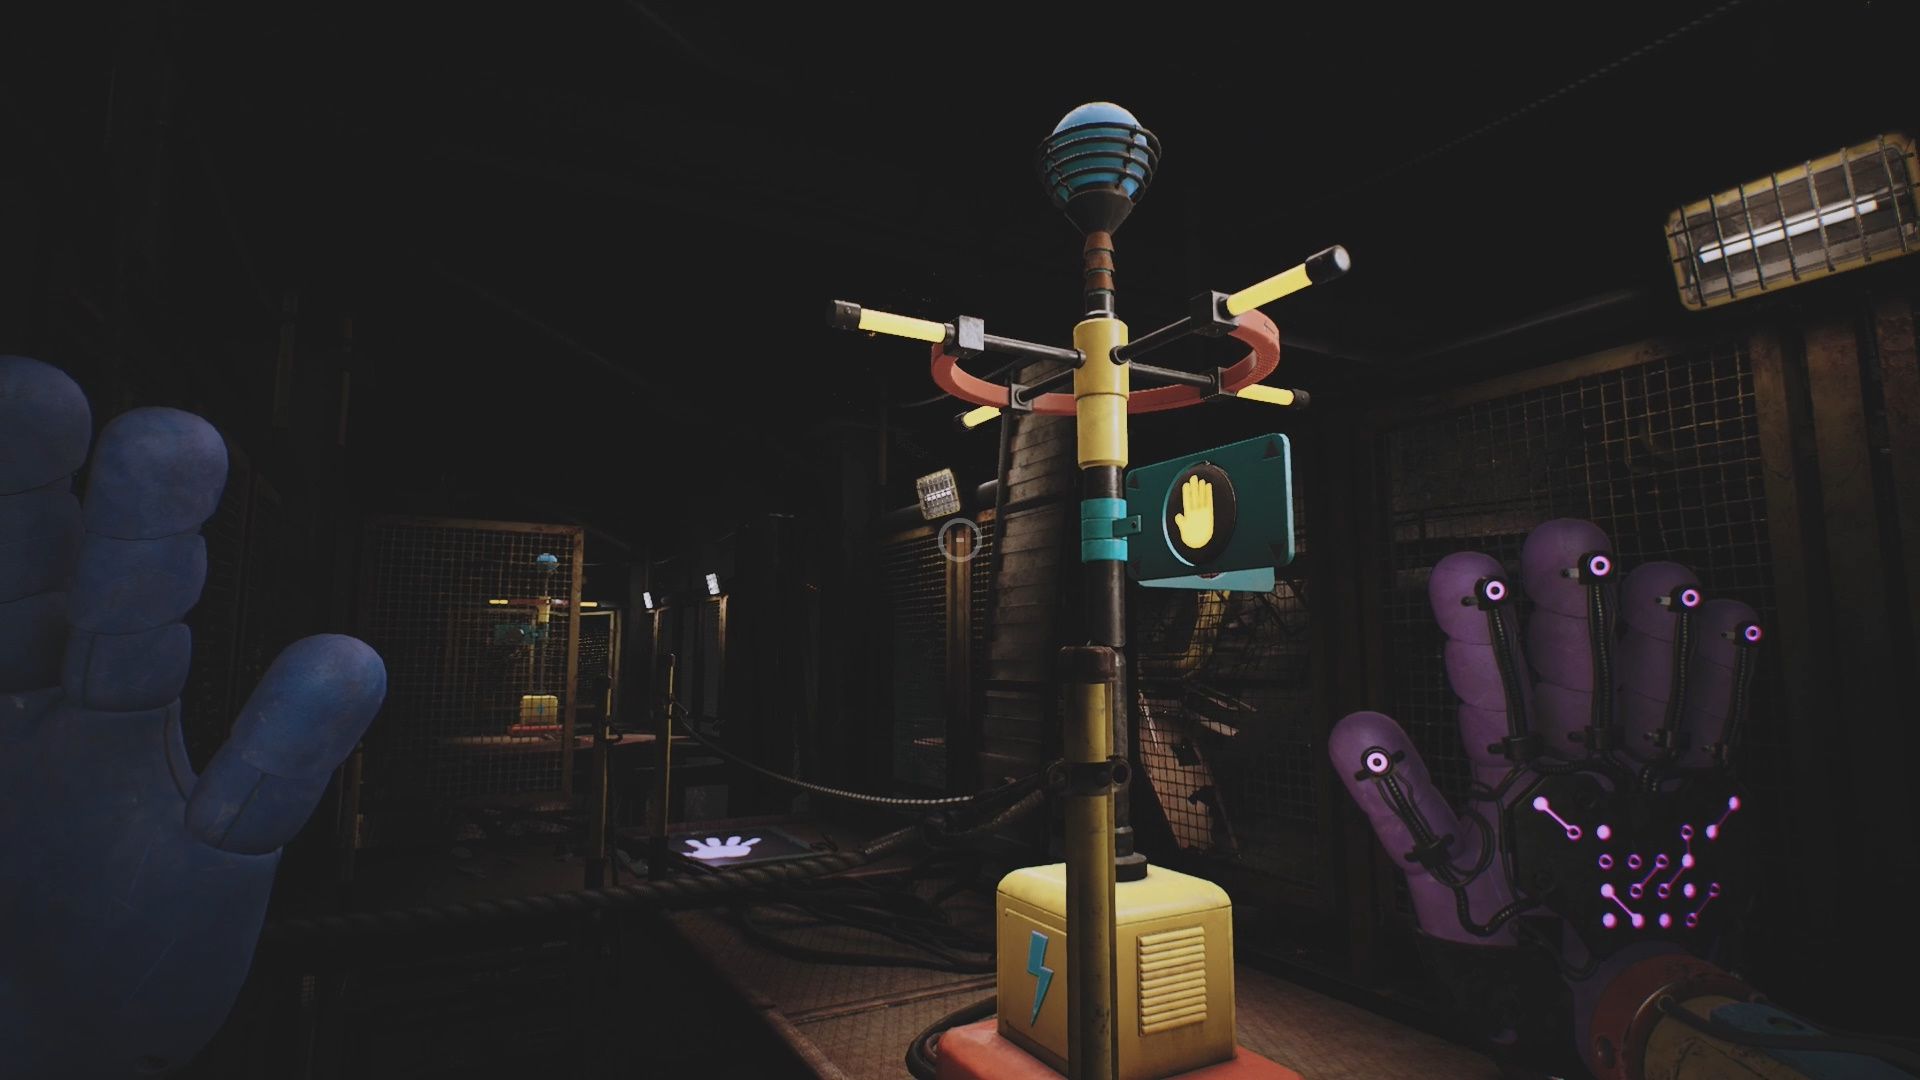
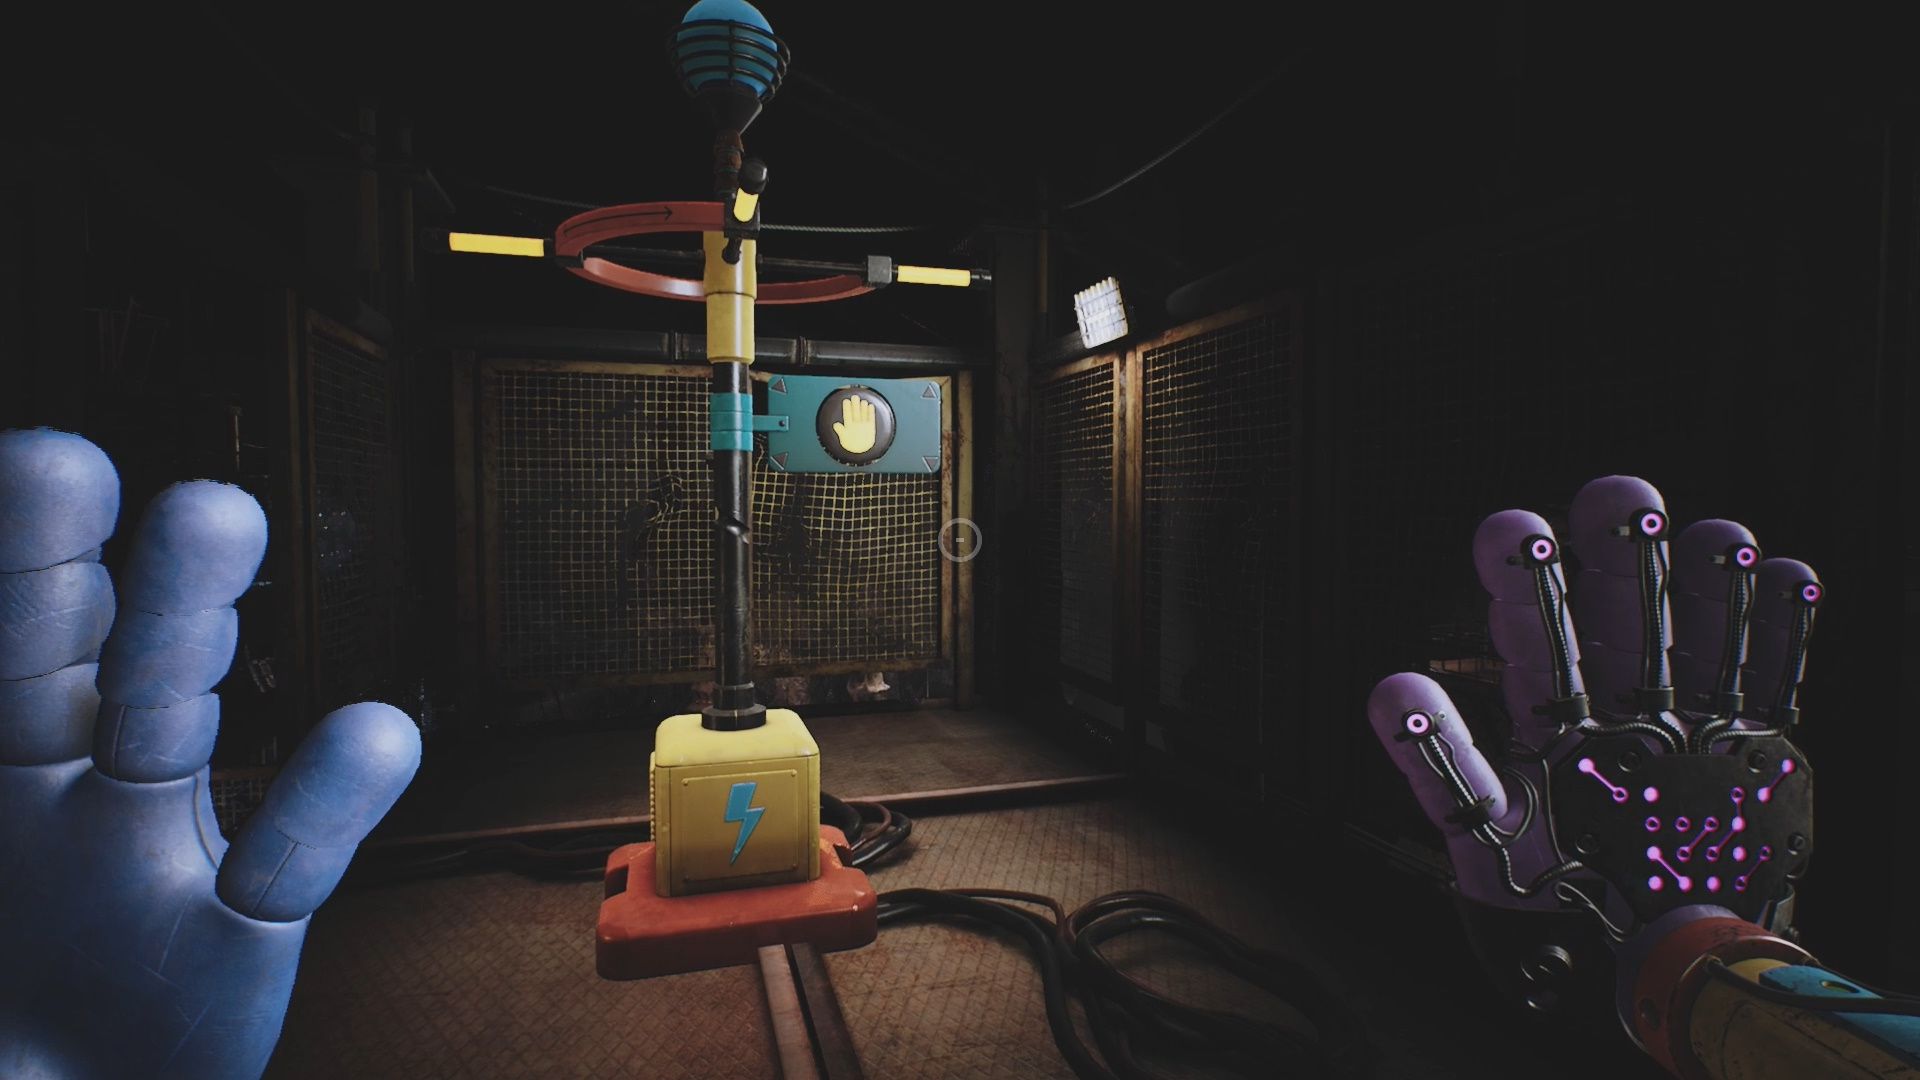
In the Maintenance room you will find a pole in the middle of the room with a Hand Icon on it. When you hit this hand icon your hand will stretch in a fixed direction, allowing you to complete the circuit.
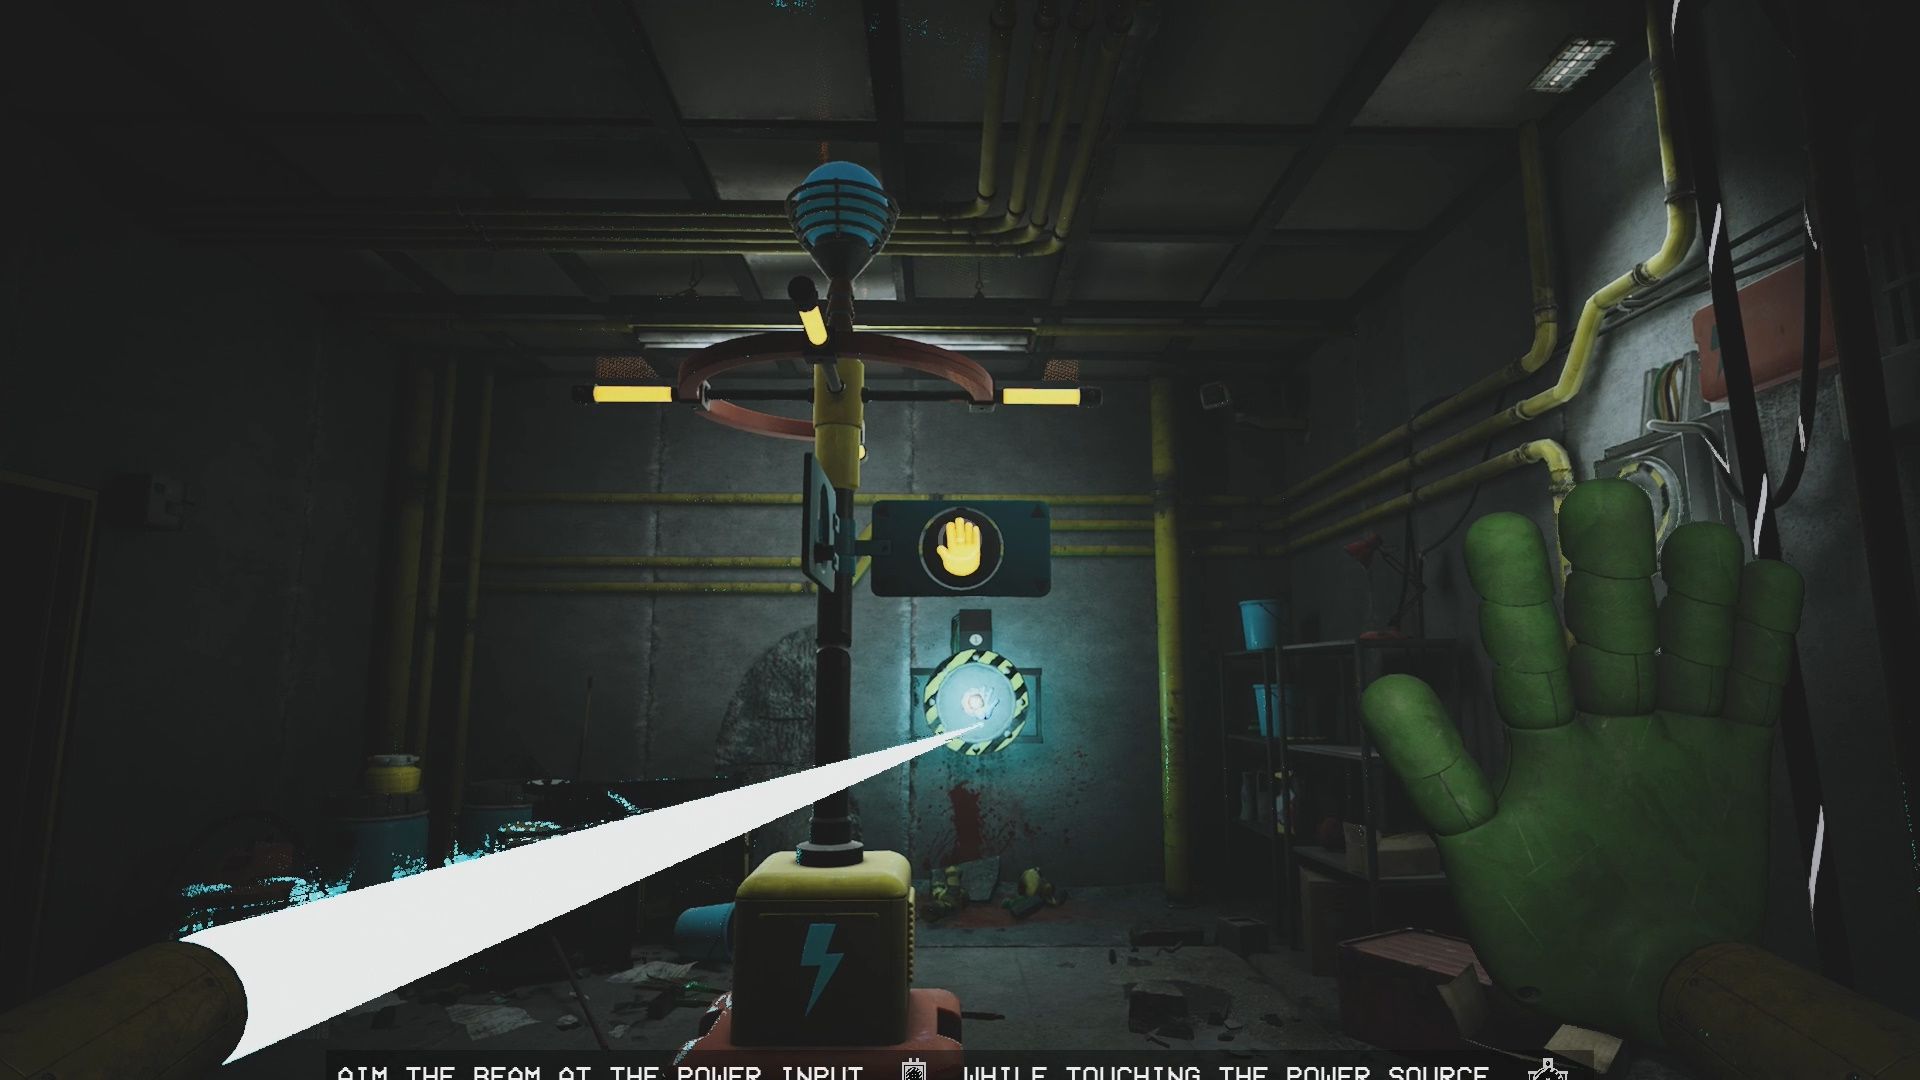
Grab and rotate the pole so it matches the screenshot above. Use your Hand to connect to the plug on the far wall, and then hit the Hand symbol on the pole. This will complete the circuit, opening the nearby door, and powering up the train.
Elliot’s Express Ride to the Playcare
Leave the room and go back to the train platform. Head up onto the platform via the Turnstiles (by the Huggy Wuggy statue) to the Elliot’s Express. Pull the Levers on both the left and right walls, then board the now open express.
There will be a short loading screen upon entering. After the loading screen walk forward on the express so it starts moving and a movie starts playing. You will ride the express forward into the Playcare area.
Go Under the Statue
At the Playcare exit the express and walk down the stairs into the center of the area. Ollie will call you. You will get a new objective to Go Under the Statue.
The statue is in the middle of the Playcare area. Go under it by using the door marked with the red sign that says “authorized personnel only.”
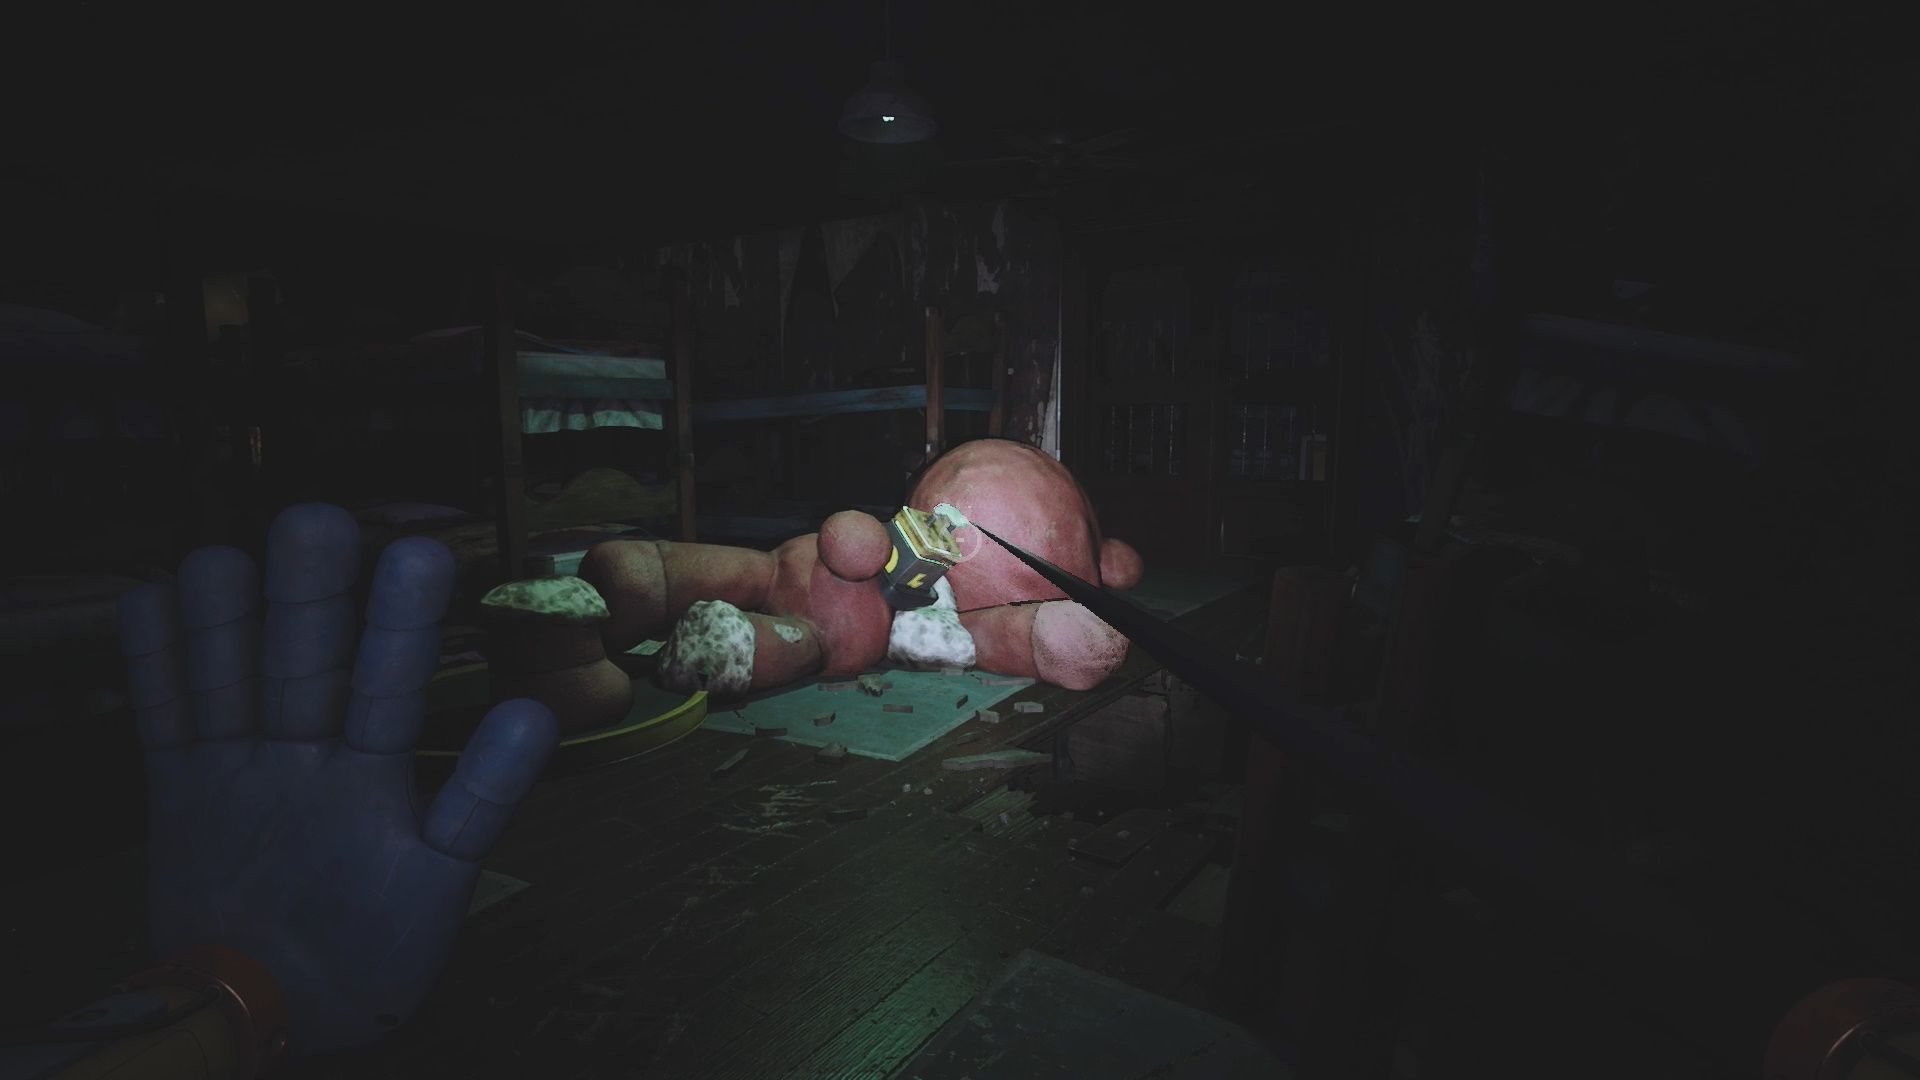
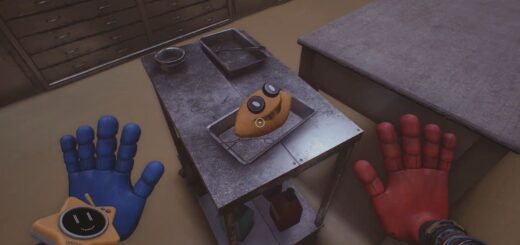
Get the Production Zone Key
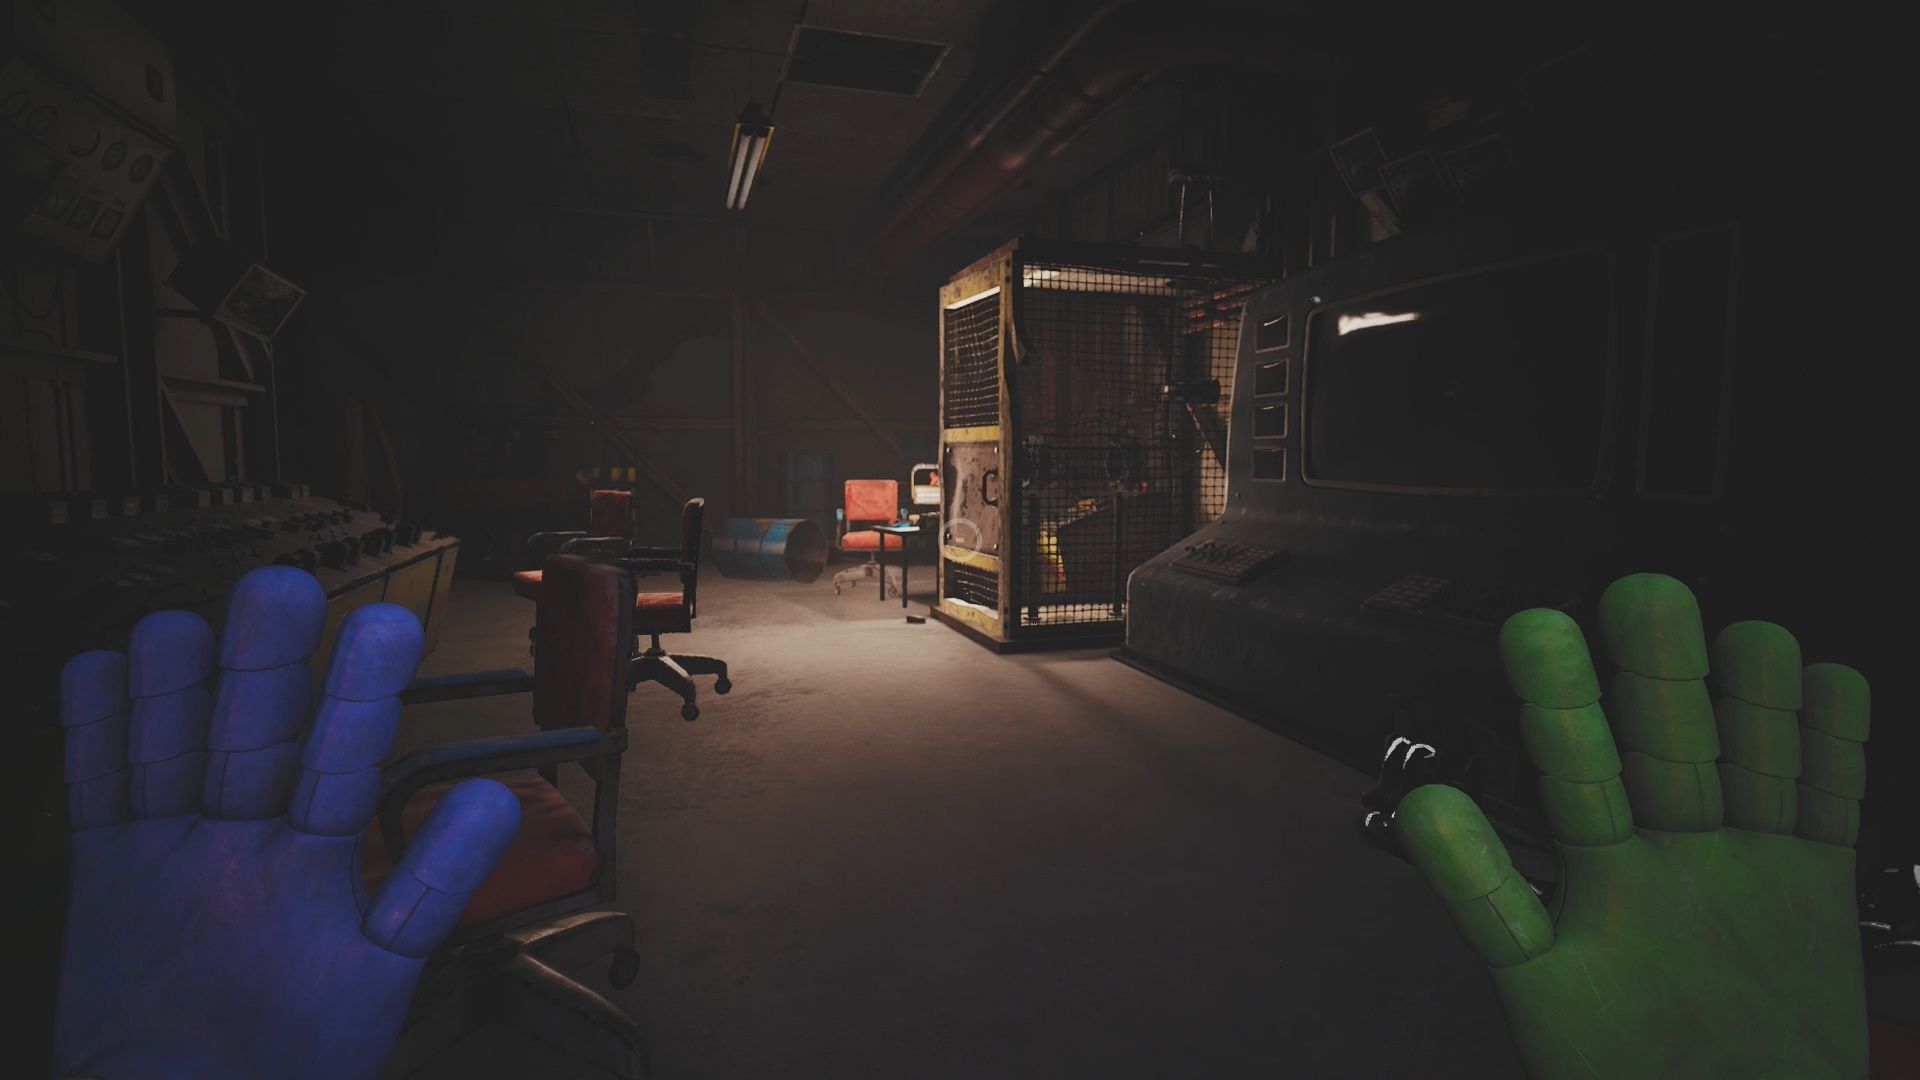
Under the statue go left to the side with the control console. Next to the control console is a yellow cage with a pipe in it. Open it. Grab the Production Zone Key from inside of it.
Enter the Gas Production Zone
Upon getting the key you will trigger a new objective: Enter the Gas Production Zone. Leave the area under the statue. When you get outside look straight ahead. There is a door on the hill with an illuminated light above it. Go up to it.
Go through the door and make your way forward. You will trigger a loading screen. Following the loading screen make your way forward into the Gas Production Zone. Ollie will call you here and you will get a new objective.
Find a Way to Divert the Gas
In the center of the Gas Production Zone there is a large control console. It currently has now power. We need to get the power going in this area.
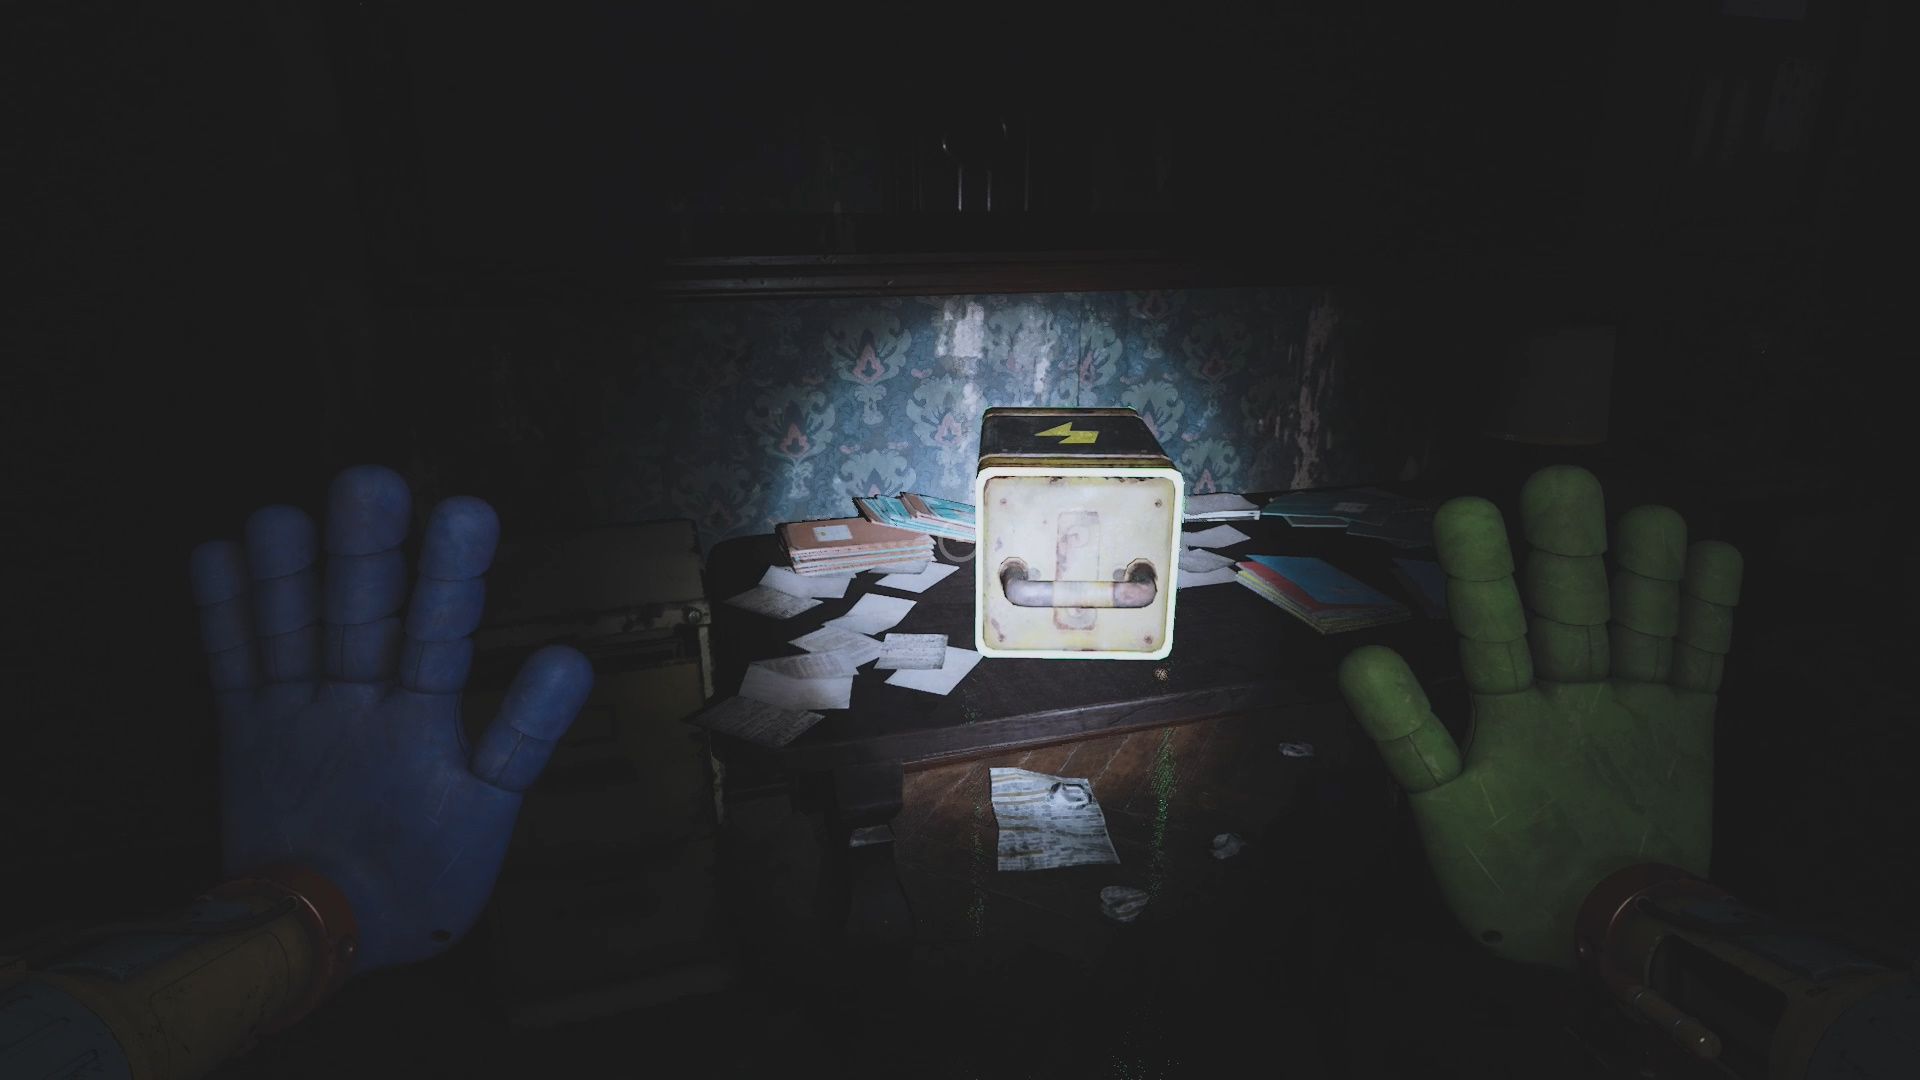
To start make your way into the room to the left of the control console (the one with the CatNap cutout in it). Grab the Battery in this room that is laying on the floor.
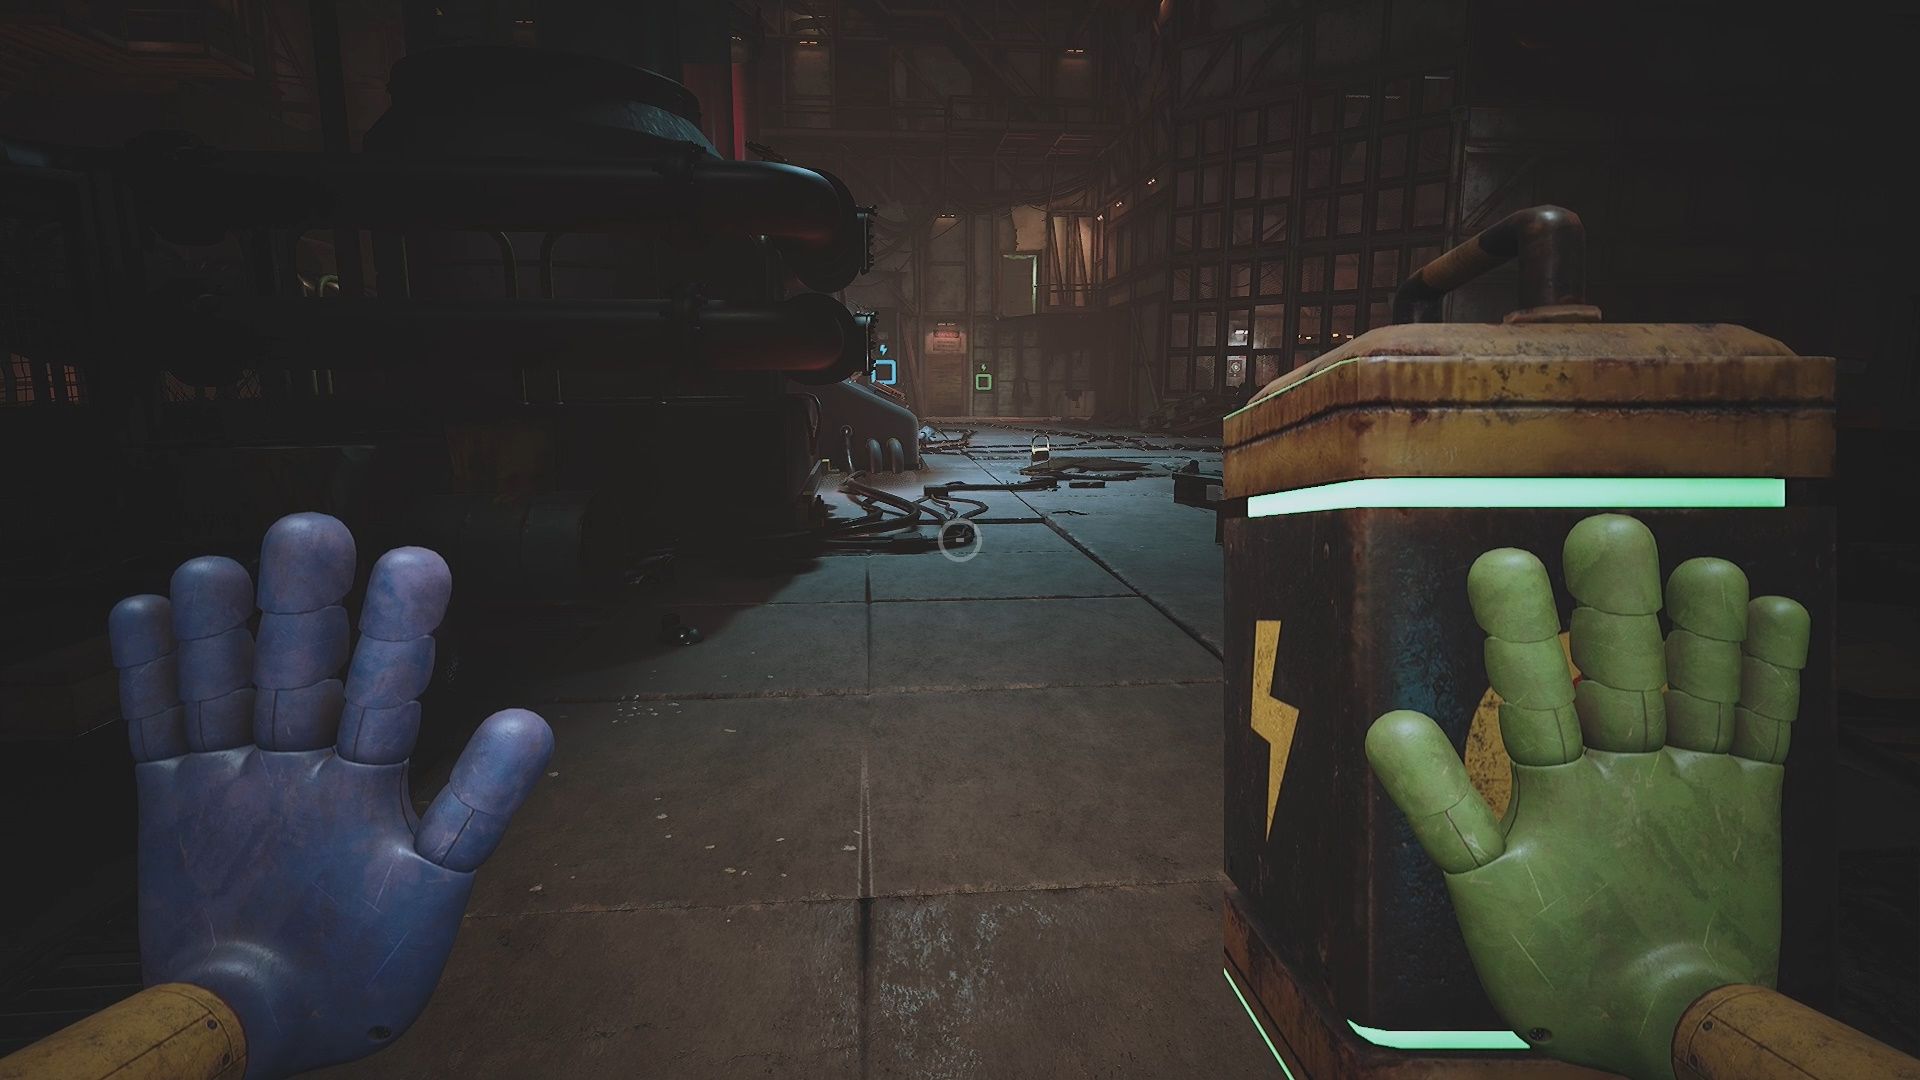
Return to the room with the large console. Go across the room and place the Battery into the green Battery Socket to open the shutter beside it.
Grab the Grabpack 2.0
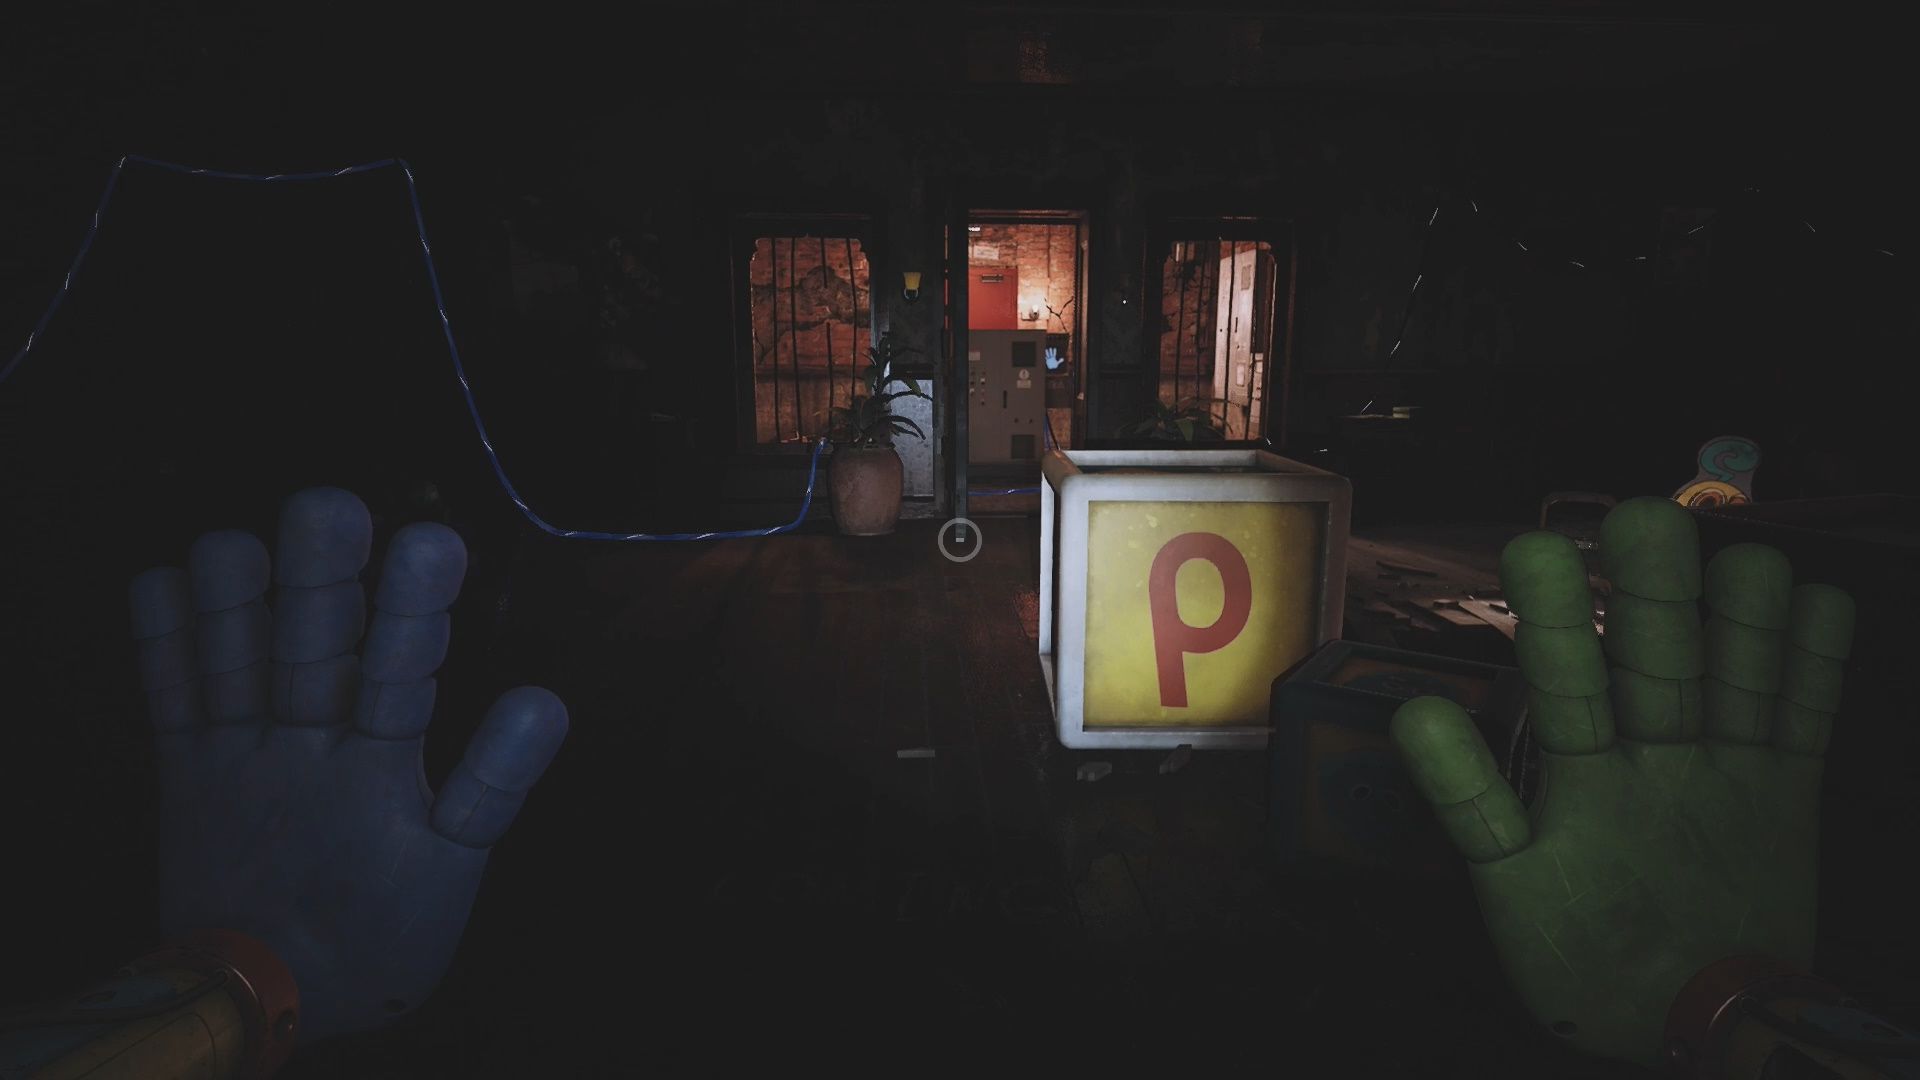
In this room grab the GrabPack 2.0 from the container in the corner. Getting this allows you to swap to the new Purple Hand, which allows you to jump on purple pads!
Purple Hand Pads Room
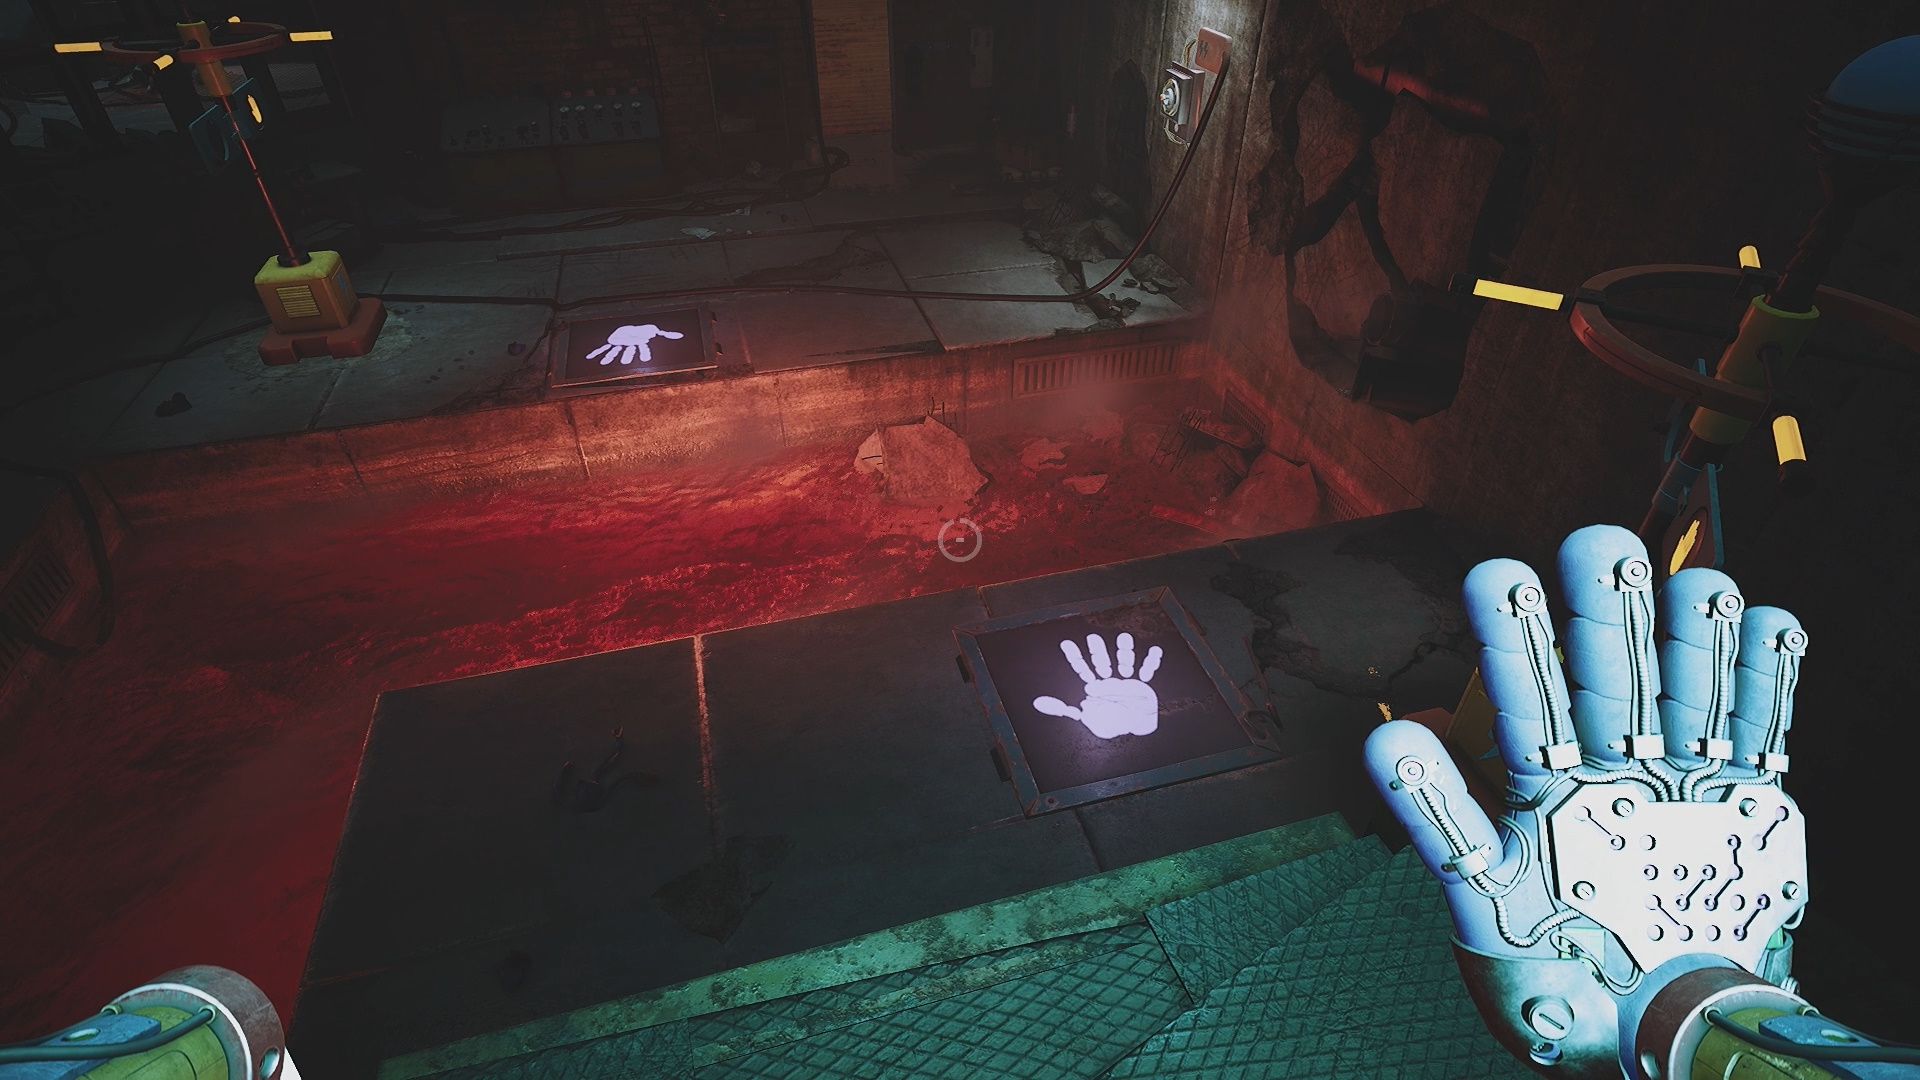
Exit the room and use the Purple Hand on the Purple Hand pad to launch up to the catwalk above. Enter the next area.
This area is a bit of a tutorial on the Purple Hand. Walk forward and use the Purple Hand on the Purple Hand Pads to launch yourself across the different gaps you encounter.
The only section that is difficult is the last part. You will see a large gap with seemingly no pad to launch from. Hovering on the far side is a platform you can pull. Pull it all the way to you. Then pull it down (there is a handle on the middle underside).
Once the platform is down you will see the launch pad. Use the Purple Pad to launch yourself to the yellow pipe on the wall to your left.
While standing on the yellow pipe pull the pad so it is in the middle of the gap. Jump to it and launch yourself across to the other side. Once across, pull the pad one final time all the way to you and use it to launch yourself over the gate. Walk forward into the next room, which is the Laboratory.
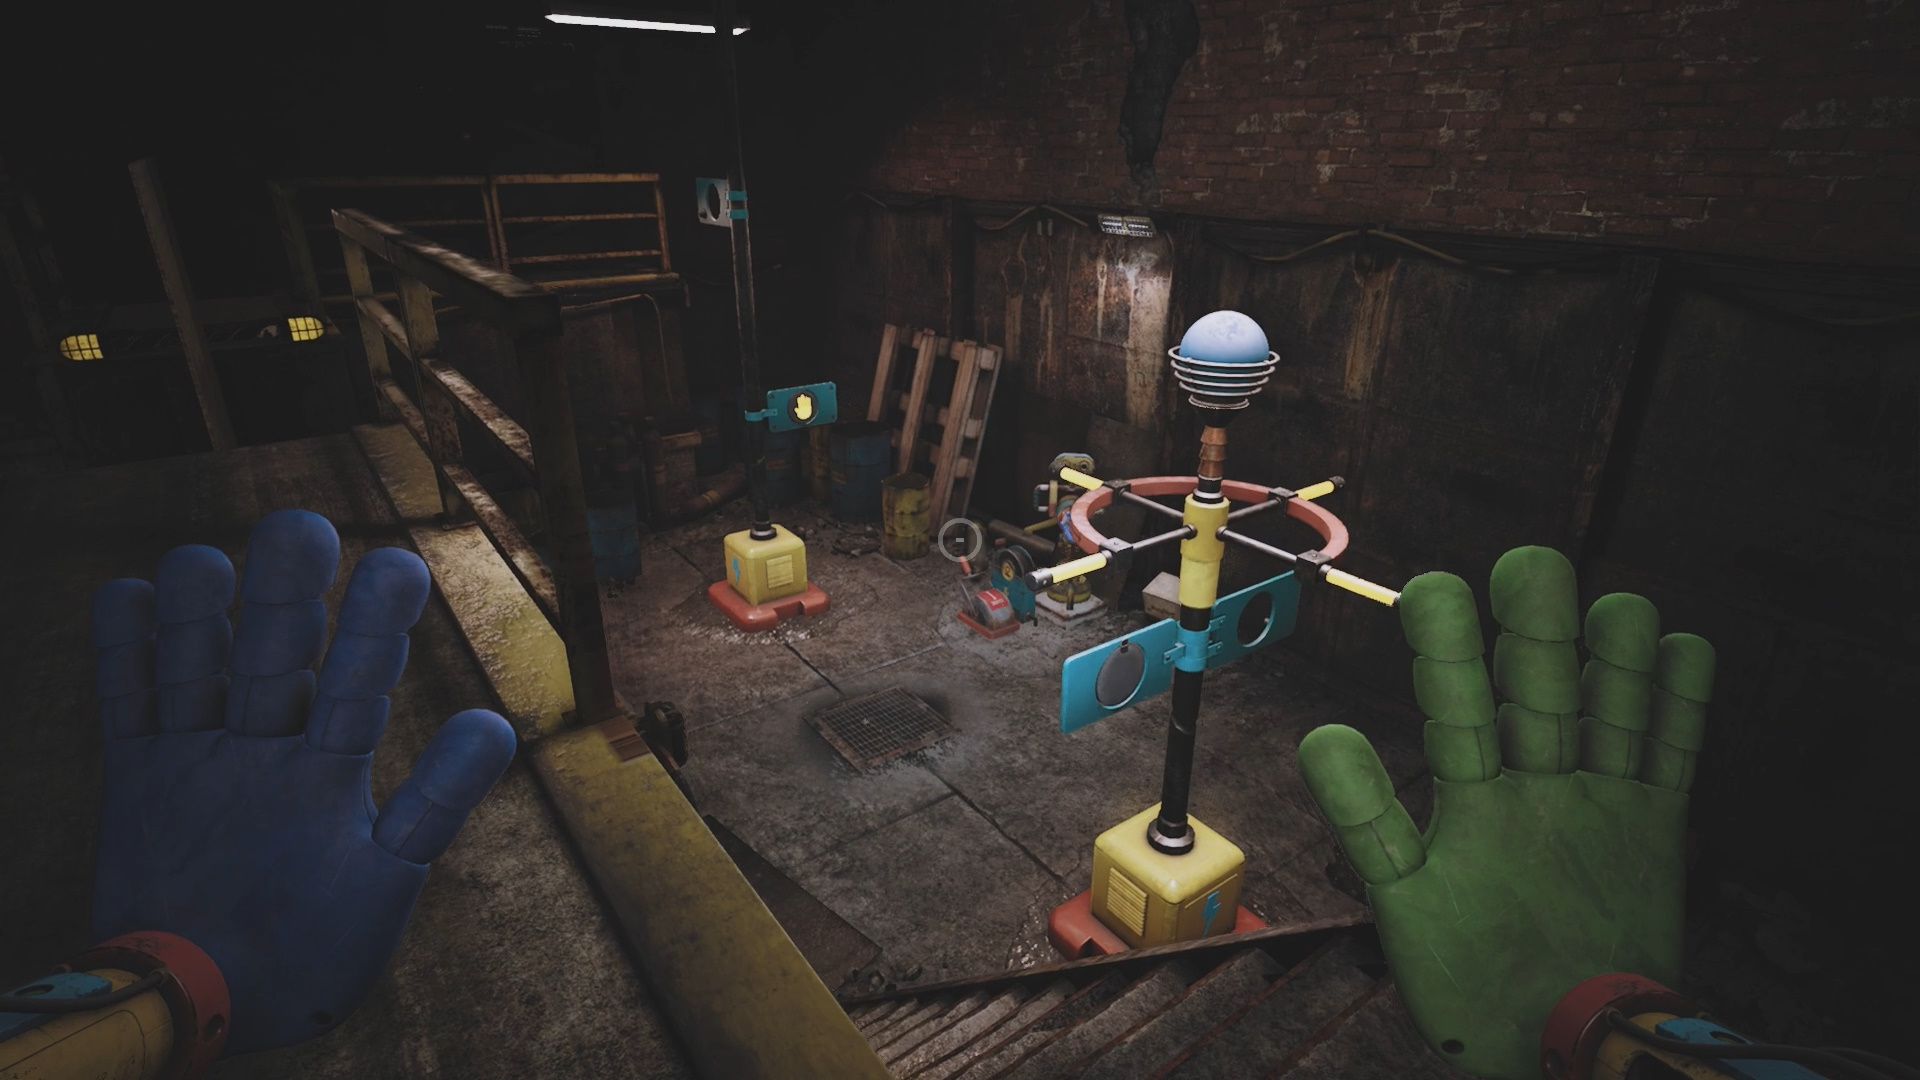
Laboratory Power Puzzle Solution
This puzzle is a bit confusing to complete. You need to power up this room. This can be done in two setups. They are as follows:
Setup 1
- Use the launch pad nearest the door to launch on top of the nearby cage.
- Attach to the plug in the cage by shooting through the hole in the wood.
- Turn the power poles so they match the screenshot above. You are trying to get the power to the plug on the far wall.
- Hit both poles and power up the plug.
Setup 2
Completing Setup 1 will reveal a new plug on the wall. Do the following.
- Remain on top of the cage.
- Attach to the plug in the cage by shooting through the hole in the wood.
- Turn the pole nearest you so it is setup like the screenshot above.
- Hit the pole and power up the plug.
Upon powering up the Laboratory, you will unlock the door, allowing you to return to the room with the large control console.
The console is now ready for you to interact with it. Push the big red button to restart the generator. The generator will try to restart, but it will fail. Ollie will call you and tell you need to go to Home Sweet Home.
Obtain the Key to Home Sweet Home
To complete this objective, leave the Gas Production Zone. Make your way back under the statue. Go to the cage in control center area and grab the key from the pipe (just like we did earlier to get the Gas Production Zone key).
Once you have the Home Sweet Home key, Ollie will talk to you and will give you the next objective.
Restore Power in Home Sweet Home
Leave the under the statue area and head back outside. When you are outside look for the house with its lights on. That is Home Sweet Home. Go there, open the front door, and walk down the stairs to load the Home Sweet Home area.
Inside Home Sweet Home walk forward into the red gas. Keep going forward through the gas. You will enter the Nightmare Maze.
Nightmare Home Sweet Home Maze
The Nightmare Maze is a bit misleading. It is less of a maze and more of an experience. Keep walking forward and listen to the lore. Eventually, you will reach a bed room. Walk towards the Red Phone in this room and Ollie will tell you to run. Leave that room and keep going.
Keep walking forward until you reach a long hallway with a room at the end. About halfway there is a hallway going left, go down with hallway instead. Keep going forward until you eventually reach another hallway with a door at the end. Make your way to that room and enter it.
Red VHS Tape & Nightmare Huggy Wuggy “Chase”
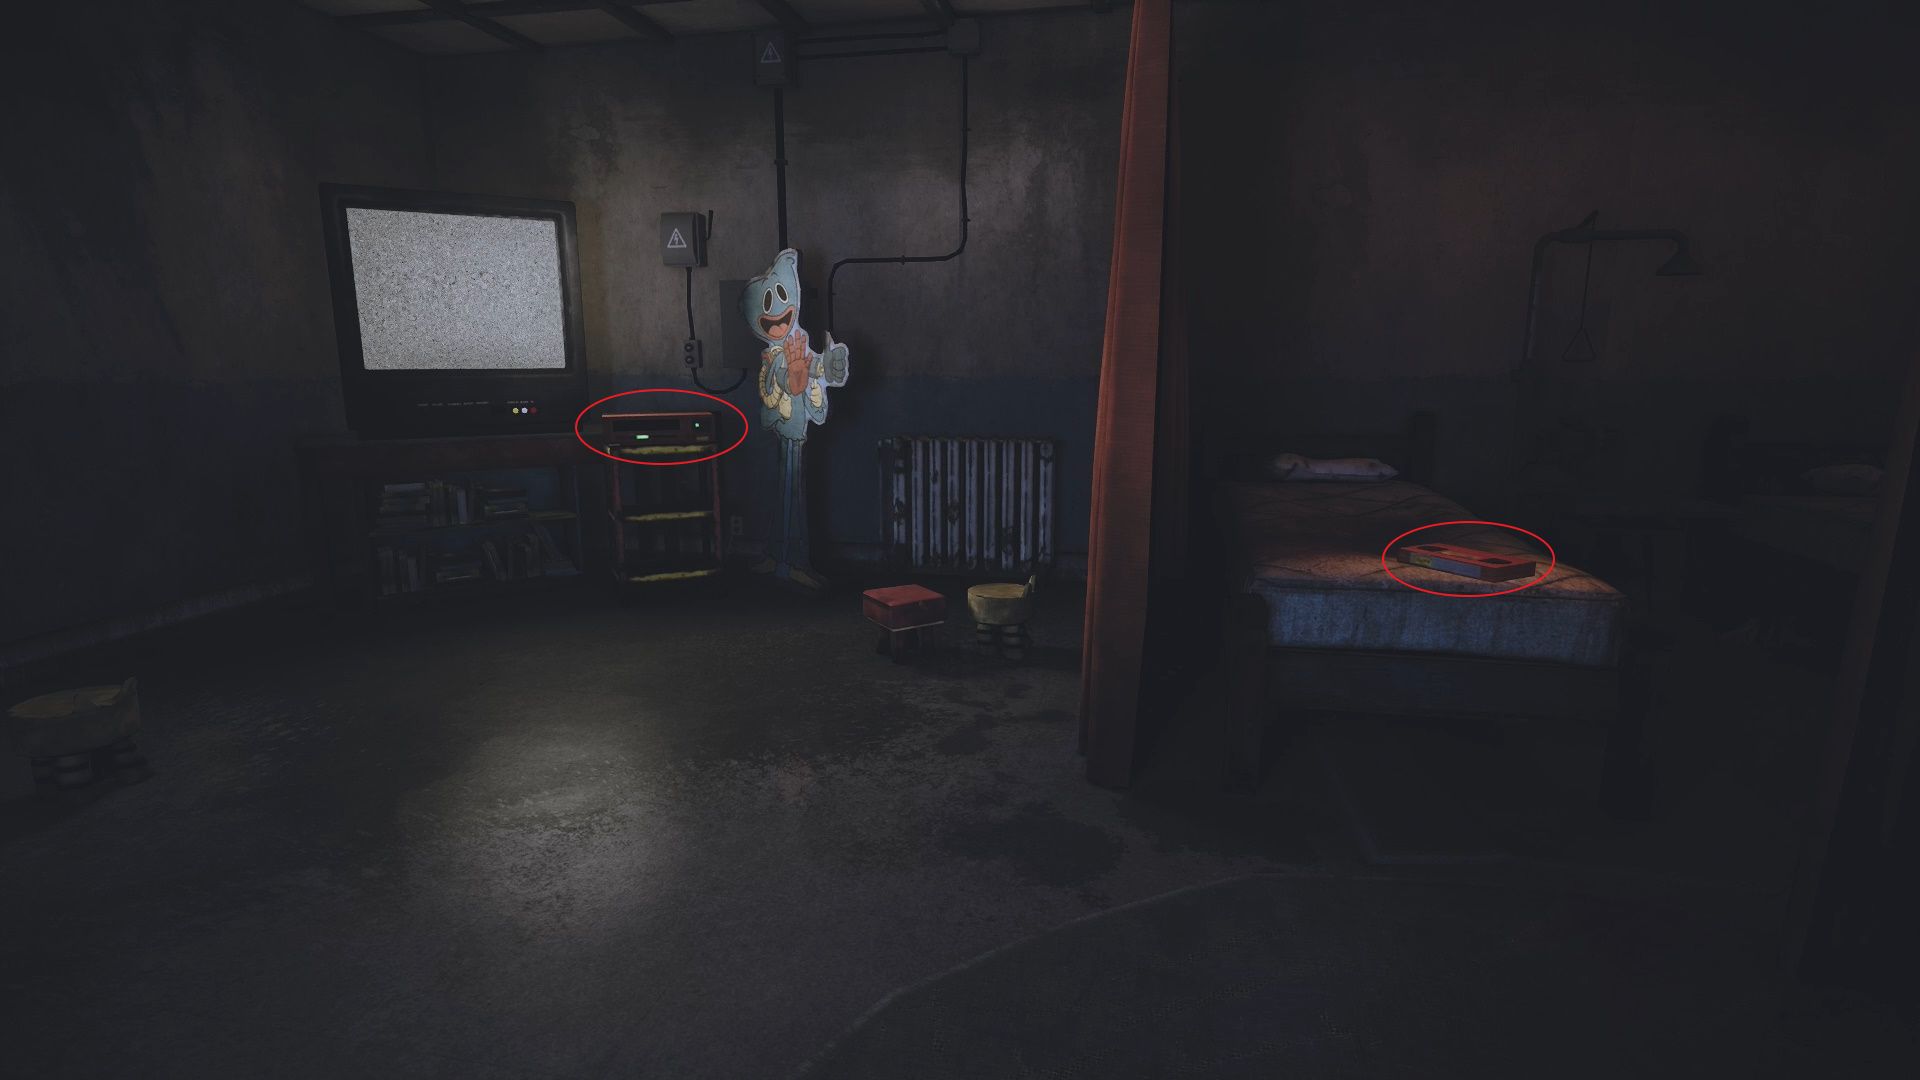
You will enter a medical room with multiple beds. On the nearest bed there is a Red VHS. Pick up this Red VHS and put it into the Red VCR.
Watch the video. While you are watching the tape a Nightmare Huggy Wuggy will appear on the screen. The Huggy Wuggy will exit the screen and will “chase” you. Run!
So you can’t actually complete this chase. The Nightmare Huggy Wuggy will always catch you. After catching you, you will wake up in the non-nightmare version of Home Sweet Home.
Back in Home Sweet Home
Walk forward and open the door. Continue forward and walk into the large room. Walk into the middle of the room and look for a hole in the floor.

Before dropping down, grab the Gas Mask hanging from the broken wood piece. Once you have the Gas Mask, equip it, and then drop down to the floor below.
On the floor below you will see a toy racecar. Pull the pull string at the back to wind it up. Release it so it goes crashing through the wall, creating a new path.
Go down the new path. About halfway look up for a hole in the floor. Hook onto the ceiling and pull yourself up to the floor above.
Open the door, but don’t go through it (it goes back to the large room from earlier). Instead go through the hole in the wall. Grab the dressers blocking your path and pull them down.
Go into the next room. About halfway in this room you will find a hole in the wall. Head through the hole in the wall to reach a bedroom.
Go through the bedroom into the hallway. Crouch and go into the next bedroom across the hall. Go through the bedroom into the next one (by going through another hole in the wall). You will end up in a hallway facing a new power puzzle.
Home Sweet Home Power Puzzle 1
Grab the Battery on the floor and put it into one of the Battery Sockets. Leave the room and go down the hallway towards the hanging yellow electrical wire. Stand under this wire and look up. Hook and pull your self up to the second floor.
Go through the nearby door at the top of the hole (the room that has bunk beds). Grab the Battery off the destroyed toy in this room.
Backtrack to the power room and place the Battery. Push the Red Button to get 50% of the power flowing. This also opens a door next to the power room, that allows you to go upstairs.
Upstairs
Head upstairs using the new staircase. At the top of the stairs you will encounter another Toycar. Pull the pull string to launch it and create a new path. Follow the newly created path straight (don’t fall through the hole in the floor by the ramp).
Go into the living room area on the balcony. Charge your Green Hand on the plug and use it to on the plug on the ceiling to open the door. Go through the door.
Make your way through the bunk room. Follow the path until you see a Huggy Wuggy block on the floor. Jump on the block and look towards the wall to find a Green Hand Charger. Charge your Green Hand then use it on the plug in the ceiling of this room to open a nearby door. Go through the open door into the Nursery.
In the Nursery you will repeat the same thing we just did. Jump on the Huggy Wuggy blocks by the hole in the wall then look towards the Green Hand Charger. Charge your Green Hand. Use it n the plug in the ceiling to open the door.
Battery
Walk forward into the next room. You will come across another bunk room that has a sentinel toy in it on your left. Go into this room and make your way behind the toy (use the bunks as cover). Grab the Battery off its back.
Take the Battery and drop down the hole in the floor in this room. You will land on the floor below, inside of the second Power Puzzle room.
Home Sweet Home Power Puzzle 2
Place the Battery we snagged into a Battery Socket. Turn to your left and charge your Green Hand on the plug. Leave the room and go down the hallway. About halfway there is a locked staircase. Use your charged hand on the plug to open the door.
Once the door is open, snag a charge off the Green Hand Charger about halfway up the staircase. Take the charge and run down the hallway. Use it on one of the two plugs above the door there. Run back down the hallway, grab a second charge off the Power Puzzle Room plug and run back and charge the other plug to open the door.
In the newly opened room, pull the pull string of the Toycar. Launch it to create a new path. Walk down the new path to the very end and enter the door on your left.
Put on your Gas Mask, go into this room, go into the vent in this room. Go through the vent to reach a new room. At the end of this room is a Battery. Grab it.
Backtrack through the vent back to the Power Puzzle Room. Place the second Battery and push the green button. This will power up Home Sweet Home to 100%.
Make your way back to the main large room. Enter the now open Generator Room. Use the Blue Hand on the Blue Hand Sensor to open the Red Door. Go through the Red Door.
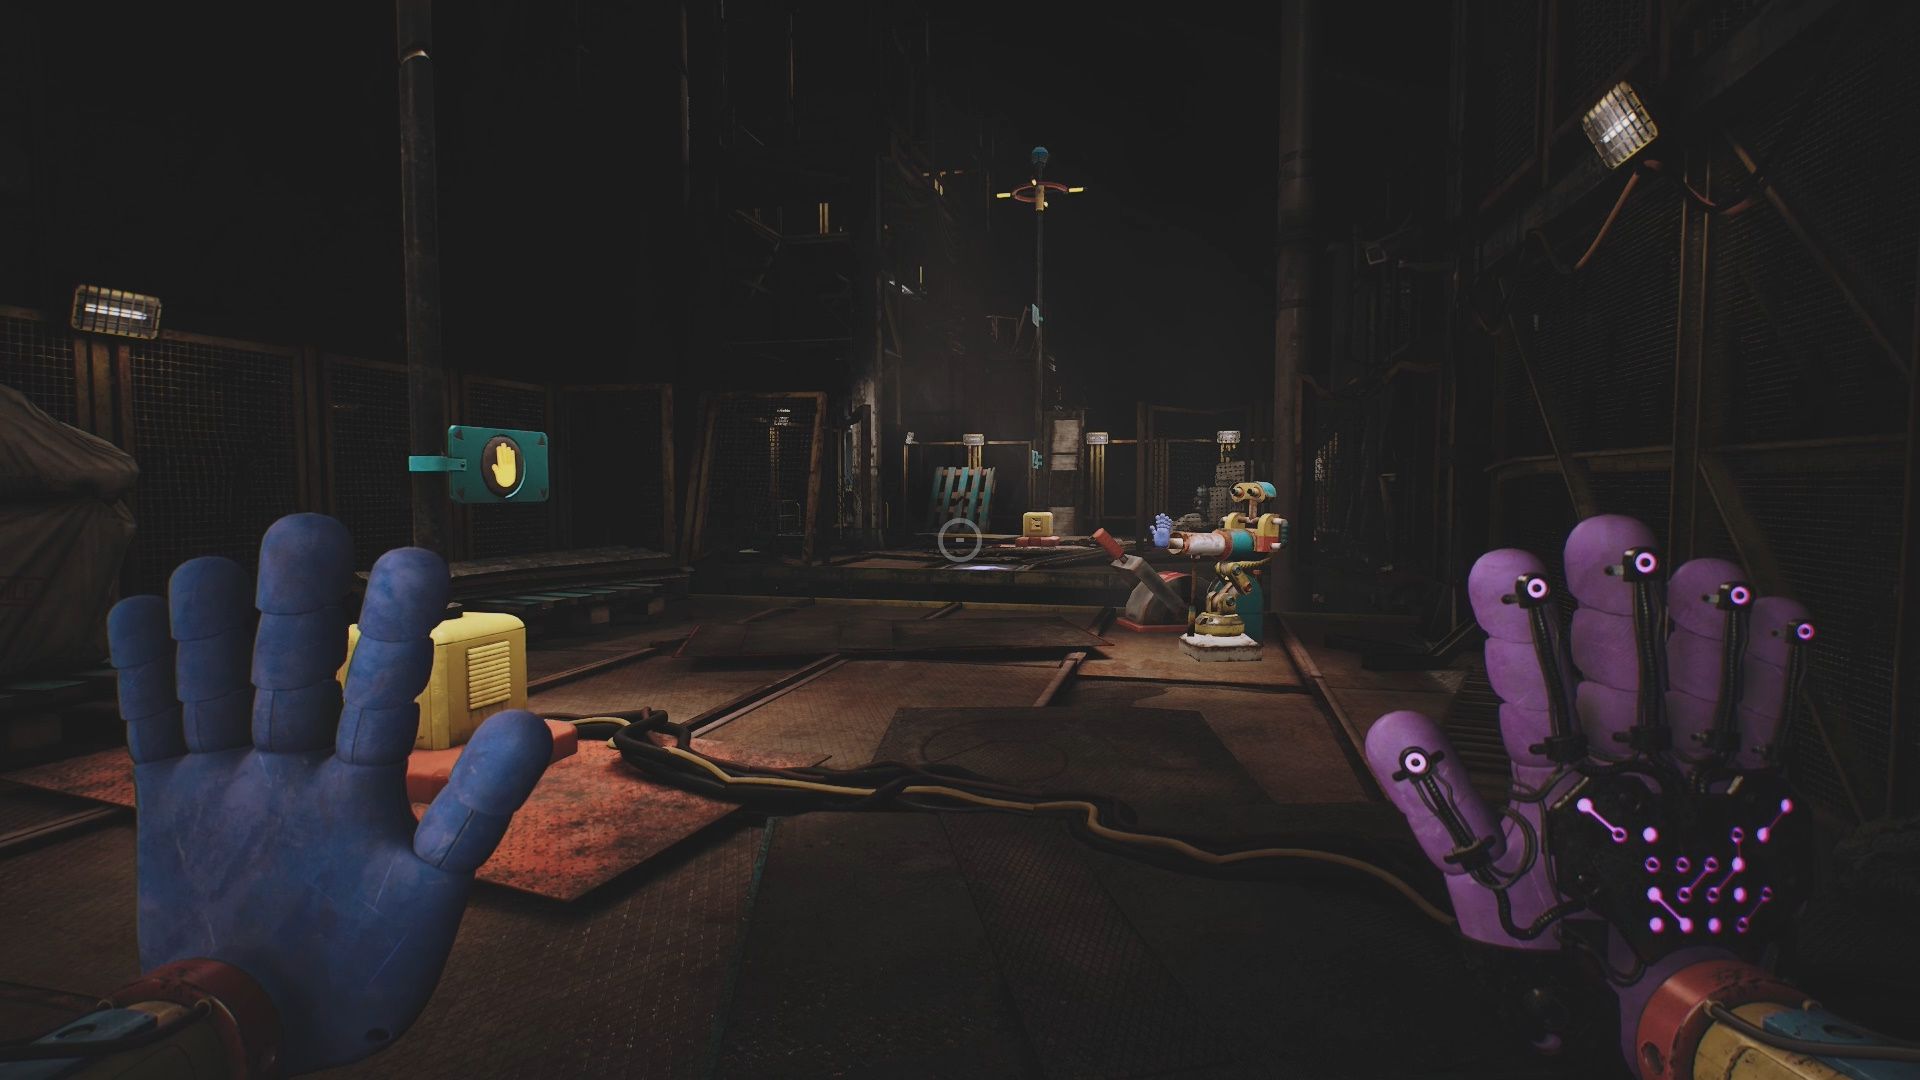
Home Sweet Home Power Puzzle 3
Just when you thought we were done with the puzzles! There is one more to do. This one seem complicated, but it isn’t too bad. You need to do two setups and then a third thing to complete it.
Setup 1
Move the pole as shown in the screenshot above. Then point the Turret at the hand part of it. Fire the Turret so it triggers the power plug, this opens the gate between the two sections. Go into the next section.
Setup 2
In the second section there are two poles to setup. Set it up like I have them in the screenshot above. Aim the Turret at the shorter pole. Don’t fire yet.
Putting It All Together
Go up the stairs so you are standing, looking at the raised gate. From here you can access both section’s Turrets. Turn off the Turret in Setup 1.
Grab the platform above the gate and pull it towards you. Hold it and fire the Turrets on Setup 1&2. This will keep the gate down and will cause the shutter door to power up and open. Go through the shutter into the next area.
Find A Way to Return to the Dome
In the next section you will trigger a new objective to Find A Way to Return to the Dome. This is pretty simple to do. Follow the path forward until you see a Red Button. Push the Red Button to call the elevator. Ride the elevator up. Exit Home Sweet Home to return to the Dome.
Poppy & Kissy Missy Lend A Hand
Outside of Home Sweet Home you will trigger a cutscene with Poppy and Kissy Missy. Follow them to the fuse box. They will turn on power to a nearby elevator. Get on the elevator and ride it up to the controls. push the big Red Button to turn the power back on.
Go back down the elevator. Head back down towards the statue. Ollie will call you. He needs you to rout the power from Home Sweet Home to the Gas Production Zone.
Route the Power From Home Sweet Home
Go back to the front of Home Sweet Home. You will see a plug you can grab by the front door. Grab it and take it to under the statue. Plug it in next to the large control console.
After you’ve done that, Ollie will send you the School Key through the pipe in the yellow cage. Take it to add it to your inventory.
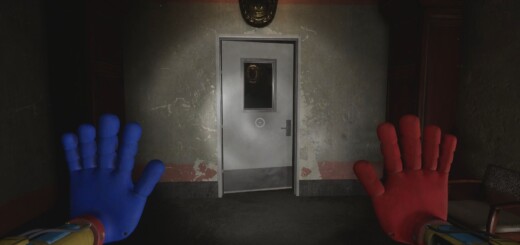
Restore Power in the School
Make your way back to the path leading to Home Sweet Home. Instead of going all the way up, turn right and take that path to reach the School. Open the door and head inside. Prepare yourself, because Miss Delight is waiting…
When you enter the School, go into the first classroom on your right. Inside you will find a Green Hand Charger. Charge your Green Hand then take it out and use it to open the gate blocking your path.
Continue forward. At the T, turn right and enter the classroom on your left. Inside grab the Battery. Take the Battery into the hall and go right. Go down the hallway until you see Gray Door. Go inside to to reach the Mechanical Room which has a Battery Puzzle to solve.
School Battery Puzzle 1
You need to find two Batteries to charge up this Green Hand Charger on the wall. We grabbed one earlier (put it in the socket) and just need one more.
Leave the mechanical room and take a right. Crawl under the desk blocking your path. Miss Delight will appear out of a room. Don’t worry, she won’t chase us… yet. Go in the door that Miss Delight came out of.
You are now in a Computer Lab. Look up and you will see an open grate on the ceiling. Stand under it and hook up to pull yourself into the vent above. Crawl forward until a hole leading down. Drop down and grab the Battery from in the cage.
Look up and hook yourself back up into the vent. Go to the other side of the vent (not the side you came from). Crawl forward and you will drop into the Mechanical Room. Slot the Battery in the remaining Battery Socket to charge up the plug.
Charge your Green Hand then run out of the room. Go right, crawl under the desk again, but this time head left (instead of going in the Computer Lab). You will see a Green plug beside a gate. Power it up to open the gate.
Deeper Into the School
Go through the room with the tv and open the door on the other side. Turn right. You will see a closed gate blocking your path. This gate can only be opened with a Battery.
Turn left at the gate and go into the room. You will see an open vent on the ceiling. Go up into this vent. Crawl through the vent until you reach the next room.
In the next room you will see a Green Hand Charger on the wall. Charger your hand and go out the door. Use the charger on the plug by the gate in front of you. This opens the gate. Go through this room into the Generator Room.
Inside shoot the plug on your left. Wrap around the pole and then shoot the plug marked 2 to complete the circuit. This powers up the generator.
Miss Delight Chase
Completing the circuit powers up the generator and causes Miss Delight to appear in the room. She destroys the generator and a Battery appears! Grab it and run!
Completing the Miss Delight chase is a bit hard to explain so I’ve linked a video of myself doing it above from Hold To Reset’s YouTube Channel.
The most important thing to remember is that Miss Delight only moves when you are not looking at her. Use this to your advantage and if you need to take a break and regroup!
Once you complete the chase sequence you will drop a shutter on her, killing her. This ends the School sequence and triggers a new objective to Find a Way Back to the Dome.
Find a Way Back to the Dome
Walk down the corridor to the very end. Grab the Flare Hand from the shelving beside the Hoppy Hopscotch cardboard cutout. This hand allows you to shoot flares!
Make your way into the caves. Walk onto the scaffolding. You will see a closed shutter that requires a Battery to open. Turn and look right. You will see a Battery on a ledge. Use your hand to grab it. Put it into the Battery Socket to open the shutter.
Walk forward through the caves. Use your Purple Hand on the launchpads to clear the gaps you encounter. As you progress you will reach a dead end section with broken walkways above you.
Power up your Green Hand on the charger and use it on the plug to power up the Purple Hand pads. Launch your way up the Purple Hand Launch pads on each catwalk to reach a catwalk way above you. Go forward on this catwalk then drop down to reach a power puzzle.
Caves Power Puzzle
To complete this power puzzle you need to setup four sections of Turrets and power poles. The setups below are in the order you encounter them. Do it like I do to complete the puzzle:
Setup 1: Turret & Pole
Have the first pole and turret positioned like this.
Setup 2: Pole
Setup 3: Pole
Setup 4: Pole
Once you’ve setup the poles and turret as shown, stand in the elevator and then shoot the turret. It will complete a long circuit that will reach the plug, powering up the elevator. Ride the elevator up.
Follow the catwalk path forward until you reach a door to the Playhouse. Open it using your Blue Hand. Head inside to enter it.
Playhouse
The Playhouse is one of the more annoying sections in the chapter. It is a large maze you need to go through while Smiling Critters spawn from various places and try and attack you. The Critters can be scared away by shooting them with the Flare Gun Hand.
Maze
Getting through the maze is a bit annoying to explain. I recommend following the video I linked above. This video does a good job of showing the way to go and how to complete the platform puzzle at the end.
Once you complete the maze section you will arrive at some stairs. Go down them to reach a swimming pool area. Go through the swimming pool area to reach some jail cells. In the last cell, you will find DogDay hanging there.
DogDay is conscious and will talk to you. As he is speaking critters will appear and will crawl inside of him. He will turn evil and will begin to chase you.
DogDay Chase
Like the Miss Delight chase, the DogDay chase is a bit hard to explain. The video above shows me completing it. Use it for your reference. This chase is pretty hard to complete. The failure window is pretty short. Only a few mistakes will end your run. Keep trying though!
After you complete the chase with DogDay ride the elevator up. Go through the next room and enter the slide. You will arrive back in the dome.
Restore Power in the Counselor’s Office
Back in the dome Ollie will contact you. He wants you to restore power in the Counselor’s Office now since turning the power on in the School was a failure.
Make your way back under the statue. Grab the Counselor’s Office Key (exact same process as the other keys). Leave and make your way to the Counselor’s Office building (it is the Roman looking building by Toys). Enter the building.
Battery Puzzles

Go forward in the building until you reach a powered down door that needs a Battery. Jump up on the red chair and look in the vent. There is a Battery inside. Grab it and put it into the Battery Socket to open the door.
Head into the next room. You will need to find a Battery to open the next door. This is simple. Stand in this room and pull the Battery out of the socket we used to open the first door. Place it in the new socket to open the next door. Continue forward.
Go to the very end of this hallway. You will see a hole in the wall. Look through the hole. You will see a Battery besides a socket. Grab the Battery. Take it back down the hall and slot it into the Battery Socket by the door.
Make your way down the hallway that has Help written on it. At the end, look up, and go up into the vent. Drop down and use your Purple Hand on the launchpad to cross the gap.
Caves Power Puzzle 2
You will end up in the Caves again. You need to complete a power puzzle here to advance further, and get back into the office. To complete this puzzle:
- Walk forward on the catwalk and stand on the not active launchpad
- Look up
- Pull yourself up to the next level
- Attach to the plug behind the ladder
- Wrap around pole
- Use launchpad to jump across
- Unattach
- Shoot plug from lower platform (with pole on it)
- Wrap around pole
- Use launchpad to jump across gap
- Pull yourself up to next level
- Wrap around pole
- Attach to socket
Completing this puzzle causes platforms to raise, allowing you to platform your way to another Office entrance. Go into the Office now.
Make your way into the Office area. Follow the path. You will encounter a locked door. We need to find the key to this door. Continue forward until you reach the Head of Playcare’s office.
Where to Find the Counselor’s Office Key

Go inside the office. In the ceiling you will see a vent. Open the vent. When you open it the Counselor’s Office Key will fall to the ground. Pick it up and add it to your inventory.
Make your way back to the locked door. Use the key to open it. Follow the path forward until you reach a dead end with a hole in the ceiling. Look up and pull yourself up to the vent there. Make your way through the vent.
At the end, equip the Gas Mask and open the vent, so you drop to the floor below. This next section is fairly annoying to complete as it is very hard to see.
Counselor’s Office Offices Puzzle
When you drop down look for a hole in the wall. You will see a Battery in a Battery Socket. Grab the Batter. Place it into the socket besides the Head of Home, Sweet Home’s office door and Green Hand Charger. This will open the door.

Go into the office. Inside open the fuse box to reveal a Green Hand plug. Do this process for all of the other offices (go in and open the fuse box to reveal the plugs). There are three total.
Once the plugs are revealed. Stand outside and charge your Green Hand. Use the charges to turn on all three plugs. This will open the door leading outside to… another puzzle!
Outside Turret Puzzle
The outside puzzle is fairly complicated to explain. The video above does a good job showing how to complete it. As you can see there are many parts to complete to open the Shutter above you next to the elevator.
Upon completing that puzzle you will get a new objective to return to the dome. Use the vent above the pipes reach a new area of the office.
CatNap Dream
In the next area go forward until you find reach an office with a Battery in it. Pick up the Battery and double back. As you are going back you will trigger a scripted interaction with CatNap.
CatNap will attack you and will knock you back into the gas where you will trigger a dream sequence. During this sequence you see various memories of the kids in Playtime Co.
Complete the dream sequence and you will wake up back in the office. Grab the Battery and place it into the Battery Socket to return to the entrance of the building. Head outside.
Route the Power From the Counselor’s Office
Outside Ollie will call you. He needs you to route the power from the Counselor’s Office. Grab the plug (it is illuminated at the bottom of the stairs leading up to the building). Take it to under the statue and plug it in.
Route Power from the Skydome
Ollie will give you another key. Grab the Sky Dome Key. The Sky Dome is referencing the fusebox that Poppy used to access the elevator (it is beside Home Sweet Home). Go there, open the fuse box and grab the cable. Take it to under the statue and plug it in.
Use the Blue Power Cell in the Gas Production Zone
Ollie will drop a huge Blue Power Cell Battery for you through the pipe. Grab it and then go to the Gas Production Zone.
In the zone take it to the Blue Battery Socket. When you go to put it in CatNap will appear and will begin to chase you.
Run to the elevator on the other side of the room. Push the yellow button on the outside and then get on it. Push the yellow button on the inside to go up to the Safe Room.
Walk to the middle of the Safe Room. When you enter the area with a bunch of Battery Sockets and a control console, you will get a new objective to Survive! This begins the boss fight with CatNap.
CatNap Boss Fight (Survive)
The CatNap boss fight is fairly simple to complete. You need to stand in the center room and gradually power up the center console by placing Batteries into the four Green Battery Slots.
You can only slot one Battery at a time, and the timer stops when a Battery is fully used. This process takes about 3 Minutes to complete.
While you are powering up the console CatNap and phantom CatNaps will attempt to stop you by coming down the different corridors and through the roof hatch. For the phantom CatNaps you can shoot them with your Flare Hand to make them disappear.
You need to keep CatNap and his phantoms at bay to survive. This is done by using the steam traps around the room (via powering the Battery Sockets) or powering up Green Plugs. If he comes through the roof hatch, simply pull it shut on him,
How to Kill CatNap
After you’ve fully charged the center console, the Green Charger above it will become active. Use your Green Hand on it. This will trigger a sequence where CatNap attacks. Shoot CatNap with your charged Green Hand to kill it. A cutscene will then play.
Escaping the Playcare
Upon defeating CatNap, make your way back to the elevator and ride it down into the Gas Production Zone area. Ollie will call you.
Walk across the room to the Blue Power Cell Battery. Pick it up and slot it in the Blue Battery Socket. Push the Red Button on the console.
Go to the huge center console and push the big Red Button. This will power up everything again.
Meet Poppy and Leave
You will get a new objective to meet Poppy in the Hatch Room. The Hatch Room is to the left of the console.
When you enter the room, Poppy will start speaking to you. She will tell you that you deserve answers. She will then play you The Hour of Joy VHS Tape.
After the tape plays, Kissy Missy will come in and pick up Poppy. She will put her on the elevator. Join Poppy on the elevator. It will go down. As it is going down Kissy Missy will scream. This ends Chapter 3 and is where Chapter 4 starts!
Replay Encounters
Completing Chapter 3 unlocks the ability to replay encounters (good if you missed things). This option appears on the chapter’s Main Menu screen. You can replay the following:
- Intro
- Cable Car Ride
- Gas Production Zone
- First Dream
- Home Sweet Home
- Kissy Poppy
- Miss Delight Chase
- Bridge
- Smiling Critters
- Counselor’s Office
- Catnap Chase
- Catnap Fight
Looking for more Poppy Playtime guide? We’ve got you covered. Check out our Poppy Playtime guide hub for all the guides you need to complete the game!
Was our Poppy Playtime Chapter 3 Deep Sleep guide and walkthrough helpful? Let us know in the comments below! Be sure to share it with your friends! Thanks for reading.
Could you guys make this like the Chapter 1 and 2 guides? Like where all the collectibles are listed in the guide itself so you can complete them as you progress naturally through the game? That’s the best part about the other guides, that I don’t have to switch back and forth between the list and the playthrough.