Odogaron Guide: How to Hunt, Defeat, and Craft Gear
As you delve deeper into the ominous landscapes of the Rotten Vale and Coral Highlands, you’ll come face to face with Odogaron, a fearsome Fanged Wyvern renowned for its ruthless speed and voracious appetite. This Odogaron guide will equip you with the knowledge and strategies needed to triumph over this challenging adversary, crucial for progressing through “Into the Bowels of the Vale” in the Monster Hunter: World storyline.
Understanding Odogaron
- Difficulty: Expert (5⭐)
- Location: Rotten Vale, Coral Highlands
- Size: Large
- Species: Fanged Wyvern
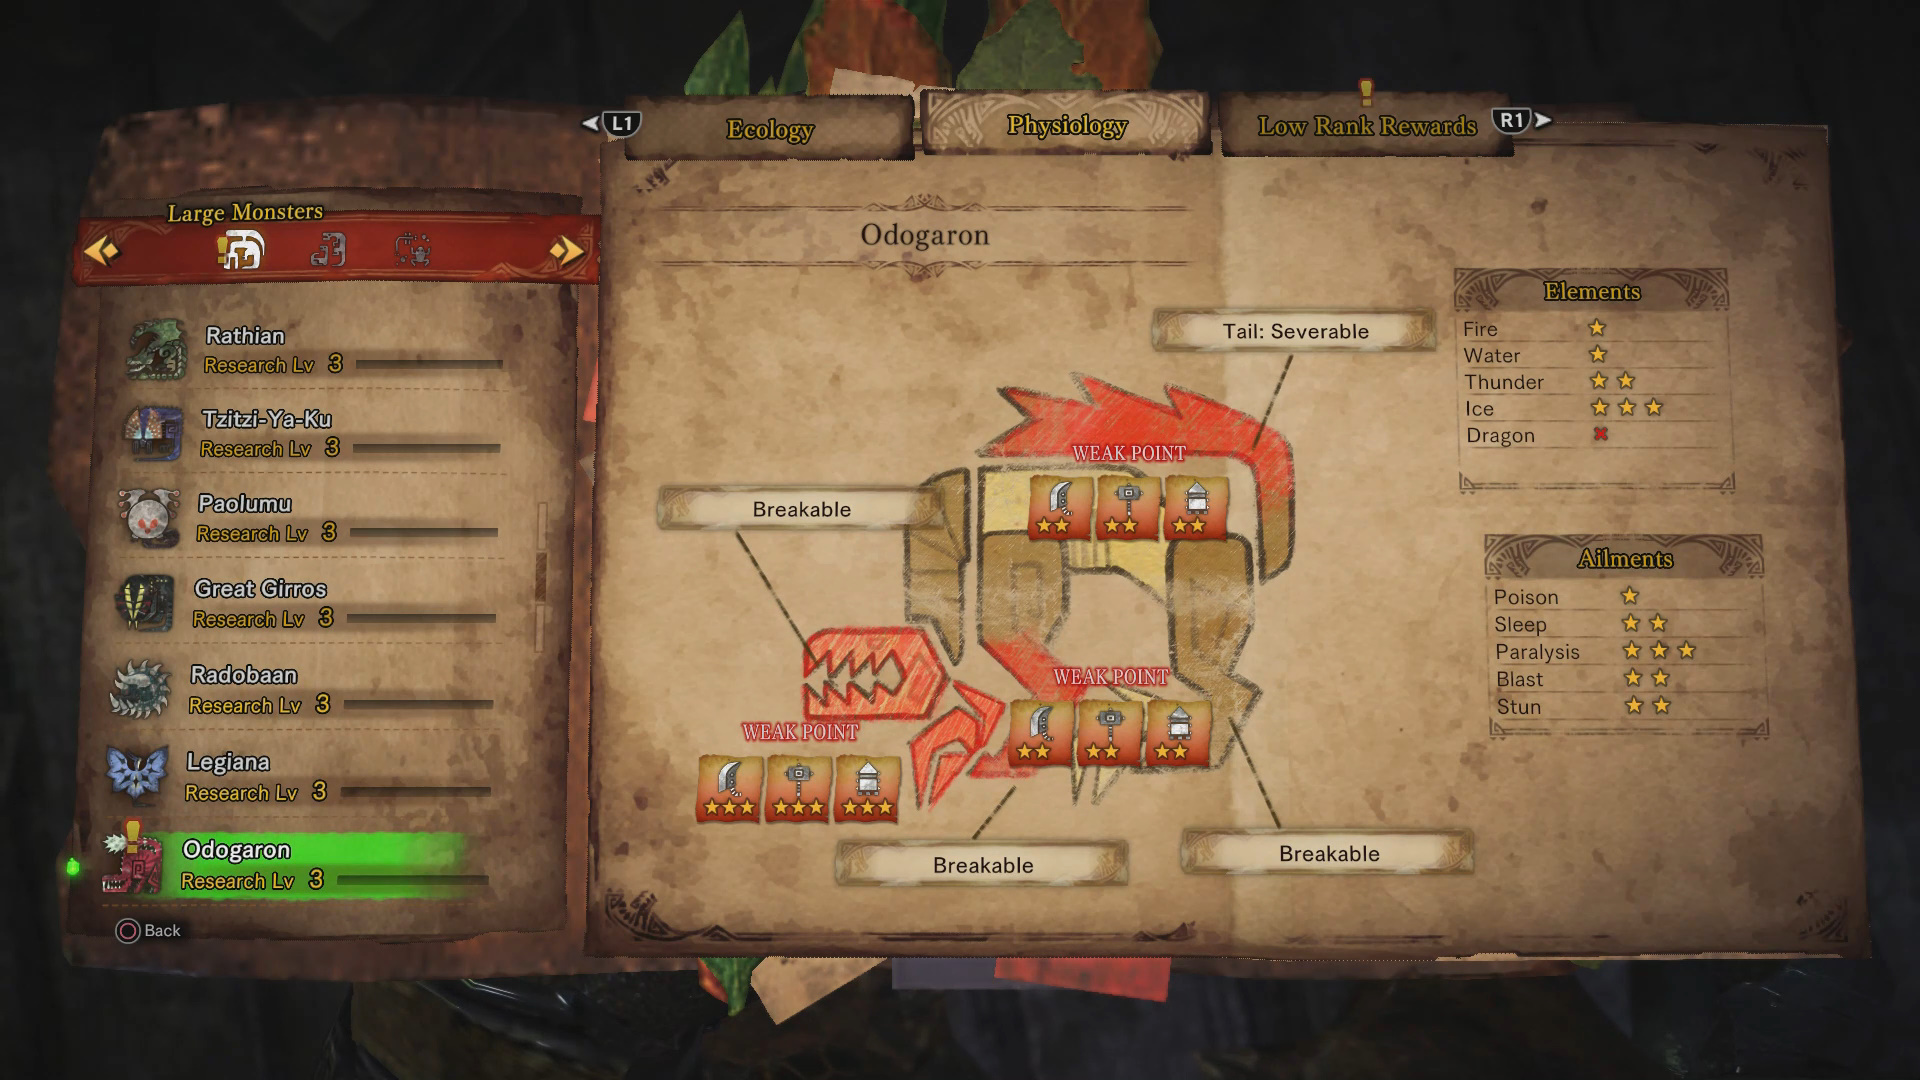
- Weaknesses:
- Ice (3⭐)
- Thunder (2⭐)
Breakable Parts: Tail, Head, Front Legs, Back Legs (all serve as weak points)
Harvesting Rewards
Low Rank Drops
- Scale (5⭐)
- Sinew (4⭐)
- Claw (4⭐)
- Fang (3⭐)
- Nourishing Extract (3⭐)
- Monster Bone+ (3⭐)
- Tail (2⭐)
- Plate (⭐)
High Rank Drops
- Scale+ (5⭐)
- Sinew+ (4⭐)
- Claw+ (4⭐)
- Fang+ (3⭐)
- Gem (⭐)
- Monster Hardbone (3⭐)
- Nourishing Extract (3⭐)
- Tail (2⭐)
- Plate (⭐)
Battle Mechanics and Tactics
Key Mechanics
- Roar: Disrupts your actions temporarily; later armor perks can help.
- Bleeding: Induced by claw attacks, curable with Astera Jerky or by crouching for 10 seconds.
Attack Patterns
- Jump: Closes the gap quickly.
- Smash: Brings down force from above.
- Claw Swipe: Close combat melee.
- Tail Whip: Watch your back.
- Lunge & Bite/Swipe: Aggressive frontal assaults.
- Leap Strike & Return: Strikes then retreats.
- Wall Jump: Uses walls for aerial attacks.
Combat Strategy
- Preparation: Stock up on traps to manage Odogaron’s agility.
- Approach: Opt for a hit-and-run style; don’t stay in one spot too long.
- Exploit Openings: Odogaron tires after combo attacks, perfect for counterattacks.
- Counter Bleeding: Keep Astera Jerky handy.
- Gear: Weapons with Ice or Thunder elements can give you an edge.
Crafting the Odogaron Armor
Odogaron Set (Rarity 4)
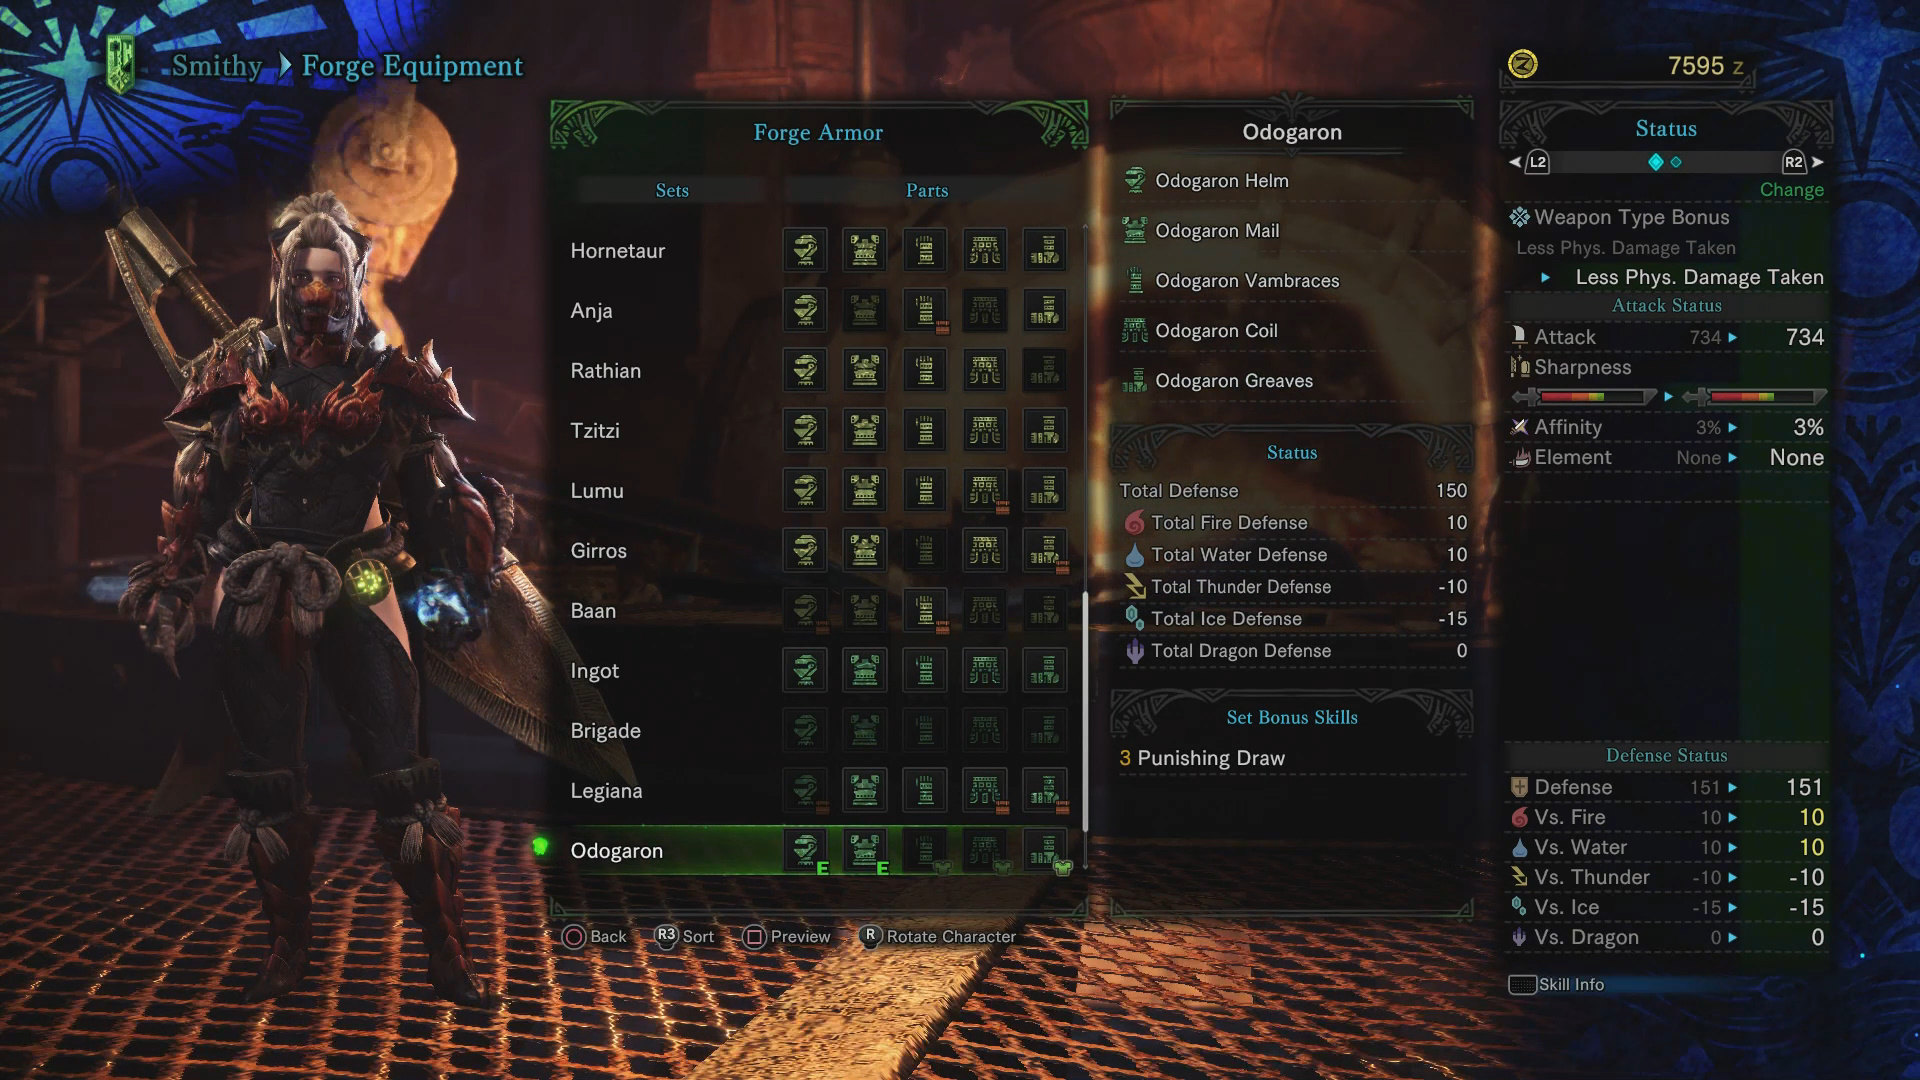

- Helm: 2x Scale, 1x Sinew, 1x Claw, 1x Warped Bone
- Mail: 2x Sinew, 2x Scale, 1x Fang, 3x Hornetaur Shell
- Vambraces: 2x Sinew, 2x Scale, 1x Tail, 2x Hornetaur Wing
- Coil: 3x Sinew, 2x Claw, 2x Fang, 1x Plate
- Greaves: 2x Scale, 1x Sinew, 1x Claw, 2x Dragonite Ore
- Set Bonus: Odogaron Power (Punishing Draw)
Odogaron α+β Set (Rarity 6)
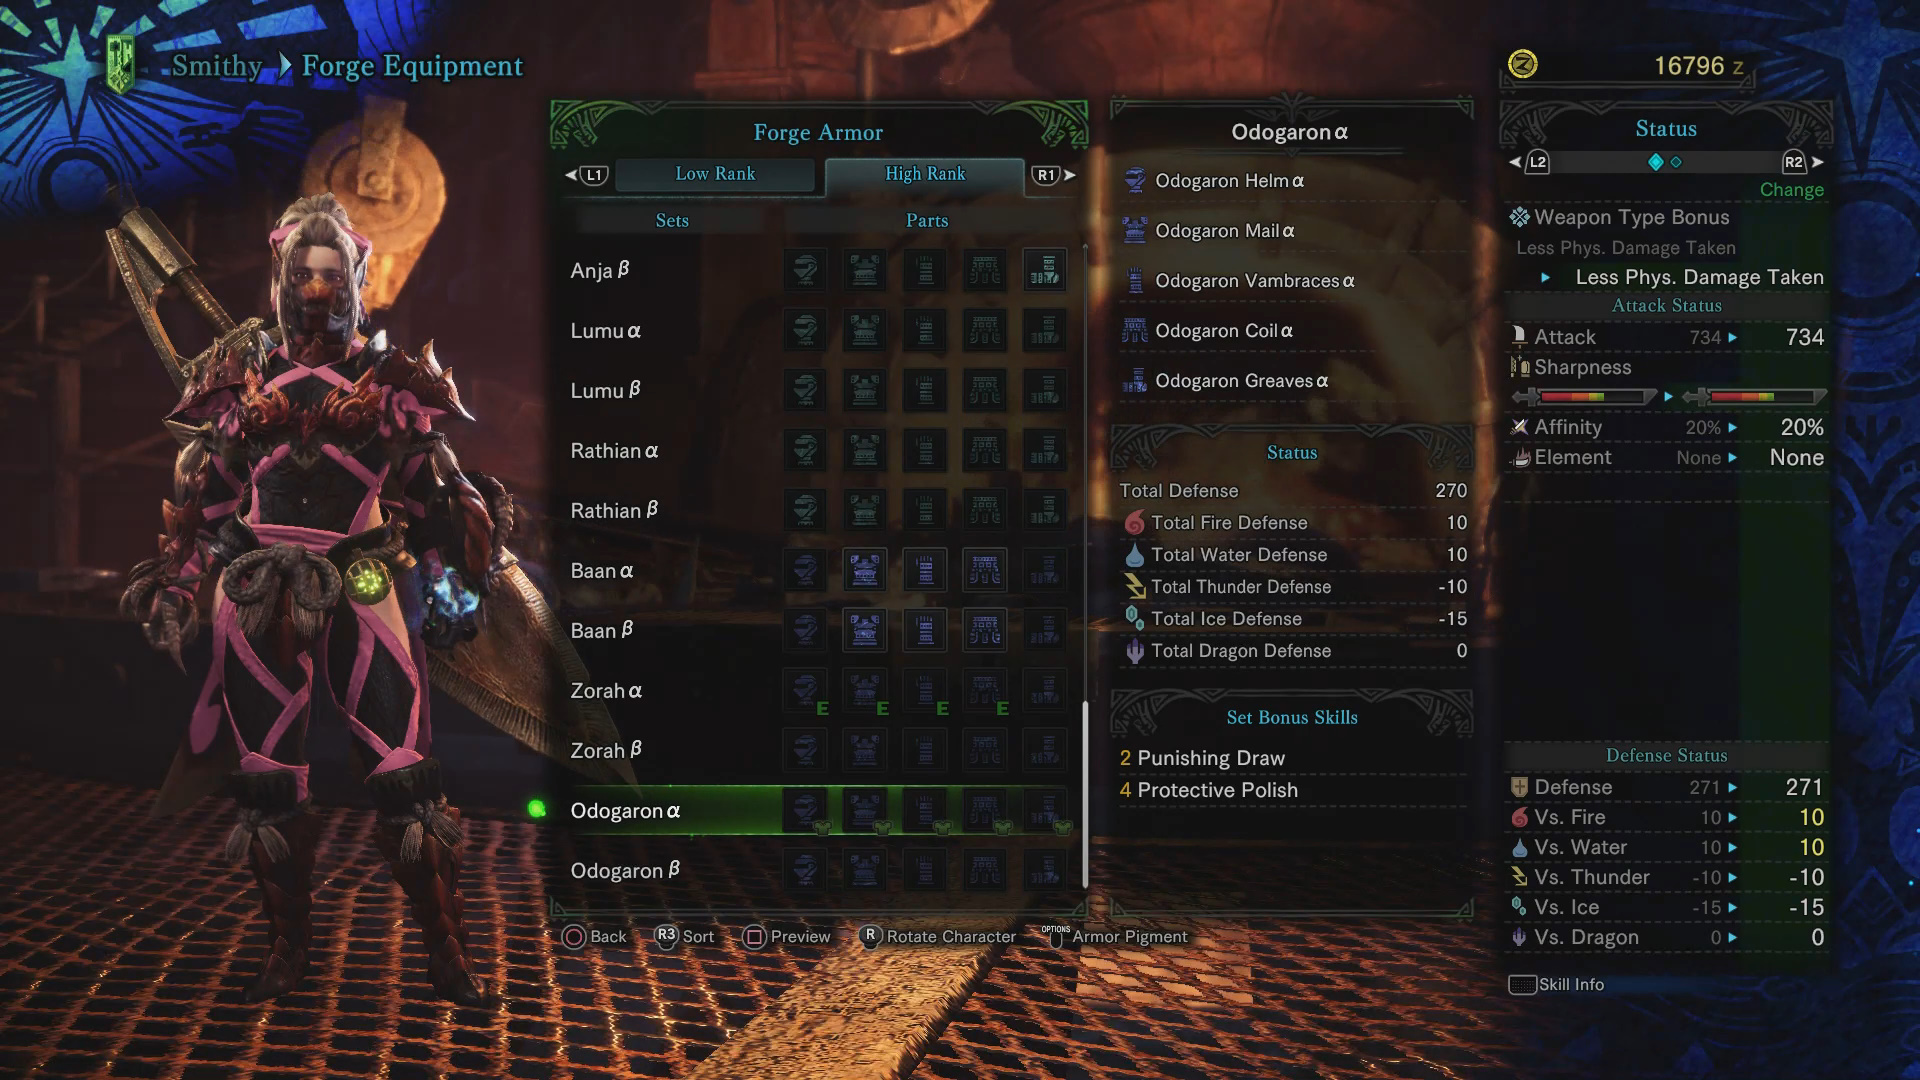

- Helm: 4x Scale+, 2x Sinew+, 2x Claw+, 3x Warped Bone
- Mail: 4x Sinew+, 4x Scale+, 1x Plate, 5x Hornetaur Carapace
- Vambraces: 4x Sinew+, 4x Scale+, 2x Tail, 4x Hornetaur Wing
- Coil: 6x Sinew+, 4x Claw+, 2x Fang+, 1x Gem
- Greaves: 4x Scale+, 2x Sinew+, 2x Fang+, 6x Monster Hardbone
- Set Bonuses:
- 2 Pieces: Odogaron Mastery (Punishing Draw)
- 4 Pieces: Odogaron Mastery (Protective Polish)
Outfitting Your Palico

- Chainblade: 1x Claw/Claw+
- Helm: 1x Scale/Scale+
- Mail: 1x Sinew/Sinew+
With Odogaron now under your belt, your journey through Monster Hunter: World continues to deepen. Next up, you’ll face the ethereal and challenging Diablos in the sandy expanses of the Wildspire Waste. To ensure you’re prepared for this underground terror, check out our comprehensive Diablos guide, where we delve into strategies, weaknesses, and how to craft gear from this formidable foe.
Thoughts on our Odogaron guide? Drop them in the comments below.
The Beta set is insane. I want it.