Wall of Holy Prohibitions – Blasphemous Guide
Once you’ve made your way across the Archcathedral Rooftops you will arrive at an area called the Wall of Holy Prohibitions. This area is crawling with enemies, so be prepared to fight. Use the Wall of Holy Prohibitions guide below.
Wall of Holy Prohibitions Map
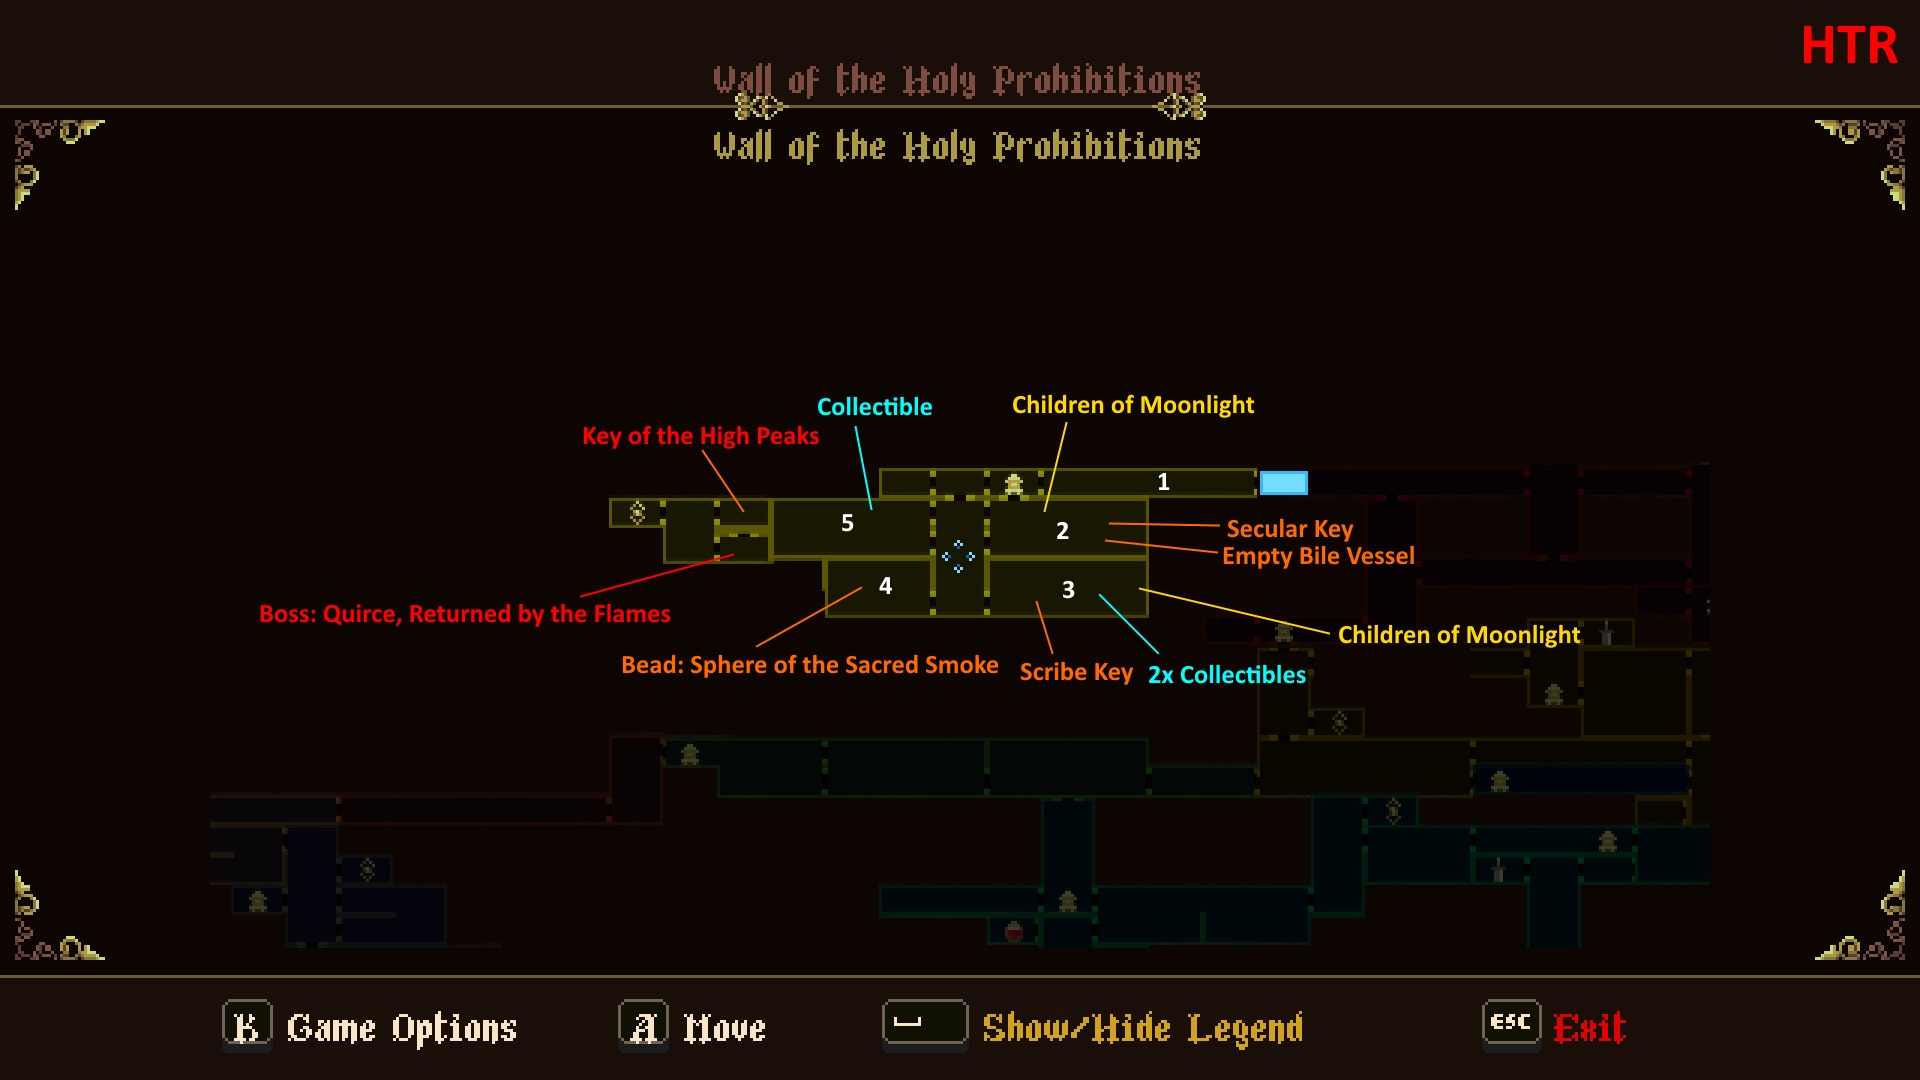
The Wall of Holy Prohibitions is relatively small, but features a number of confusing mechanics such as doors which make exploration difficult. Consult the map above to get an idea of the area layout.
Room 1

When you enter the Wall of Holy Prohibitions, you will run across a sandy exterior area. While running you will be jumped by not one, but two Warden of the Silent Sorrow enemies. You will need to take them out before advancing. Thankfully you are much stronger than the start of the game, so they shouldn’t cause you very much trouble. Once they are dealt with continue left into the building.
Room 2
Upon entering the building you will run smack dab into a Prie Dieu kneel at it then descend the ladder into the next room. This room is basically the general layout of the rooms in this area. You will enter the room and see a number of cells. These cells can be opened using different keys (Secular, Scribe, and Inquisitor). Chance are good you have none of these keys. To help figure out what to do, here’s what’s in every cell in Room 2:
First Floor:
- Cell Left of Entrance Ladder (Secular): Children of Moonlight.
- Cell Right of Entrance (Scribe): Collectible: Temporal of Joel, the Thief.
Middle Floor:
- Cell Left of Lift (Open): Go in here to get the Secular key. You will fall through the floor going towards the item on the left. After you fall the key is right there. Item on left side above is the Ulna of Koke, The Troubadour.
- Cell Left of Cell Above (Inquisitor): Leads to a chest containing Empty Bile Vessel.
Bottom Floor:
- Cell Left of Lift (Open): Where you come out of after getting Secular key.
- Cell Left of Cell Above (Secular): Head through this door to reach the next room, Room 3.
Room 3

Head down the stairs in this stairway room and make your way down the ladder and into the room on the right. This is Room 3, another cell area. As I did previously, here’s what inside each cell.
Bottom Floor:
- Cell Left of First Lift (Scribe): Children of Moonlight.
Top Floor:
- Cell Left of First Lift (Secular): Scribe Key.
- Cell Right of Second Lift (Scribe): Hamate of Vukelich, the Copyist.
Before you leave trigger the secret wall on the left side of the first lift to get the Phalanx of William, the Septic. Once you’ve cleared this room make your way back to the staircase and head to the left exit.
Room 4

Head to the left inside this room and trigger the switch. Get on the lift and ride it up. Enter the cell here. Make your way through the cell to reach higher up in the room. Slide under the wall and fall onto the lift below. Jump over the switch and pull it. Immediately jump back onto the lift to rise up. It will stop. Slide through the wall on the right to reach the Rosary Bead: Sphere of the Sacred Smoke. Head back to the stairway room and head up the left side.
At the top of the left staircase equip your Relic: Blood Perpetuated in Sand to reveal a couple of platforms leading up. Jump up the platforms and hit the Gate opener to open a shortcut back to Room 2. Drop back down and enter the door to your left.
Room 5
Walk along left along the bottom of this room and trigger the lever here. Wait for the lift then trigger the lever again and board it. Ride it up halfway and jump off to the right. Enter the cell here to get the Collectible: Phalanx of Zeth, the Prisoner. Return to the previous room and ride the lift up all the way this time. Head to the right and enter the first cell. Make your way through the cell to reach a gate switch. Destroy it to open the gate above.
Return to the floor above and head to the right. If you have the Key of the Inquisitor you can open the right door before the right exit. Regardless head to the room to the right and take the ladder up. You will be outside. Head to the right to enter the building again. You will be beside the Prie Dieu at the entrance. Hit the gate switch to gain access. Return to Room 4.
There’s only one cell left in Room 4 for us to explore and it is located to the left of the lift on the top floor. This cell is home to a boss fight, so be ready.
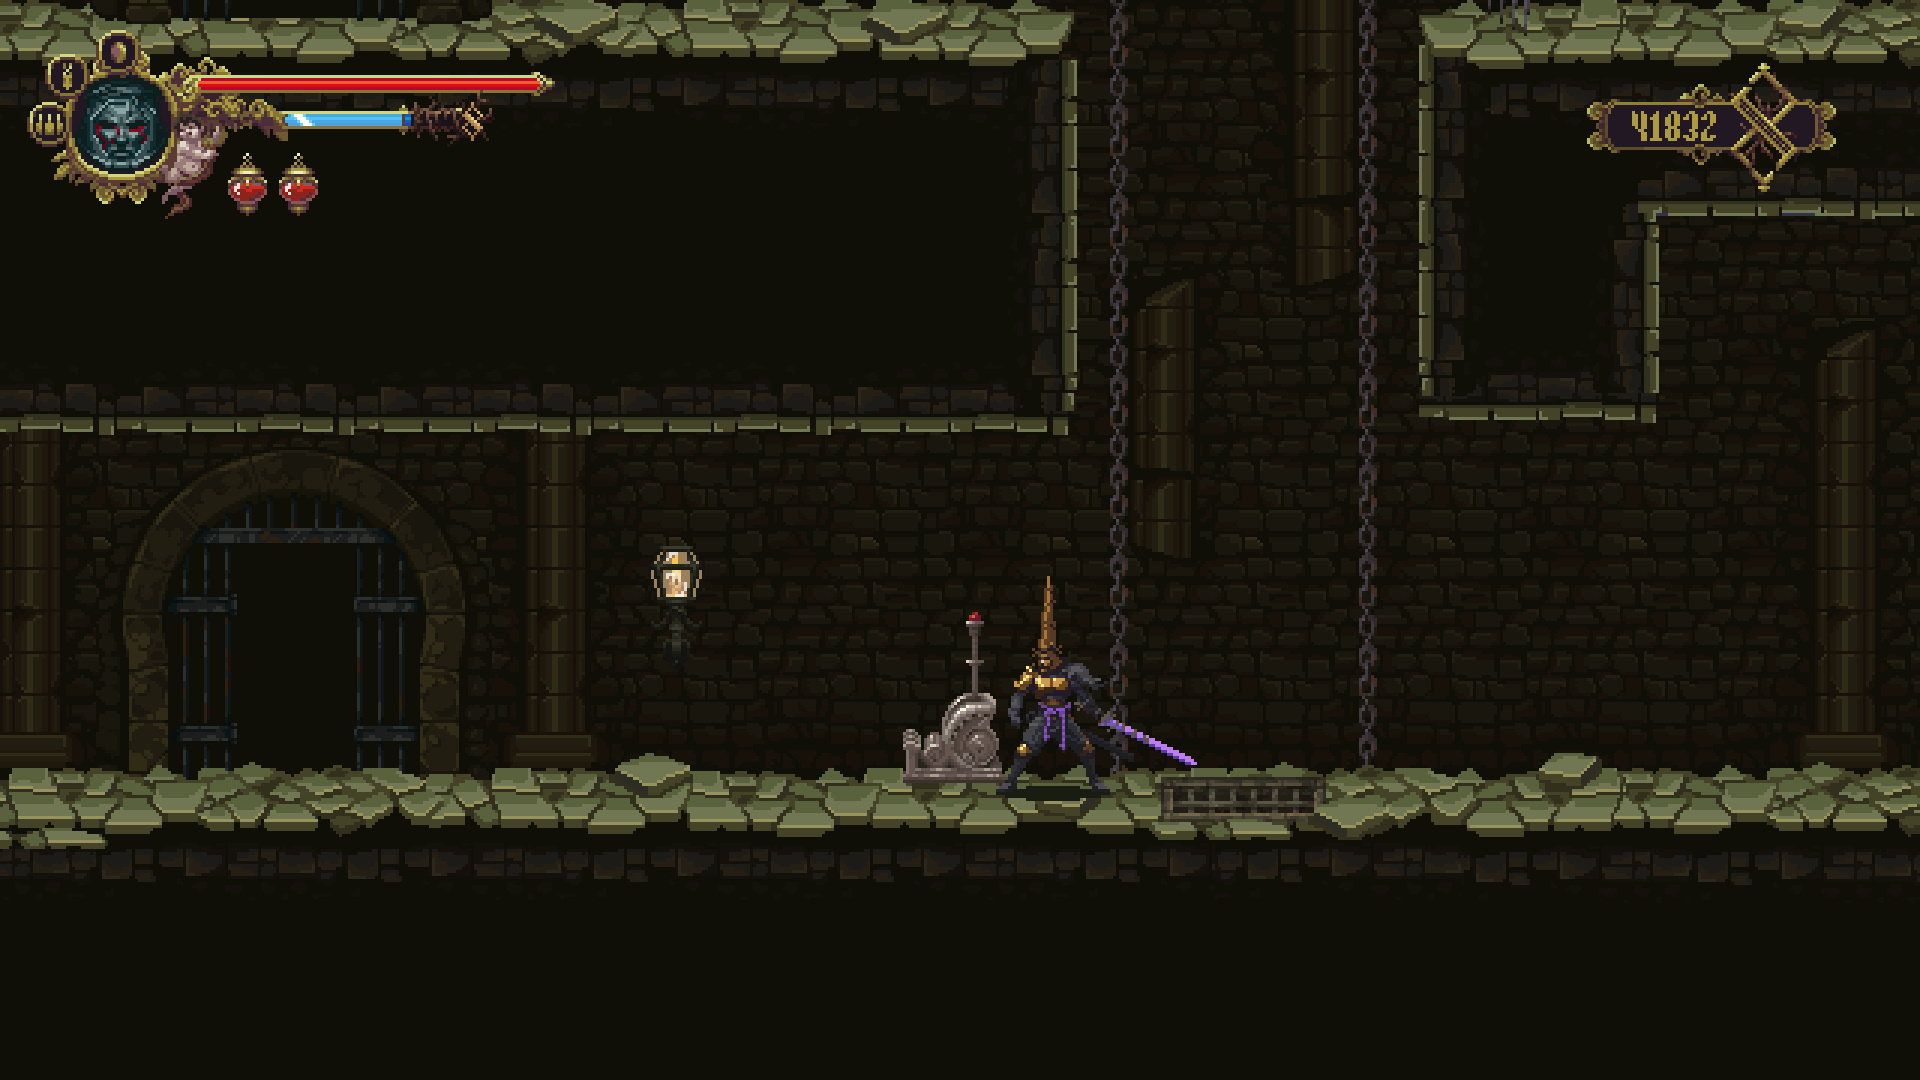
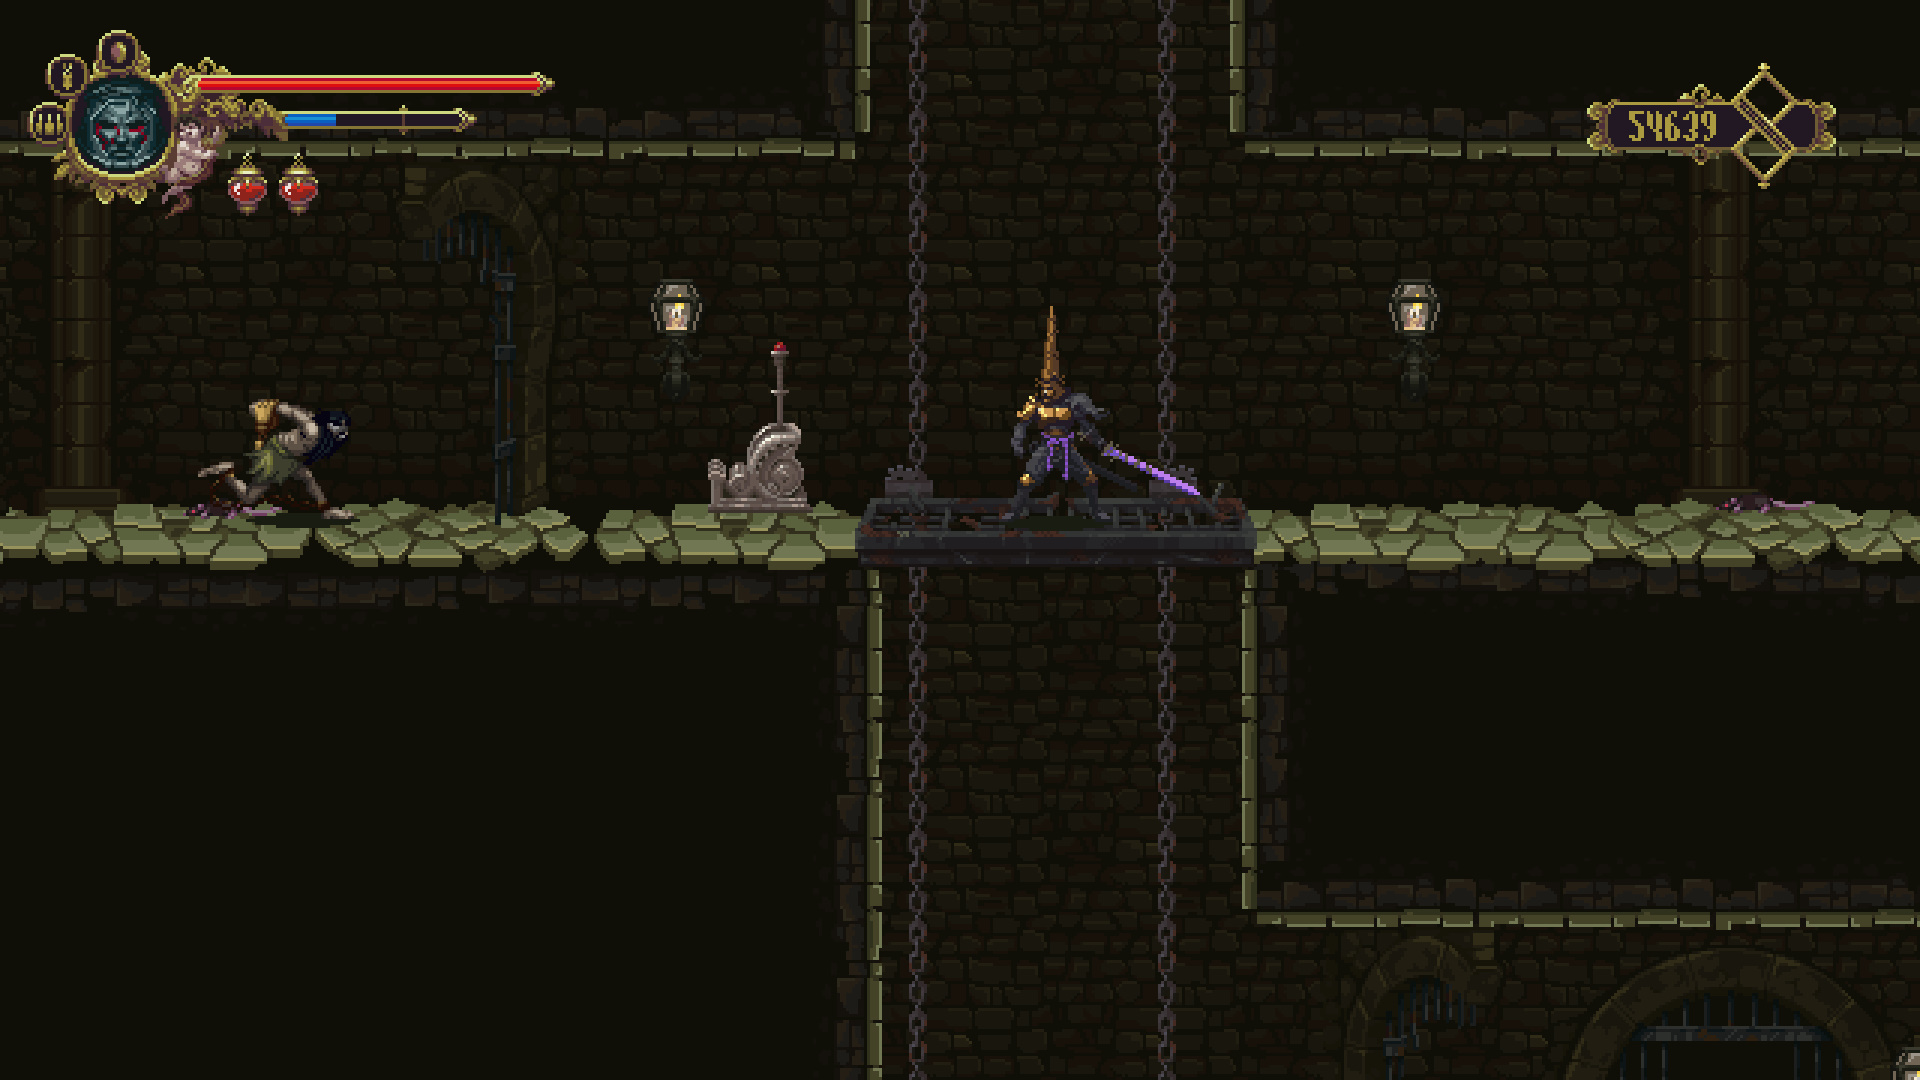
Boss Fight: Quirce, Returned By the Flames

The boss you will face here is called Quirce. As the name suggests he likes fire. You will fight him in the basement of the cell after he throws his sword up at you. This fight is a bit tricky as Quirce is fairly fast. Here are the moves I noticed he uses:
- Dash: Quirce charges up and dashes across the room. After the dash he fire cyclones will spawn behind him.
- Spinning Sword: Quirce throws his spinning blade which bounces from across the room.
- Sword Throw: At any point Quirce may throw his sword at you. It will stick in the wall. Quirce will then attack you without his weapon using a sort of flaming teleportation attack.
- Spinning Sword Throw: When Quirce goes to the ceiling he does a spinning sword throw which travels the entire outline of the room.
Defeating Quirce unlocks the Ashes to Ashes achievement along with 15K TOA. Once you’ve downed this boss head out of the boss room to the left. Speak with Degracious if you feel like learning a bit about Quirce then head up and right. You will end up back at the top of the boss room. Grab the Quest Item: Key of the High Peaks. Head to the exterior area and head to the left. Get on the lift and use the key to go to the Convent of Our Lady of the Charred Visage
You missed another secret in room 4. There is a secret wall behind the left on the bottom floor that leads to the Jaw of Ashgan, the Inquisitor. You need the key of the inquisitor, Three Gnarled Tongues, Blood perpetuated in Sand, AND the Silver Lung of Dolphos.
There’s an item behind a closed door in room 2 (on the right side, halfway up the elevator). How do you open the door?
Figure it out, just ride the elevator up and down a few times and it will open.
Quirce’s rosary bead is behind the locked gate in the middle level. If you use the Shroud of Dreamt Sins on the corpse below he mentions “up and down, up and down… Why would anyone want to use it so much.” I spammed the lift several times from above and below and it eventually opened, but I’m not sure if there was an exact sequence I stumbled upon or just some arbitrary number of activations to get it to open.
Para abrir la puerta cerrada, hace con el mecanismo del ascensor arriba, abajo, arriba, abajo y luego sube para conseguir la cuenta calcinada de quirce
How do you get to the chest in room 2? Guide says cell above cell but cant find any route..
There’s an illusory wall to the right of the chest
You can buy Inq key from a shop keep in Sleeping Canvases right before the shortcut that connects it to Mercy dreams. You will see a blue glow in middle of room, interact with it and you’ll get into her shopkeep, it costs 9999 TOA. It is dirrectly the opposite of Sleeping Canvases’ boss fight and elevator that leads back into the Library of Negated Words.
Plese, where can I find the Inquisitor Key?
You buy it from the shopkeeper in The Sleeping Canvases (second room from the left), it costs 9999 TOA.