Uragaan Guide: How to Hunt, Defeat, and Craft Gear

When you reach the High Rank area of Elder’s Recess in Monster Hunter: World, one of the first challenges you’ll face is Uragaan. This massive Brute Wyvern is a more dangerous version of Radobaan, now covered in metal ore rather than bone. With its explosive ore and strong defensive abilities, Uragaan can make for a tough opponent. In this guide, we’ll break down everything you need to know about fighting Uragaan, from its attacks and mechanics to battle tips and the rewards you can earn.
Uragaan Overview
- Difficulty: 7⭐
- Location: Elder’s Recess (High Rank Only)
- Size: Large
- Species: Brute Wyvern
- Weak To:
- Water (3⭐)
- Dragon (2⭐)
- Ice (2⭐)
Breakable/Severable Weak Points:
- Tail (Weak Point)
- Head (Weak Point)
- Stomach (Weak Point)
Uragaan Materials (Carves & High Rank Rewards)
- Scale+ (5⭐)
- Carapace (4⭐)
- Scute (4⭐)
- Marrow (3⭐)
- Ruby (1⭐)
- M Hardbone (3⭐)
- Firecell Stone (2⭐)
- Inferno Sac (3⭐)
- Jaw (3⭐)
- Lava Nugget (Special Item)
Characteristics
Uragaan is a large Brute Wyvern that feeds on ore and uses its massive jaws to crush rock. It is highly territorial and often competes with Lava Soths. In battle, Uragaan is known for using explosive ore and has a tough, armored shell made of rock.
Key Fight Mechanics
- Ore Armor: Uragaan is covered in a tough outer shell made of ore. To deal serious damage, you need to either knock Uragaan onto its side or wait for it to fall over on its own. Once on its side, you can mine the ore for additional materials.
- Exploding Ore: Uragaan will scatter explosive rocks across the arena, which can be triggered by certain attacks or by the hunter running into them. Be cautious when moving around to avoid these deadly explosions.
- Sleep Gas: Uragaan can release sleep gas, causing the hunter to fall asleep and take more damage. You can wake up by being hit by a monster, another player, or waiting until the sleep effect wears off.
- Roar: Uragaan can roar to disrupt the hunter’s actions, briefly stunning them. This can be dangerous if you are in the middle of a combo or healing.
Uragaan Attacks
- Roll (Vertical): Uragaan can roll around the arena, similar to Radobaan. This attack can cause significant damage if you’re caught in its path.
- Slam: The Uragaan will rear up and slam its upper body into the ground, creating a shockwave.
- Tailwhip: A quick 180-degree spin with its tail that can hit the hunter both in front and behind.
- Jump: A gap-closing leap that brings Uragaan directly towards the hunter.
- Head Attacks: Uragaan uses its head for both vertical and horizontal attacks to deal damage.
- Exploding Ore: While performing its attacks, Uragaan sheds explosive ore. If triggered, these can cause massive damage.
Battle Tips
- Eat Before the Fight: Make sure to eat a meal at the Canteen to gain buffs that can make the fight easier.
- Avoid the Sleep Gas: Stay out of the range of Uragaan’s sleep-inducing gas to avoid falling asleep and being vulnerable.
- Stagger During Rolling: Hitting Uragaan during its roll attack will cause it to fall over, revealing its weak underbelly. Take advantage of this opportunity to attack.
- Exploit Water Elemental Weapons: Uragaan is weak to water, so consider using water-based weapons to exploit its elemental weakness.
- SOS Flare: If you’re struggling, consider sending out an SOS flare to get help from other players in the community.
Uragaan Armor Sets
Uragaan α+β Set (Rarity 7)


- Helm: 4x Scale+, 2x Carapace, 4x Lava Nugget*, 1x Firecell Stone*
- Mail: 6x Carapace, 3x Scute, 2x Jaw, 1x Uragaan Ruby
- Vambraces: 4x Carapace, 4x Scale+, 1x Marrow, 4x Lava Nugget*
- Coil: 4x Scale+, 2x Carapace, 5x Fucium Ore*, 5x Monster Hardbone*
- Greaves: 4x Carapace, 4x Scale+, 2x Scute, 5x Gastodon Carapace*
Set Bonus (3+ pieces):
- Uragaan Protection (Guard Up): Allows you to guard against ordinarily unblockable attacks.
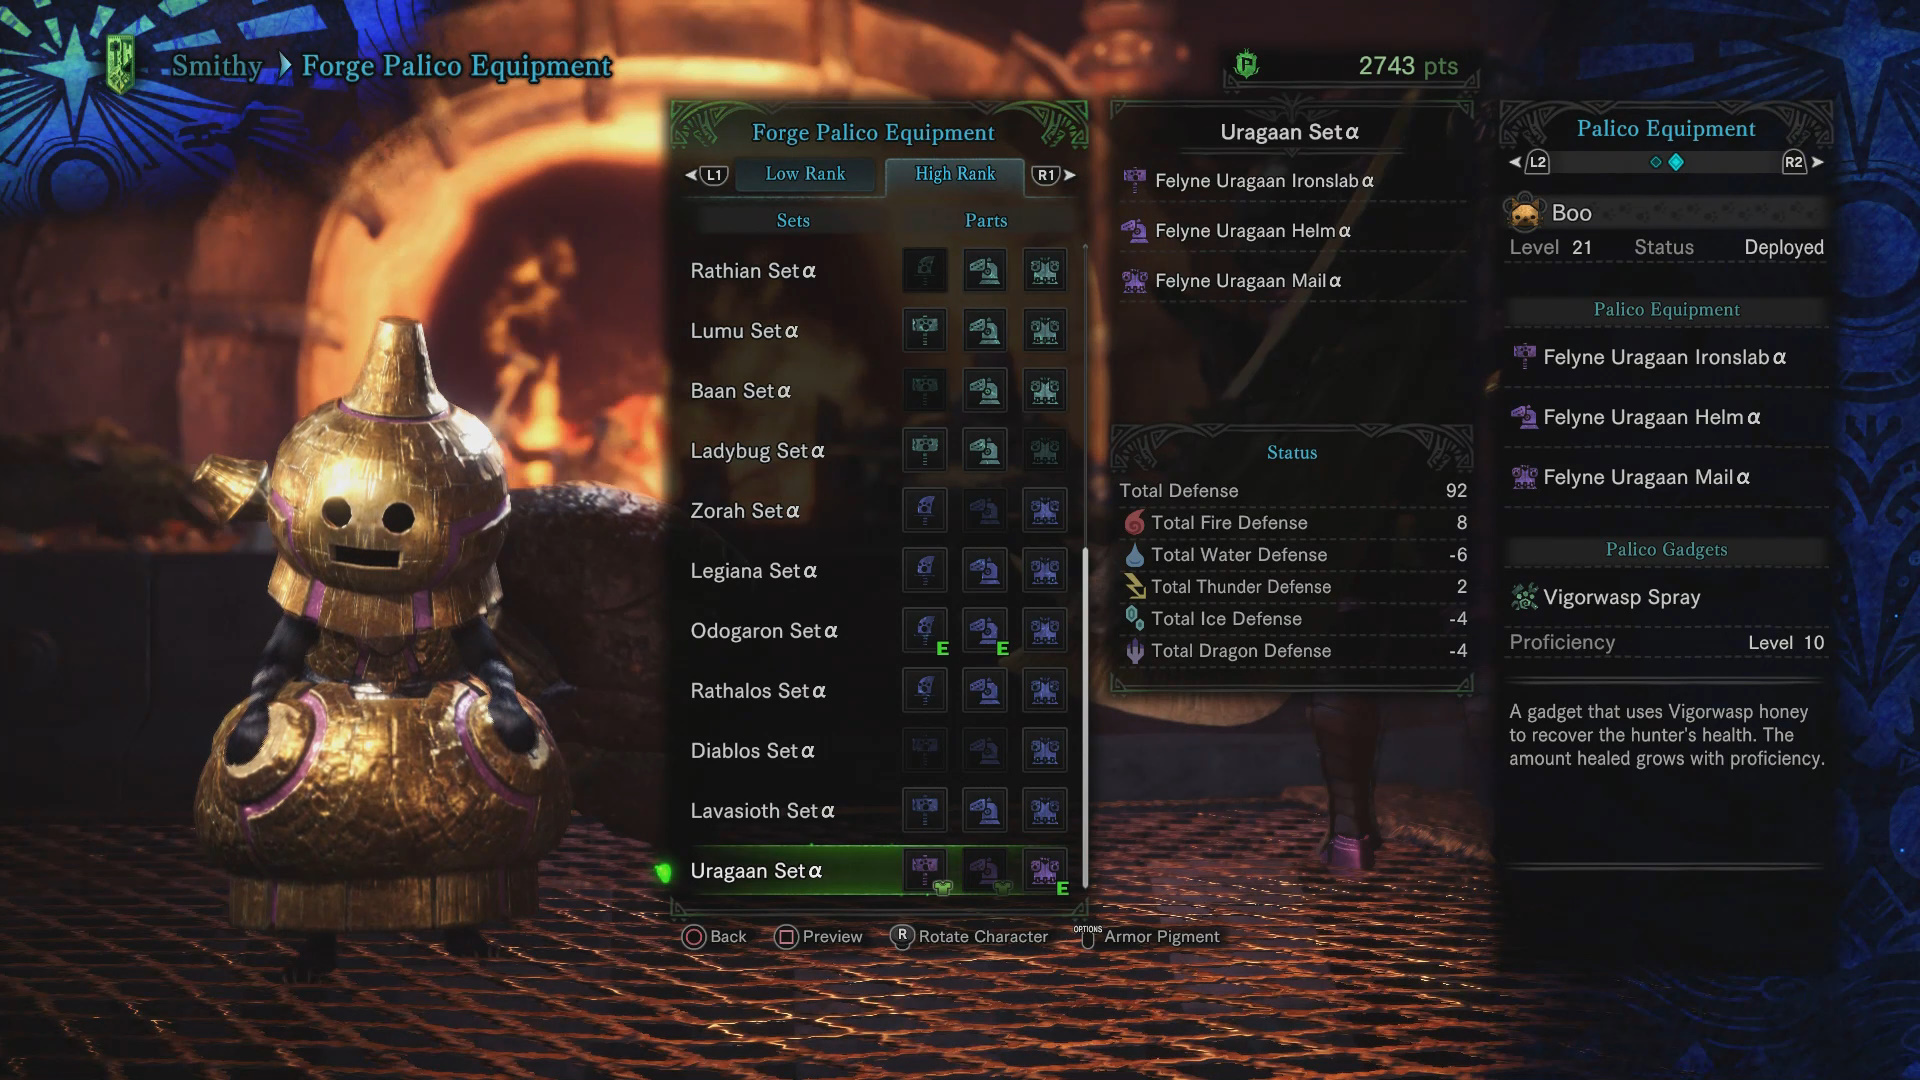
Palico Armor Set
- Ironslab: 1x Jaw
- Helm: 1x Carapace
- Mail: 1x Scute
Fighting Uragaan requires a tactical approach to deal with its ore armor and explosive mechanics. By focusing on exploiting its weaknesses and avoiding the hazardous ore scattered across the battlefield, you can increase your chances of success. For more helpful tips on battling other monsters, be sure to check out our Lavasioth guide and other Monster Hunter: World monster guides!
Thoughts on our Uragaan guide? Drop them in the comments below.

