Bloodstained Ritual of the Night Forbidden Underground Waterway Guide Part 2

After you’ve defeated Alfred in the Hidden Desert and have gathered the Deep Sinker ability, you will need to return to the Forbidden Underground Waterway. Here you will need to explore the depths. To get you through this area, check out our Forbidden Underground Waterway guide part 2.
Forbidden Underground Waterway: Reaching Next Story Area
I’m going to start this area from the Arvantville entrance since I want to explore all of it. Make your way down to the first room (accessed via floor in old building or under Castle Entrance bridge). In the first underwater room head right and collect both Materials Chests. Continue right until you reach the room I call the crossroads (large demon floating in middle of it).
Save your game at the Save Room then head out the bottom left exit. Make your way back to the room we farmed the Deeseama in (see map). In the room to the left of this room you can drop down into the water and collect a Materials Chest. Sink to the bottom of the Deeseama room and you will see an exit on the left side. Grab the Materials Chest here then head out the exit.
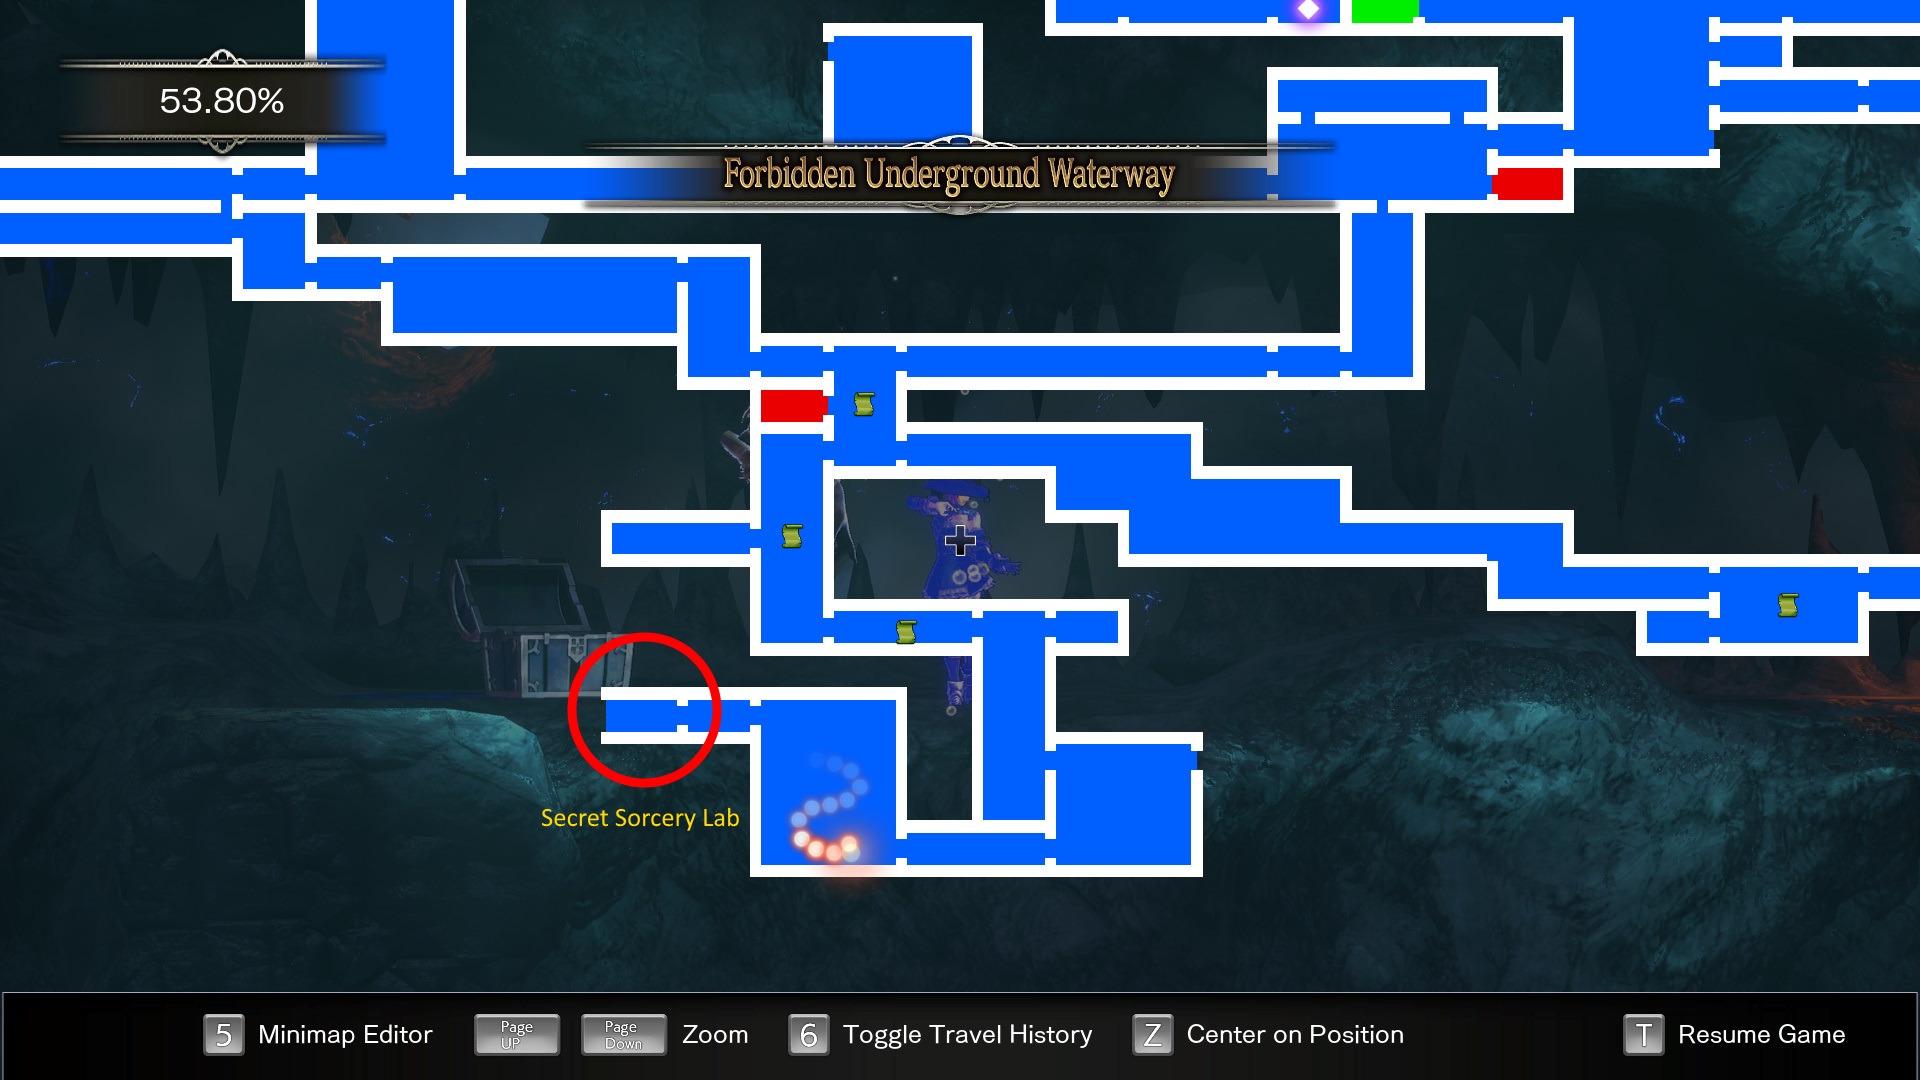
Use your Reflector Ray to go through the gap here then continue forward. In the next room head to the top of the room to find a Green Chest with the Swordfish inside. Jump to the stone ledge to the right of the chest and hit the wall here to get the Plunderer’s Ring. Drop down and use your Reflector Ray to head left. Continue heading left to reach the Secret Sorcery Lab.
Forbidden Underground Waterway: Exploration
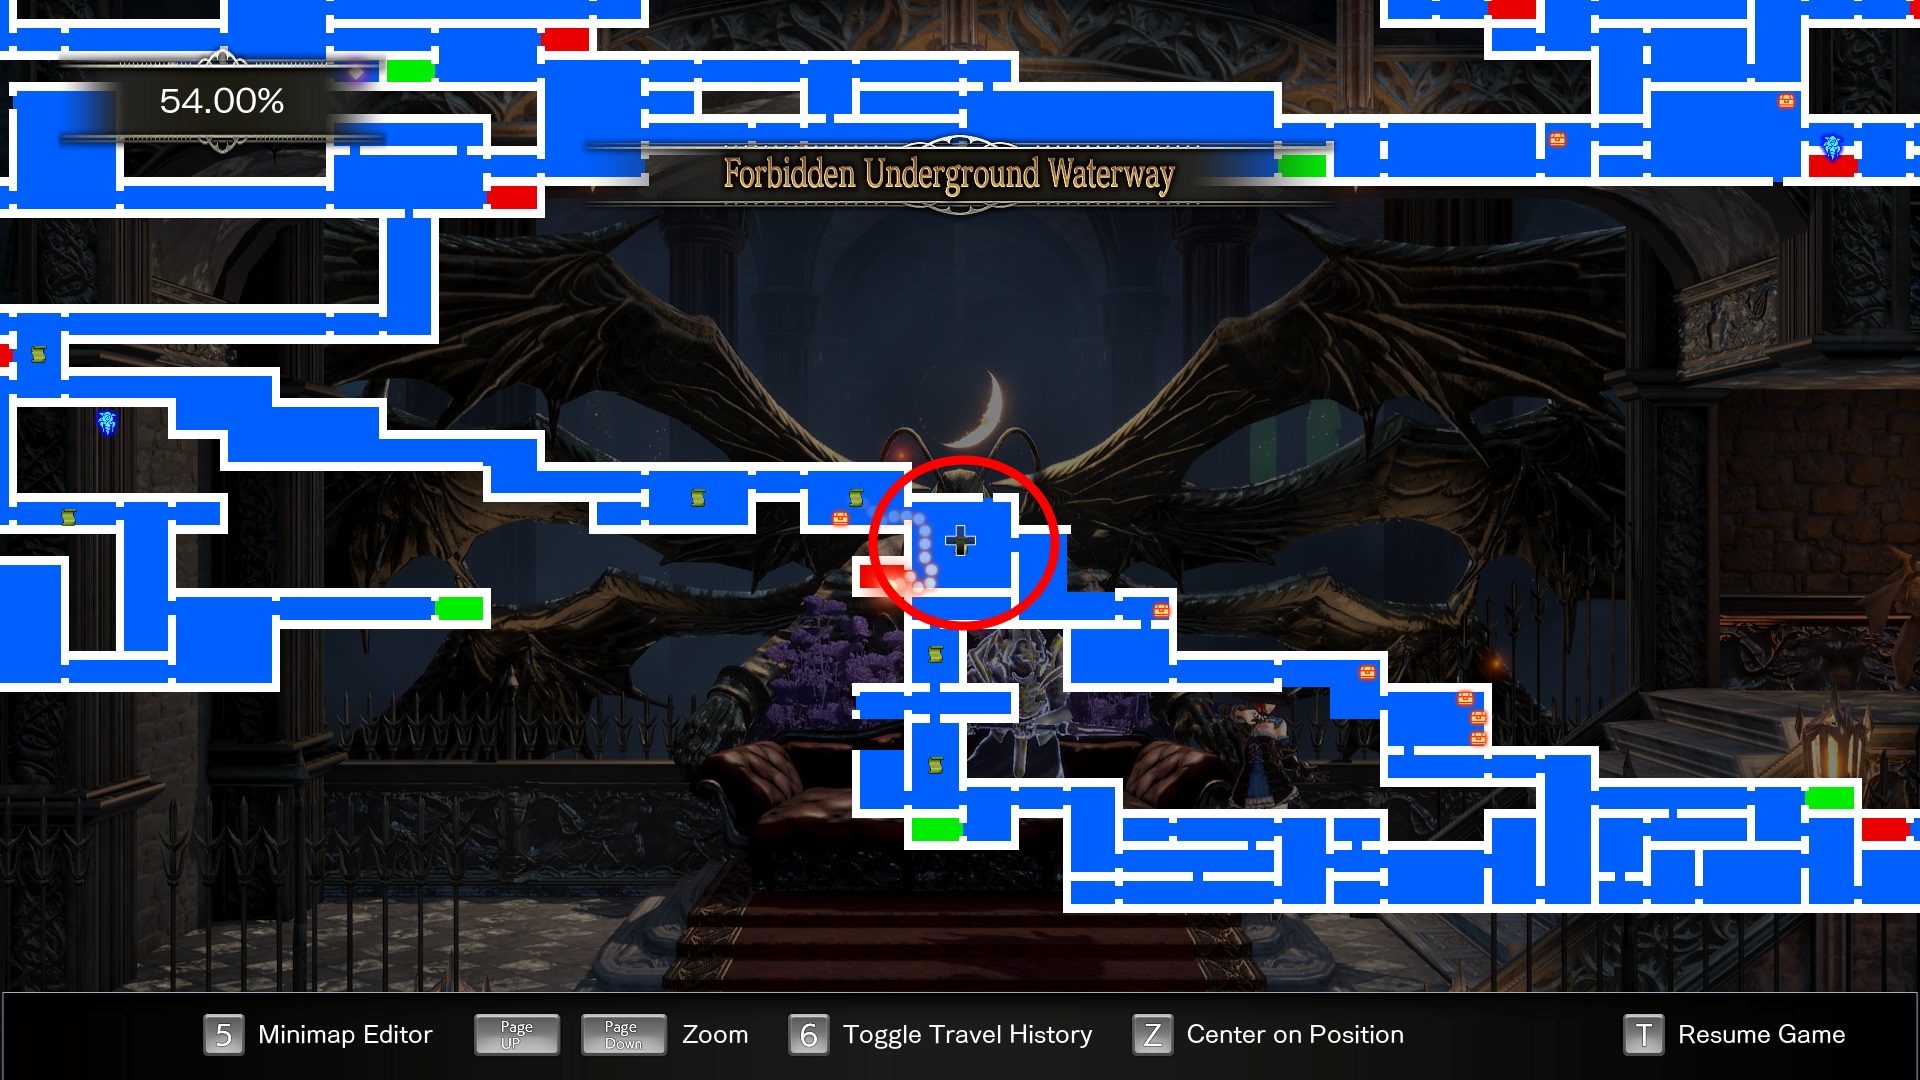
There is still a ton of Forbidden Underground Waterway to explore, so I will be doing that in this section. Make your way to the crossroads room and head out the bottom right exit. Continue heading right until you reach the large room on the map above. From here we can head right or up. For now we are going to head right to clean up the chests heading to the Hidden Desert.
Exit through the right room and drop down into the water below. Make your way through the rooms (grab the Materials Chest along the way) until you reach the large square room with multiple spike traps. In the top right and bottom left corners of this room there are Materials Chests. Grab them then head to the bottom right corner of the room for a MAXMP UP. Head right out of the room.
In this next room there are three chests along the right side of the room. There is one chest with 500G, a Green Chest with the Strider Belt in it, and a Materials Chest. After you’ve collected all three of these chests that’s all for this section. Return to the bridge room.

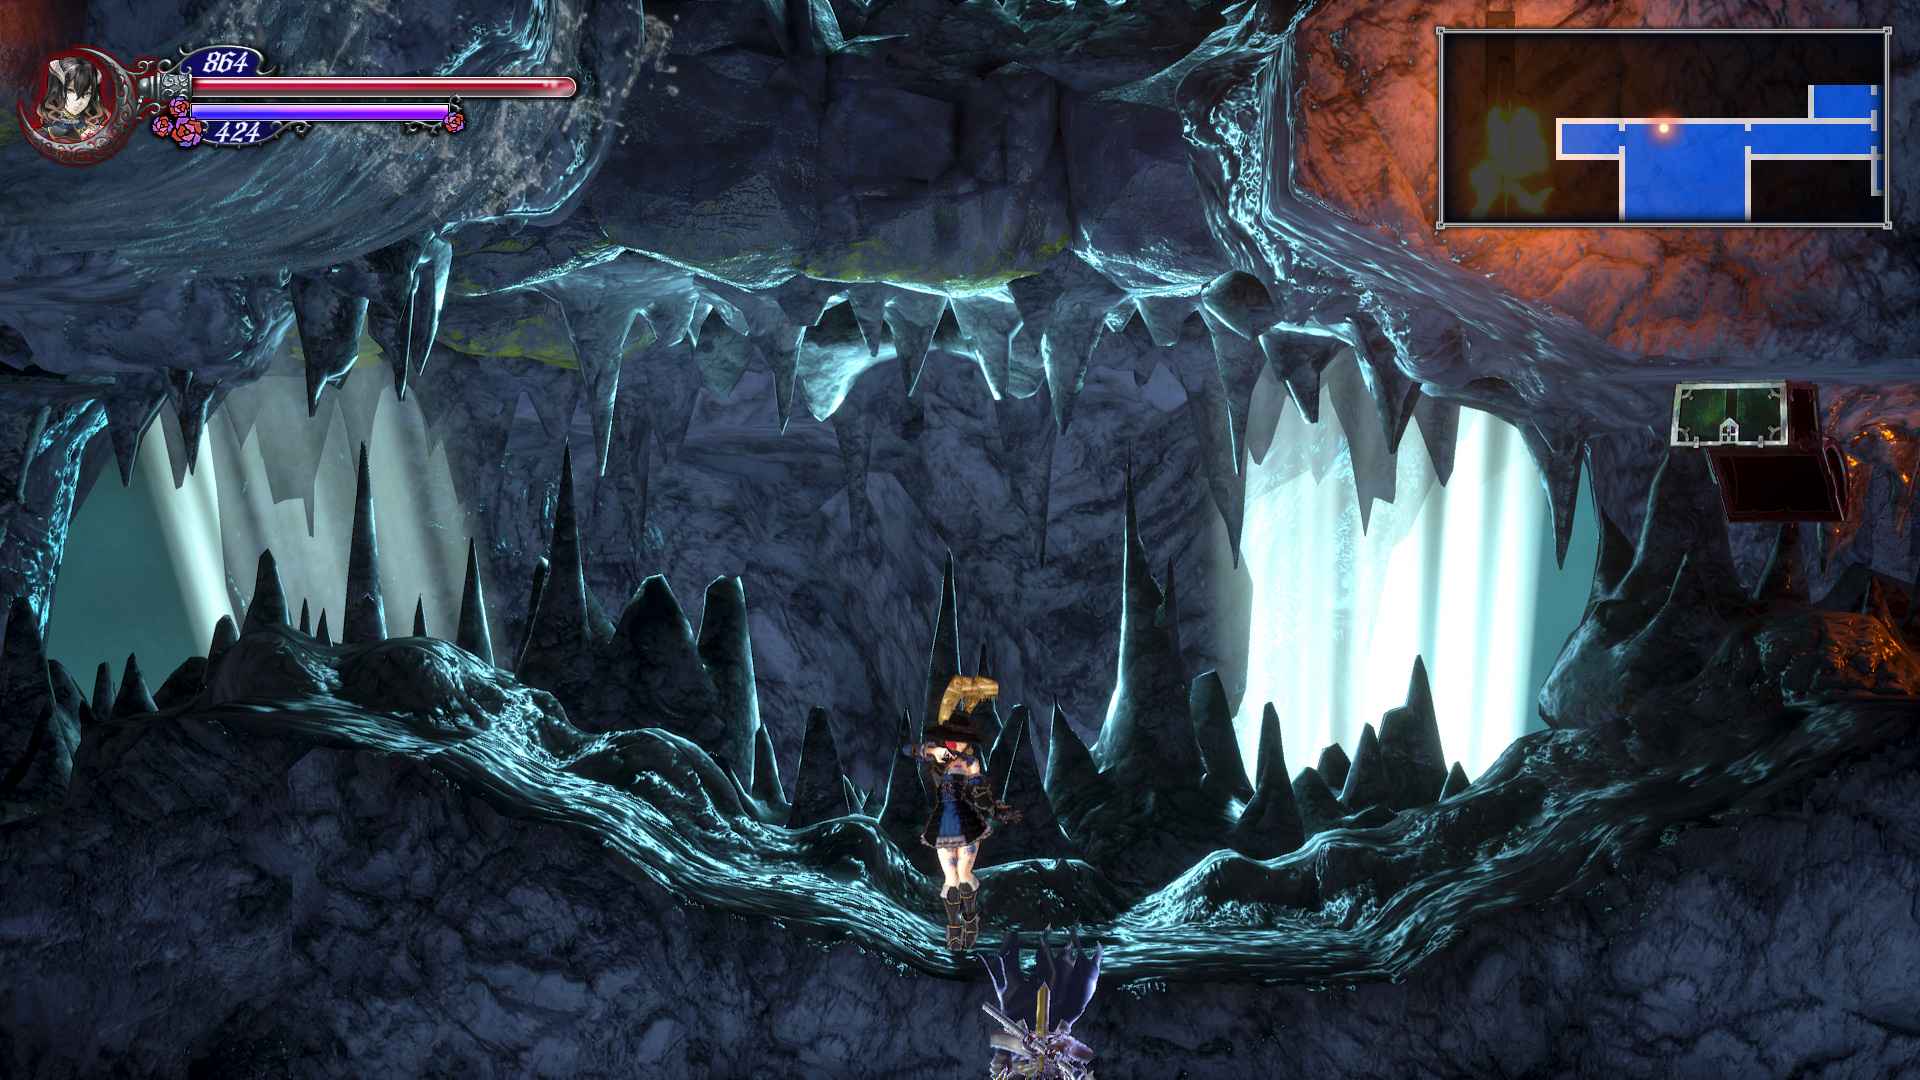
From the bridge room head right. Continue heading right until your reach a long horizontal room. Drop down in the water to reach a Material Chest. Go past the top exit. Continue right in this room and drop down into the water near the right exit to reach a Materials Chest. Continue heading right until you reach a room with a waterfall. Head all the way to the right in this room and break the wall. Go inside this room to reach a Green Chest with the Critical Ring in it. Return to the waterfall room and head up the right side of it using Reflector Ray and double jump to reach a Materials Chest. Comeback to this room later when you have Invert ability. Return to the long horizontal room and go up.

As soon as you enter this next room you will see a shovel armor on your right. Kill it then break the wall behind it to get a MAXMP UP. Head into the left room to get a Save Room. Return to the room with the shovel armor and head up. Go into the room on the top right and make your way to the end of it to reach a Green Chest with Steel Armor/R in it. Return to the shovel armor room and take the top left exit.

Go left through the long horizontal room and you will reach a large vertical room. In this room there are multiple ways you can go. Before going anywhere grab the two Materials Chests and Gold Chest along the left side of the room. Ignore the Green Chest on the right side for now (chest can be reached later with Invert skill, contains Fish Dish/R). Go into the room on the top right to reach a Green Chest with the Traverser’s Ring inside. Return to the long vertical room and go out the top right exit.

Make your way through the long horizontal room here (has two shovel armor enemies in it) to reach a MAXHP UP. Return to the long vertical room and go out the top left exit. Break the right wall in this room to get the Voice Changer. Make your way left into the next room.

Ride the lift left through this room and make your way into the next room. You will end up in the Castle Entrance. Grab the MAXHP UP and pull the lever to open a shortcut to the Castle Entrance. Return to the large square room to the left of the bridge room. Head up from here to clean up the last rooms. Interact with the lever to open the door. This creates a shortcut to the areas we just explored.
That’s it for the bulk of the Forbidden Underground Waterway. If I missed anything, feel free to drop a comment and I will add it to the guide. Thanks for reading. Your next stop after this area is the Secret Sorcery Lab.
Backtrack to Waterfall Room with Invert
Once you have the Invert ability (you get it from the boss in the Inferno Cave), return to the waterfall room. Use Invert in the middle of the waterfall to reach a whole new section of the Forbidden Underground Waterway. At the top of the waterfall grab the Green Chest to the left to get Curry. Go into the room behind this chest to get the Curry Dish/R. Leave this room and head right past the waterfall into the next room.
Head through the long horizontal room to reach a room with multiple exits. Go through the right exit to reach a Save Room. Return to the previous room and drop down to reach a room with a Shortcut Shard and a MAXHP UP. Head back up to the last room and go into the upper left room. Inside this room at the top left corner there is a Green Chest containing Elemental Ammunition/R. Return to the previous room on go all the way to the top. Leave the room.
You will come out of the well in the Garden of Silence.
More: Bloodstained: Ritual of the Night guides.